Raspberry Pi with an SD card
When you are done your Pi is online in Obacht and ready for its first app. You need a Raspberry Pi 4 or 5, a microSD card, a card reader, a computer with Raspberry Pi Imager installed, and either an Ethernet cable or your Wi-Fi password.

Add the device in Obacht
- Sign in at eu.obacht.dev, open Device and click Add a device.
- Pick Raspberry Pi.
- If you have no device key yet, you create one now: enter a passphrase of at least 8 characters and click Create key. Keep the passphrase somewhere safe, it cannot be reset. More on Your device key.
- Give the Pi a name (the default is "Raspberry Pi"). Two alerts are on by default, Storage almost full and Device goes offline. Click Create & continue.
In easy mode the wizard goes straight to the SD card path. In advanced mode you choose SD card (recommended) first.
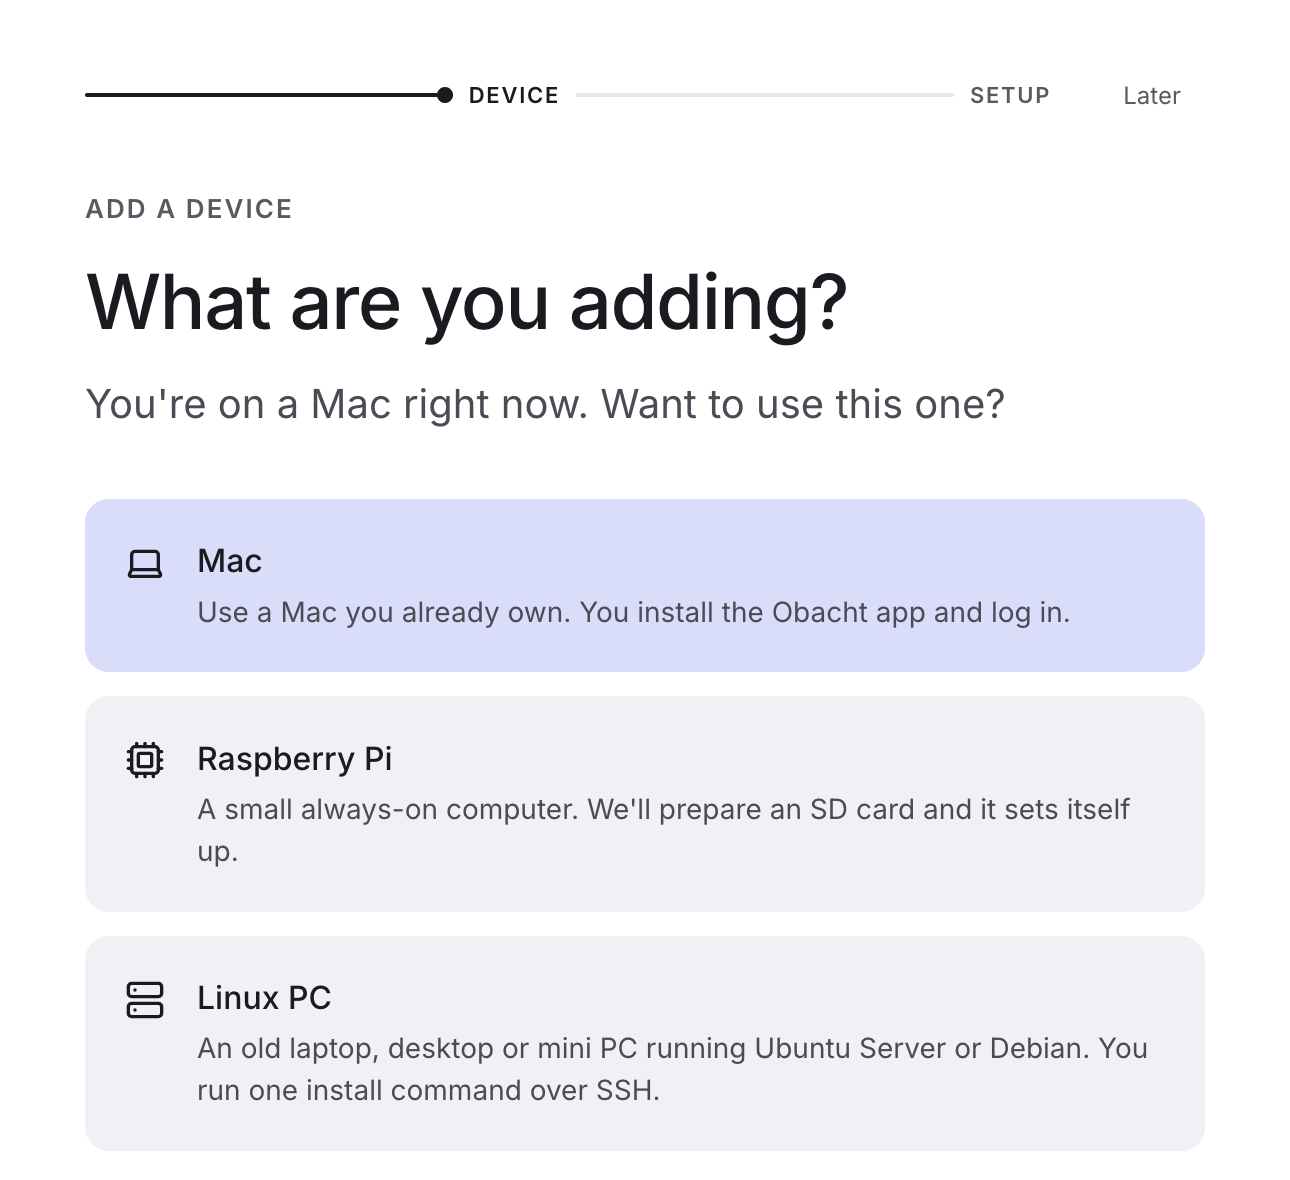
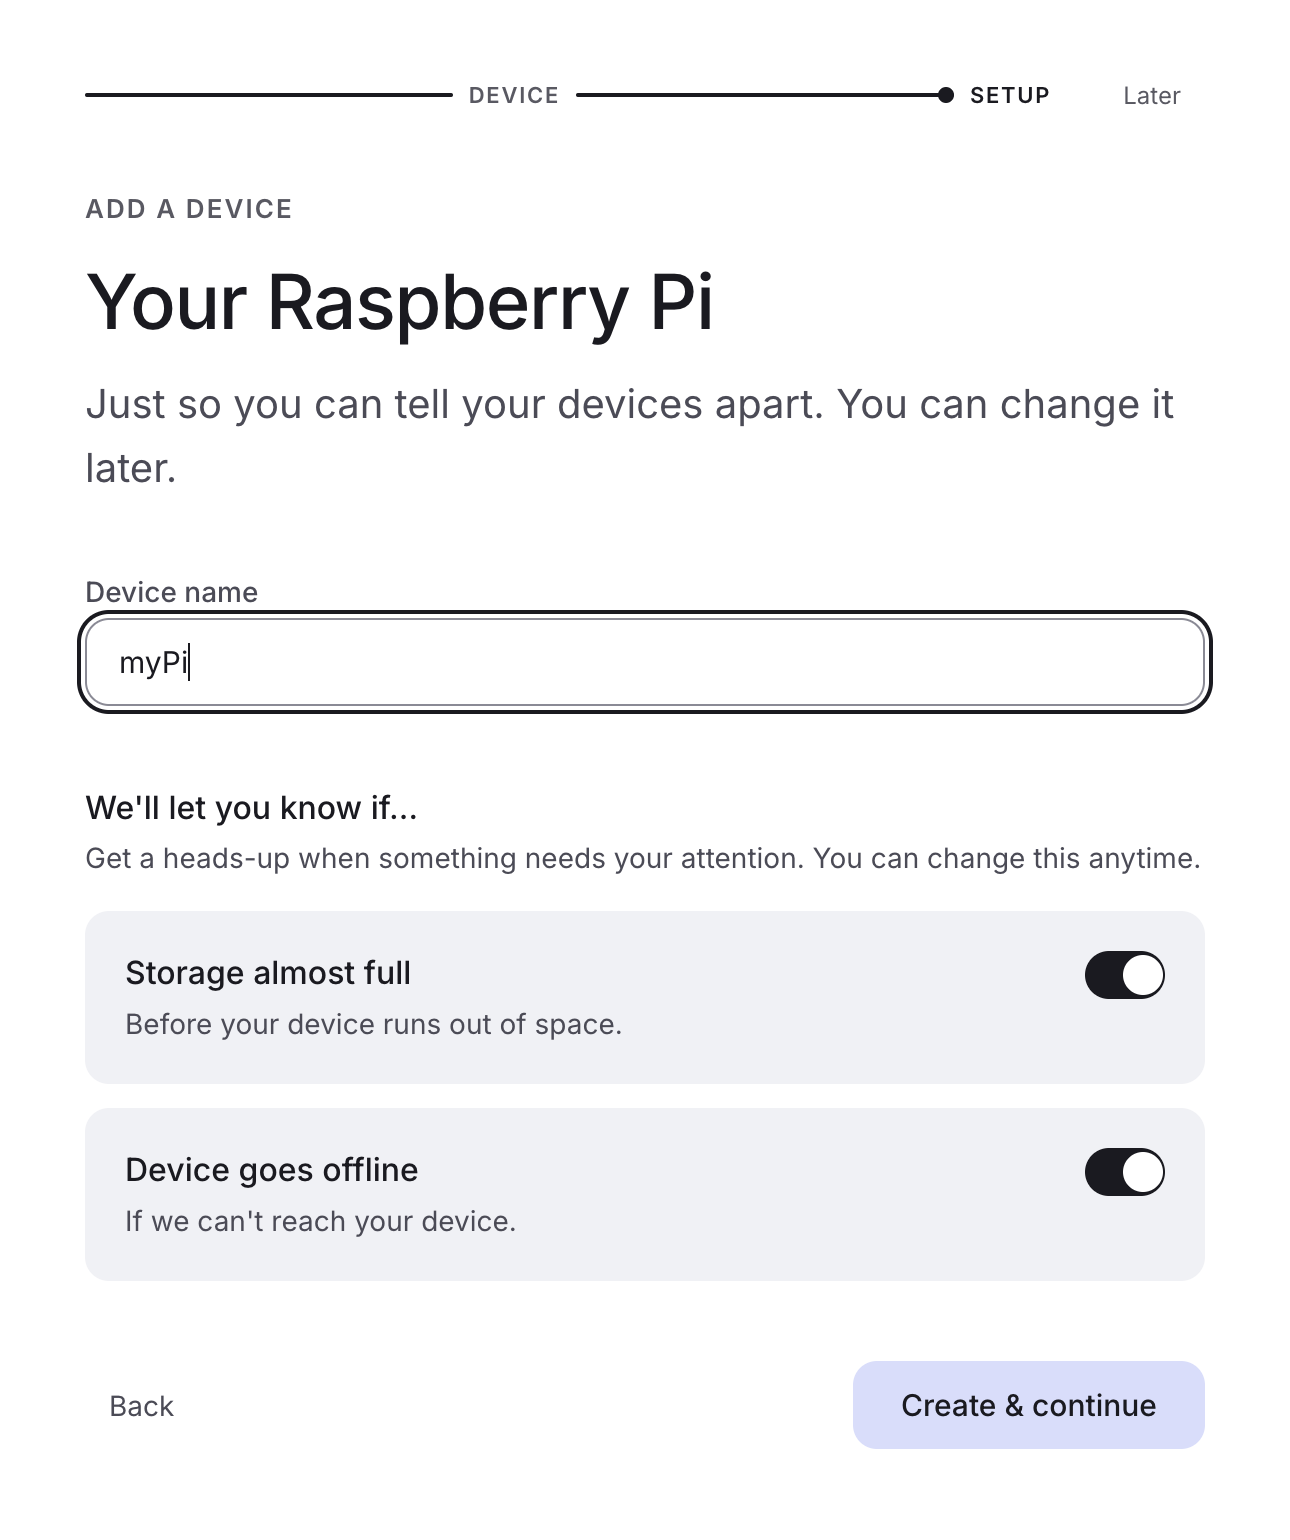
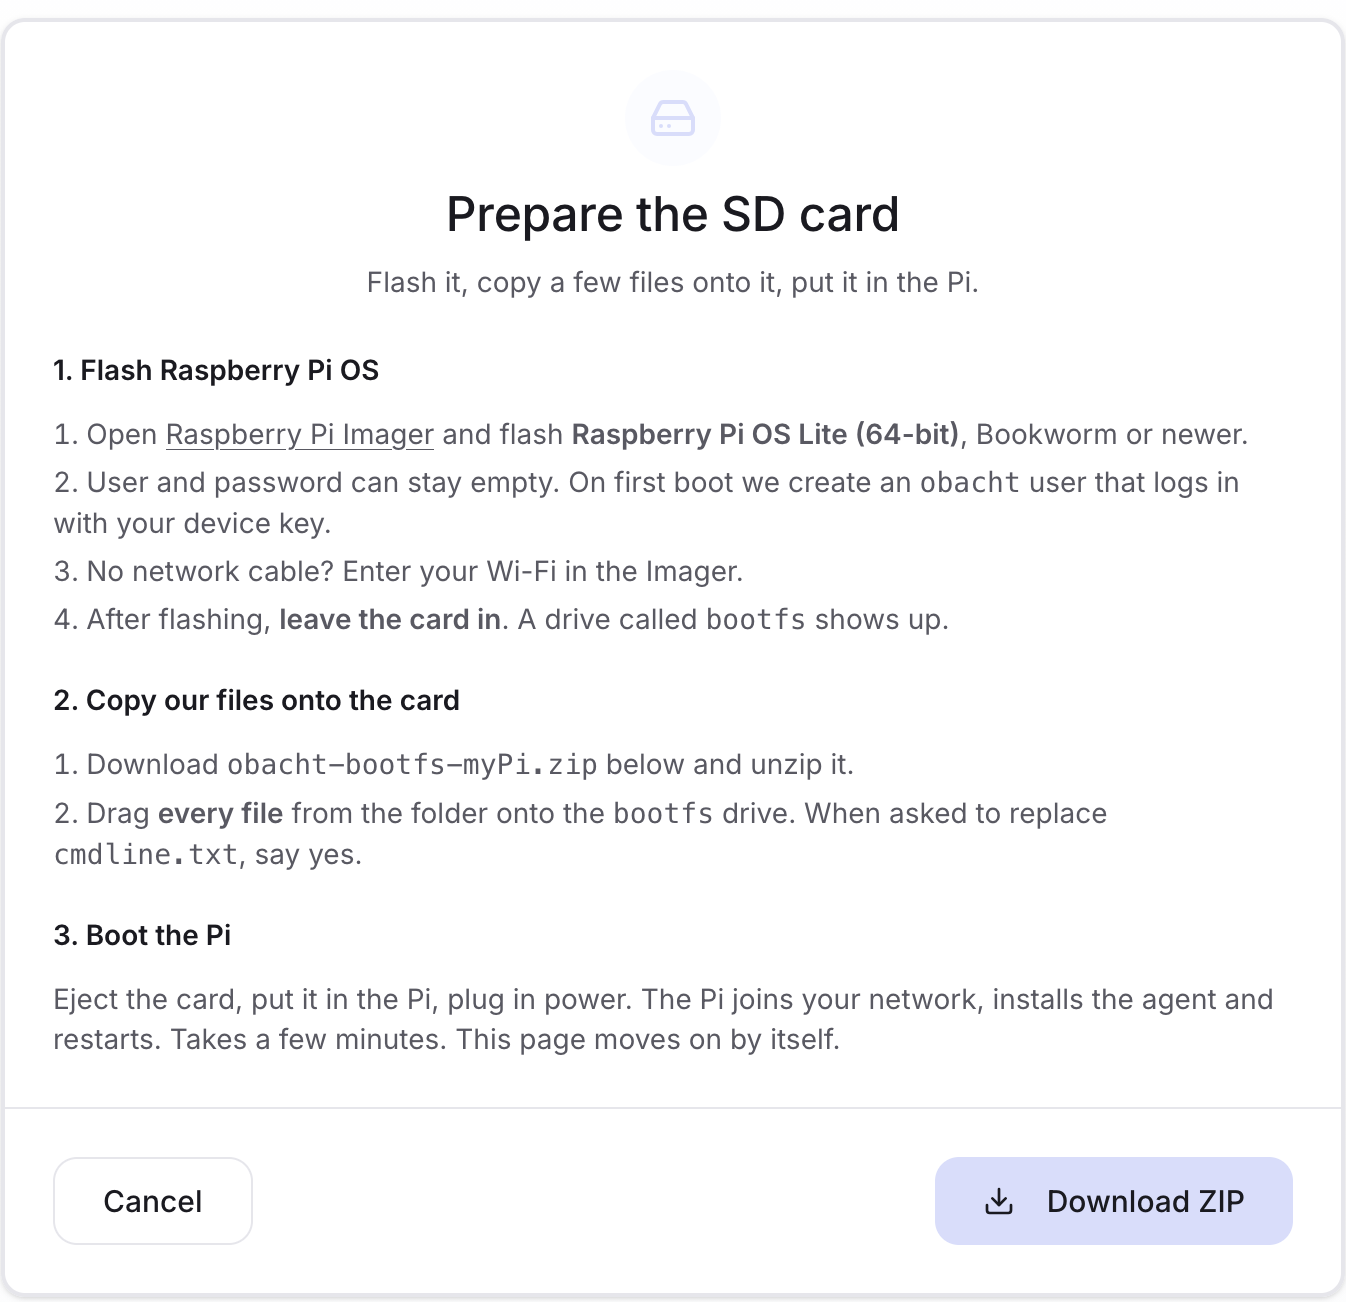
The SD card step in the wizard
The wizard page "Prepare the SD card" has three parts: flash the card, download the Obacht files, boot. Keep it open; it turns into a progress checklist once the Pi starts.
Choose the system in Imager
- Put the card in the reader and open Raspberry Pi Imager.
- Choose your Pi model, then the operating system: Raspberry Pi OS Lite (64-bit), Bookworm or newer. The Lite version has no desktop, which is what you want here.
- Choose the card as storage.
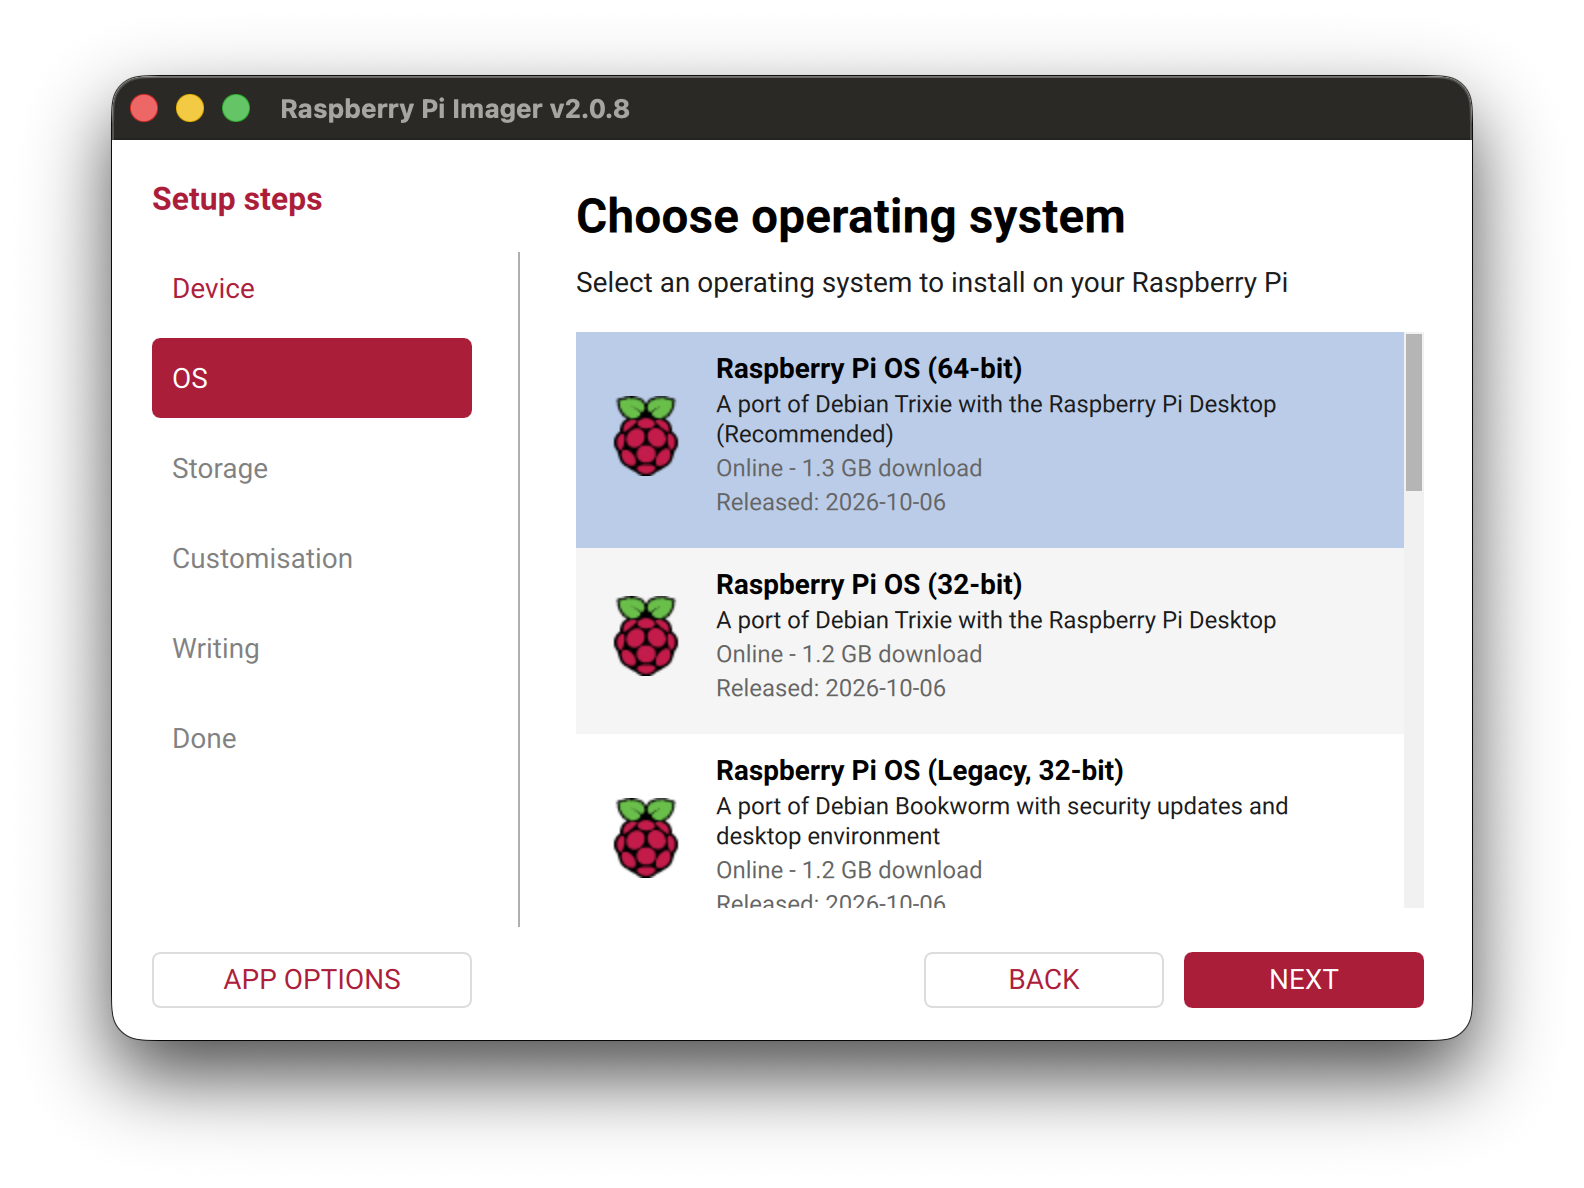
Use the 64-bit Lite image. The 32-bit image installs, but no app from the store will run on it.
User, password and Wi-Fi
In the customisation screens you can leave the user and password empty. Obacht creates an obacht user on first boot that logs in with your device key. If the Pi will be on Wi-Fi, enter the network name and password here. With an Ethernet cable you can skip Wi-Fi.
Write the card. Leave it in the reader when Imager is done.
Copy the Obacht files onto the card
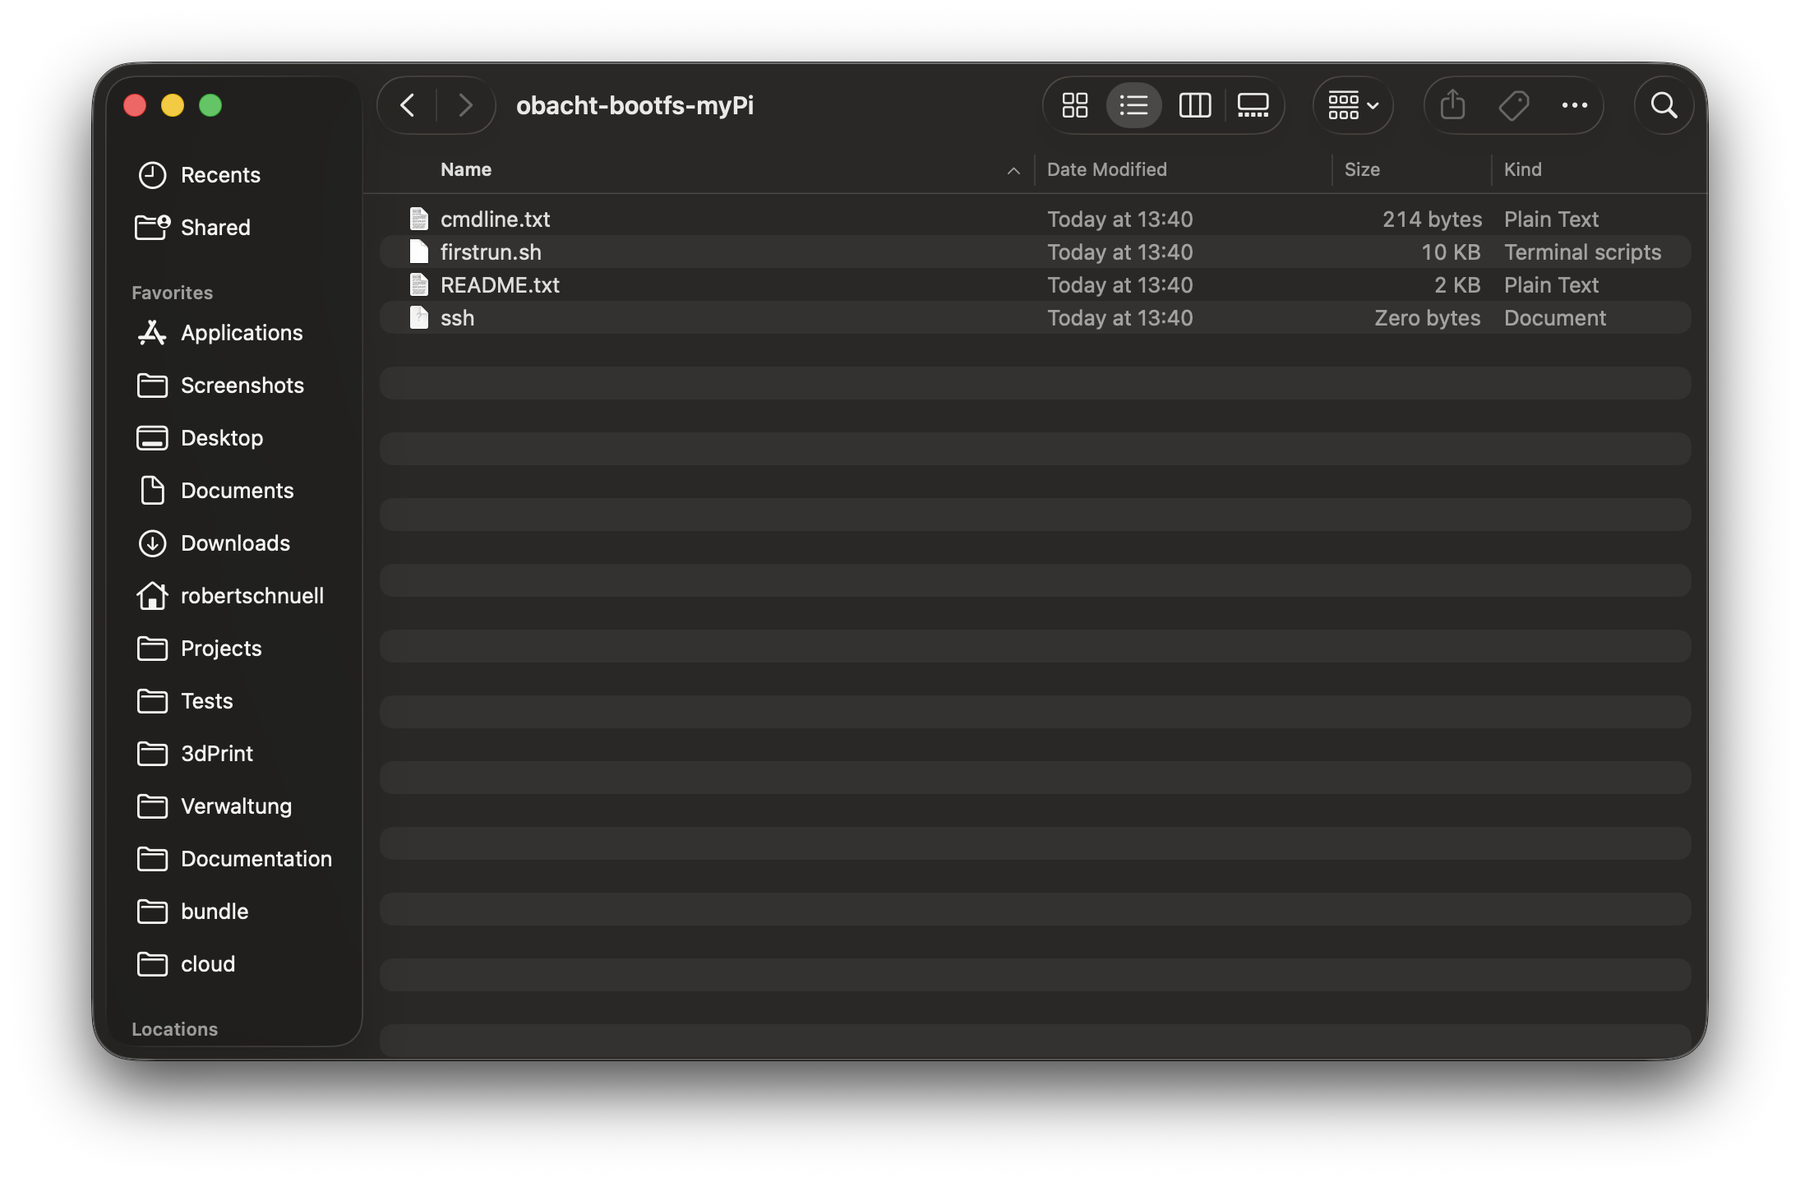
After flashing, a drive called bootfs appears on your computer. If it does not, pull the card out and put it back in.
- In the wizard click Download ZIP and unzip it.
- Drag every file from the unzipped folder onto the
bootfsdrive. - Your computer asks whether to replace
cmdline.txt. Say yes. This is the file that tells the Pi to run the Obacht setup on first boot. - Eject
bootfs.
The files in the ZIP work once. If the first boot fails or you flash the card again, click Reset and download again in the wizard and copy the new files.
Boot the Pi
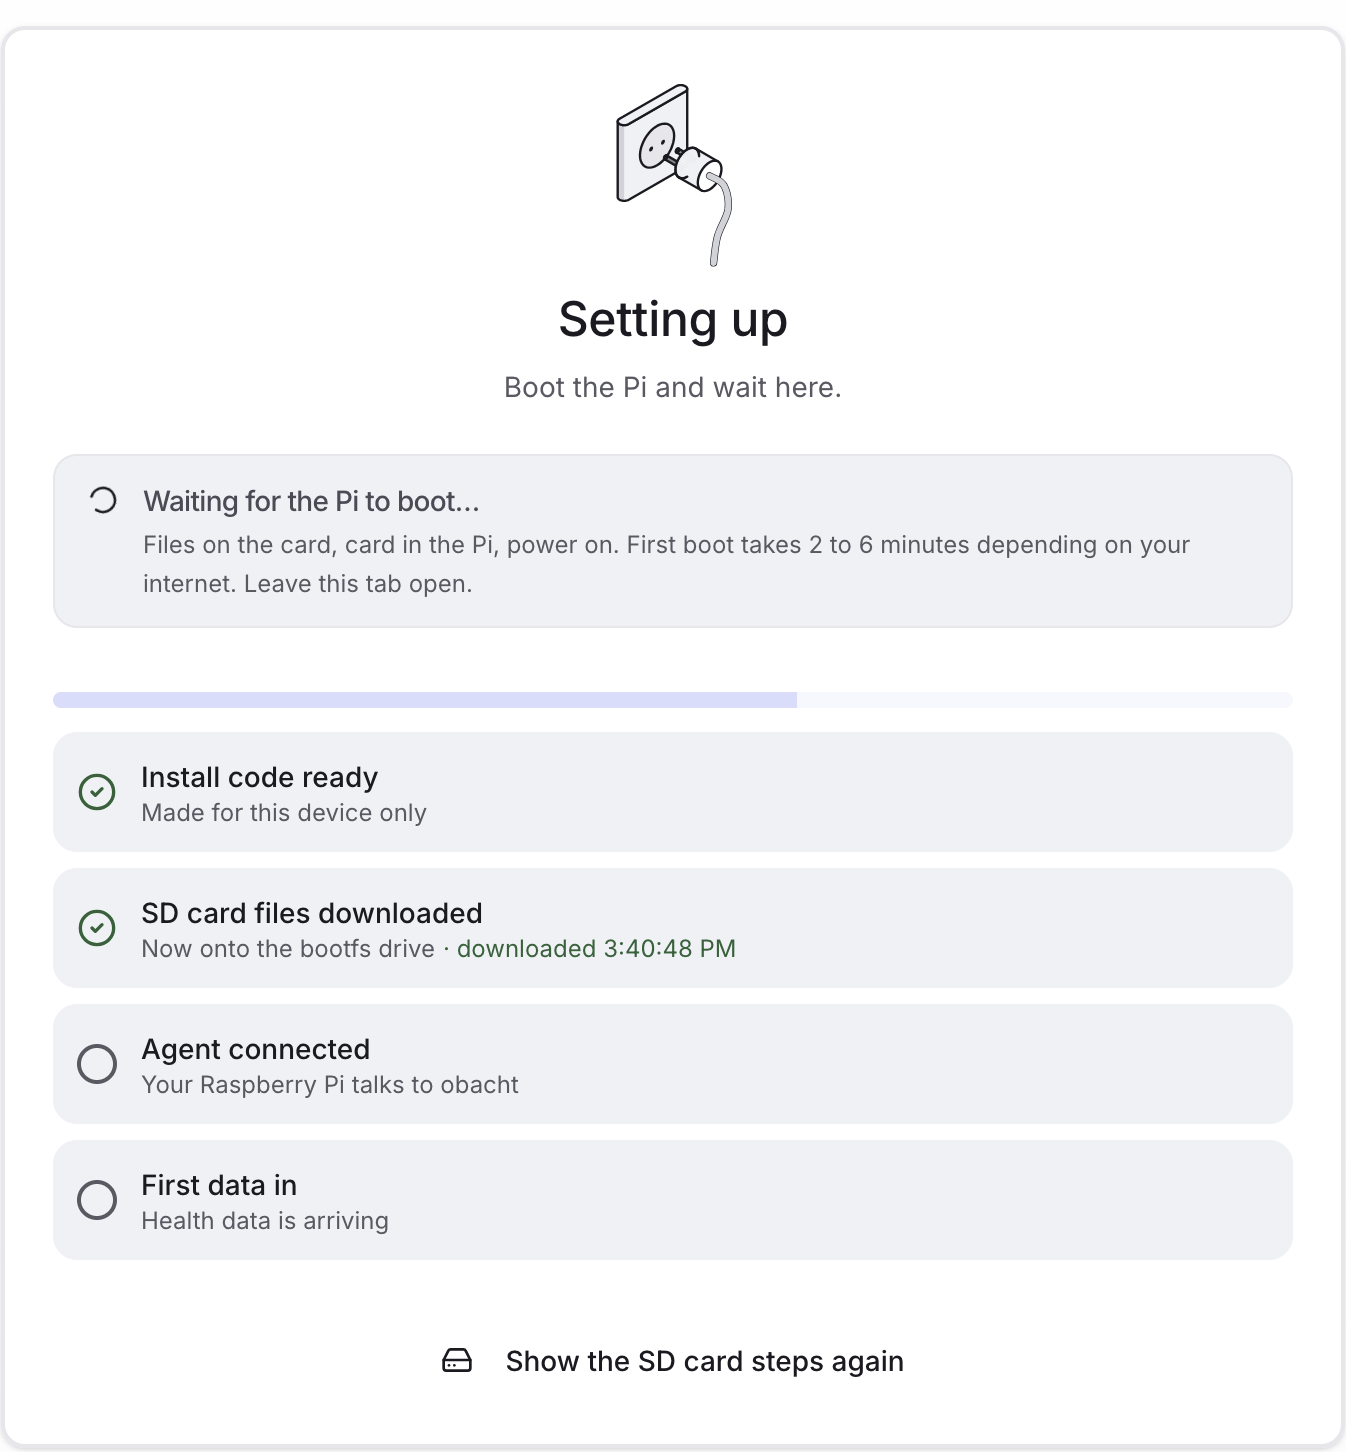
Put the card into the Pi and plug in the power. The first boot takes 2 to 6 minutes: the Pi resizes its filesystem, installs Docker and the Obacht agent (the program that talks to Obacht), joins the Obacht network and reports in.
The wizard shows a checklist and refreshes on its own every few seconds:
- Install code ready
- SD card files downloaded
- Install command ran
- Agent connected
- First data in
When all five are ticked the page says your Pi is online. In easy mode click Add your first app; in advanced mode Open device.
If it does not show up
Give it ten minutes. If the checklist still stops at "Install command ran", the Pi probably has no internet. Check the Wi-Fi name and password in Imager, or plug in a cable, then flash again and use Reset and download again for fresh files. More on Device shows offline.
Next
Install an app. If you want to know what the Pi now runs, see Paths, logs and the installer.