Getting Started with obacht
1. Adding a Device
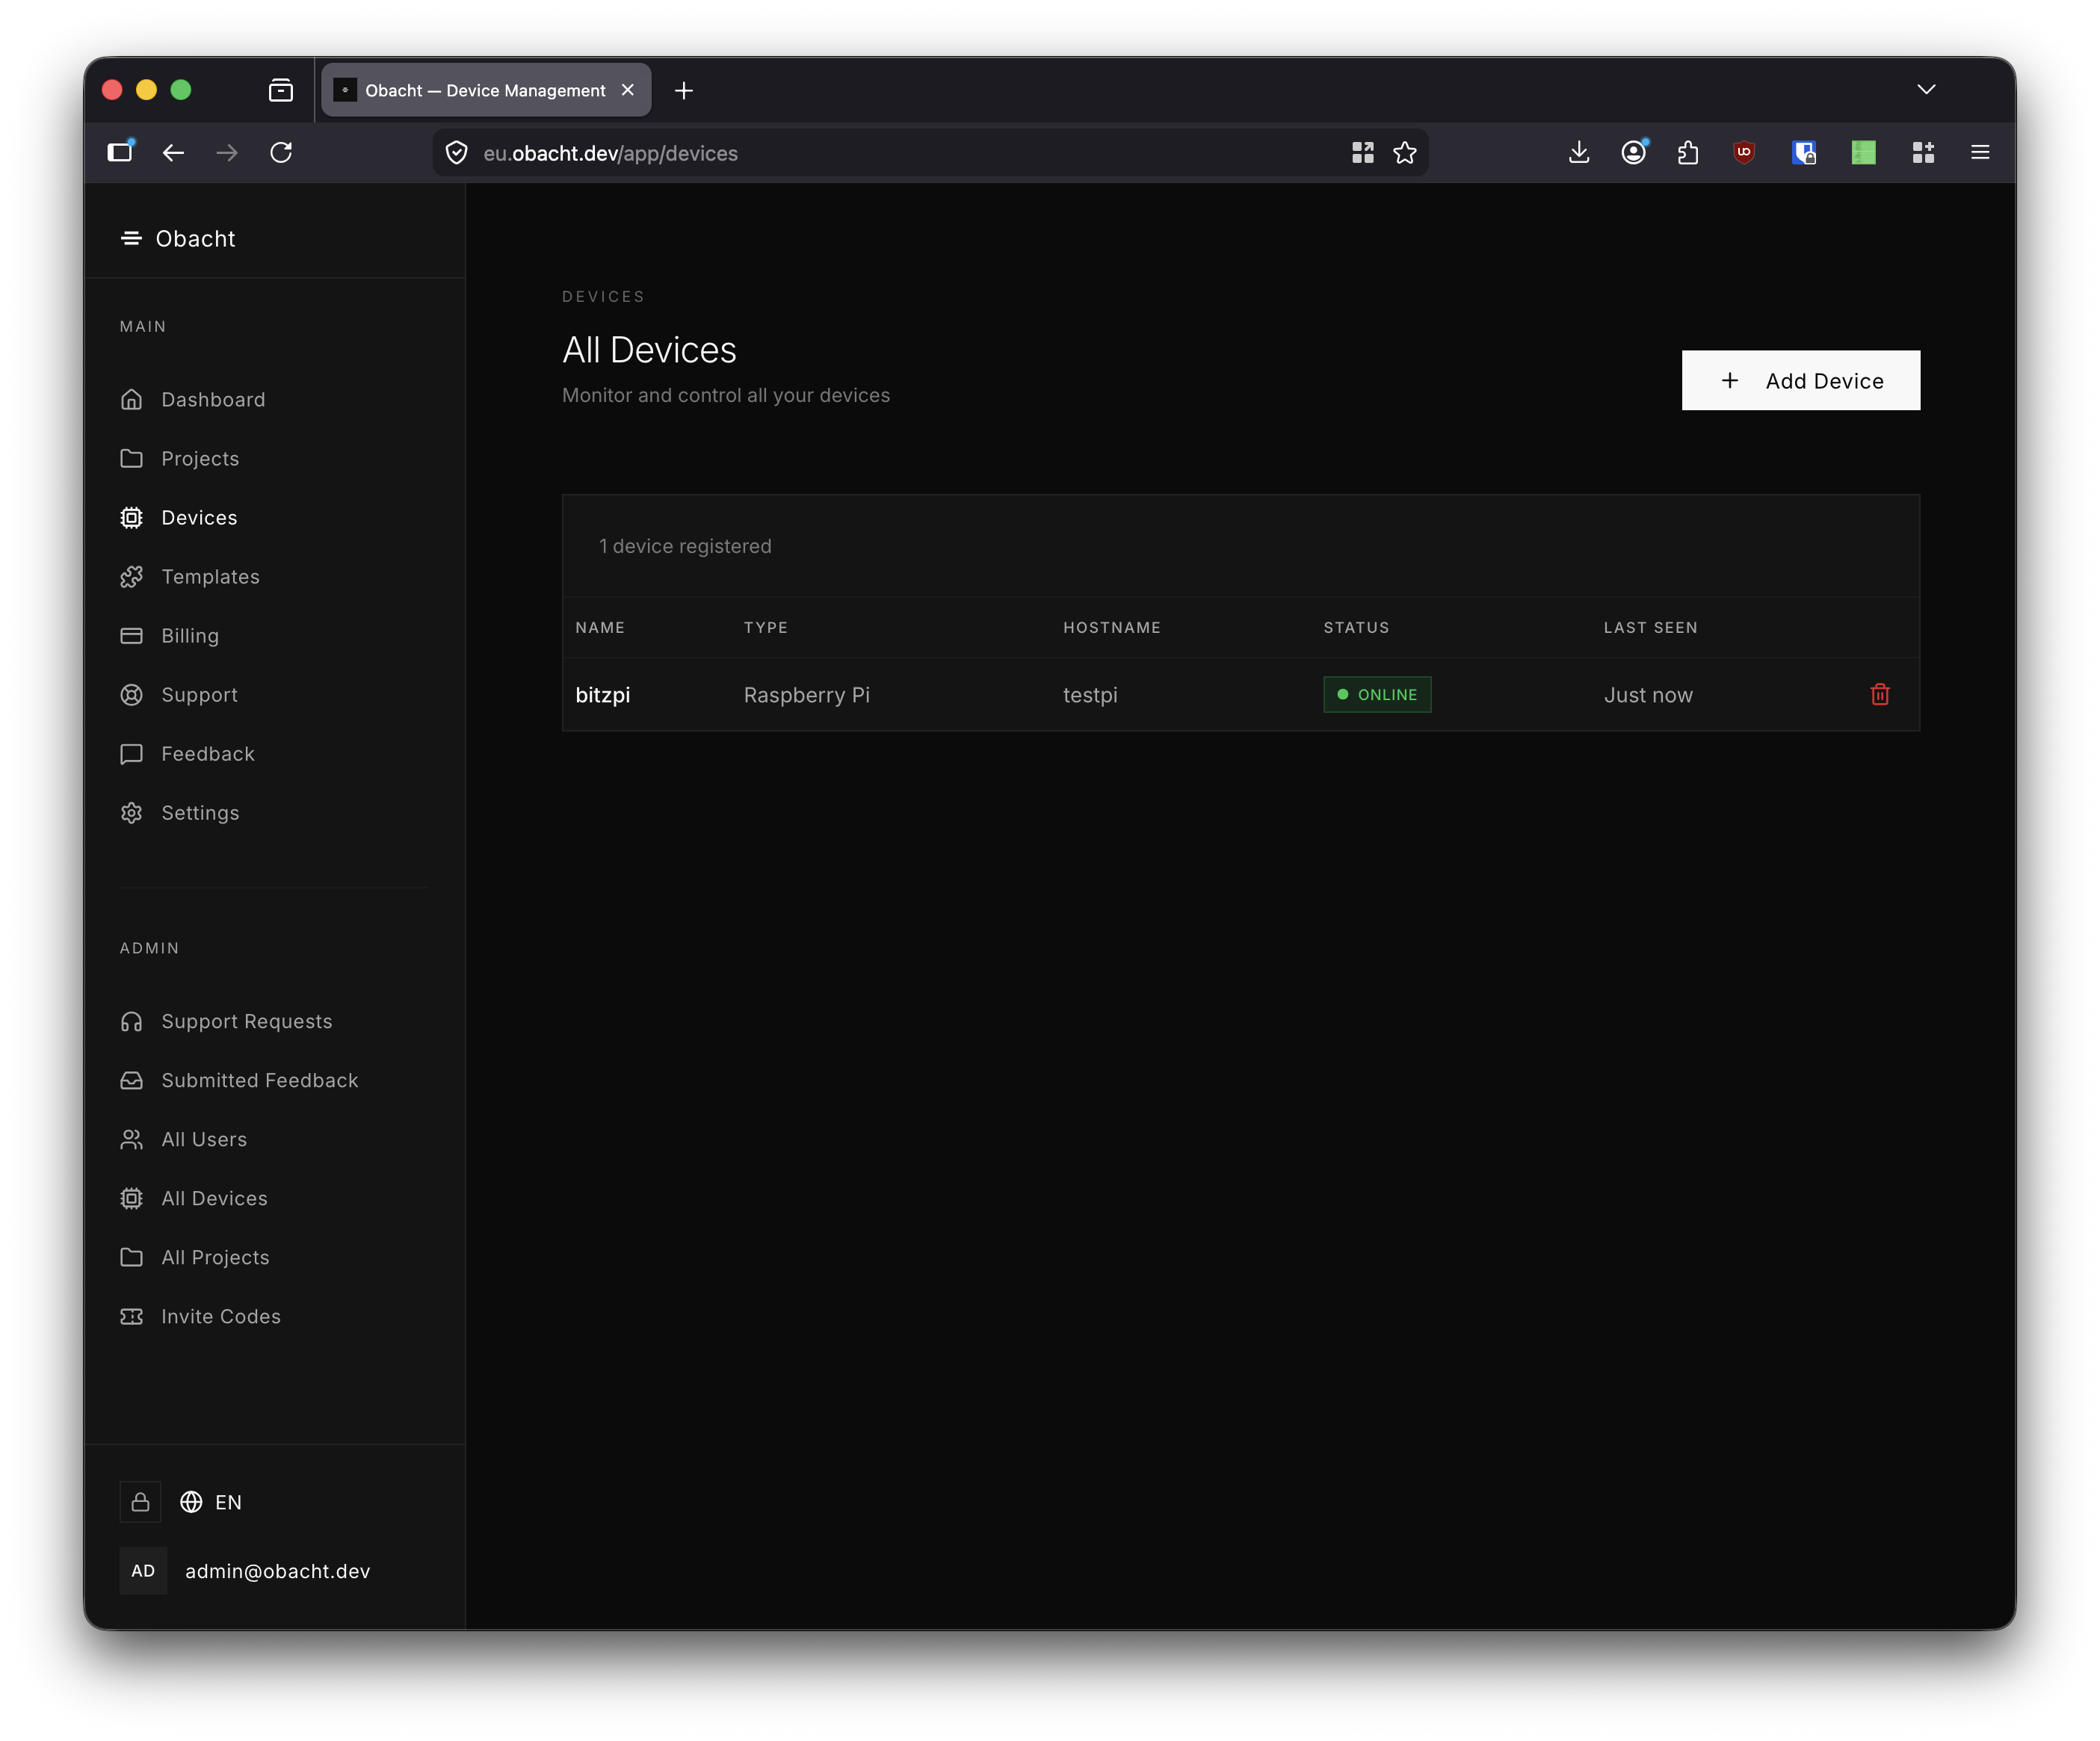
Navigate to Devices in the sidebar and click + Add Device.
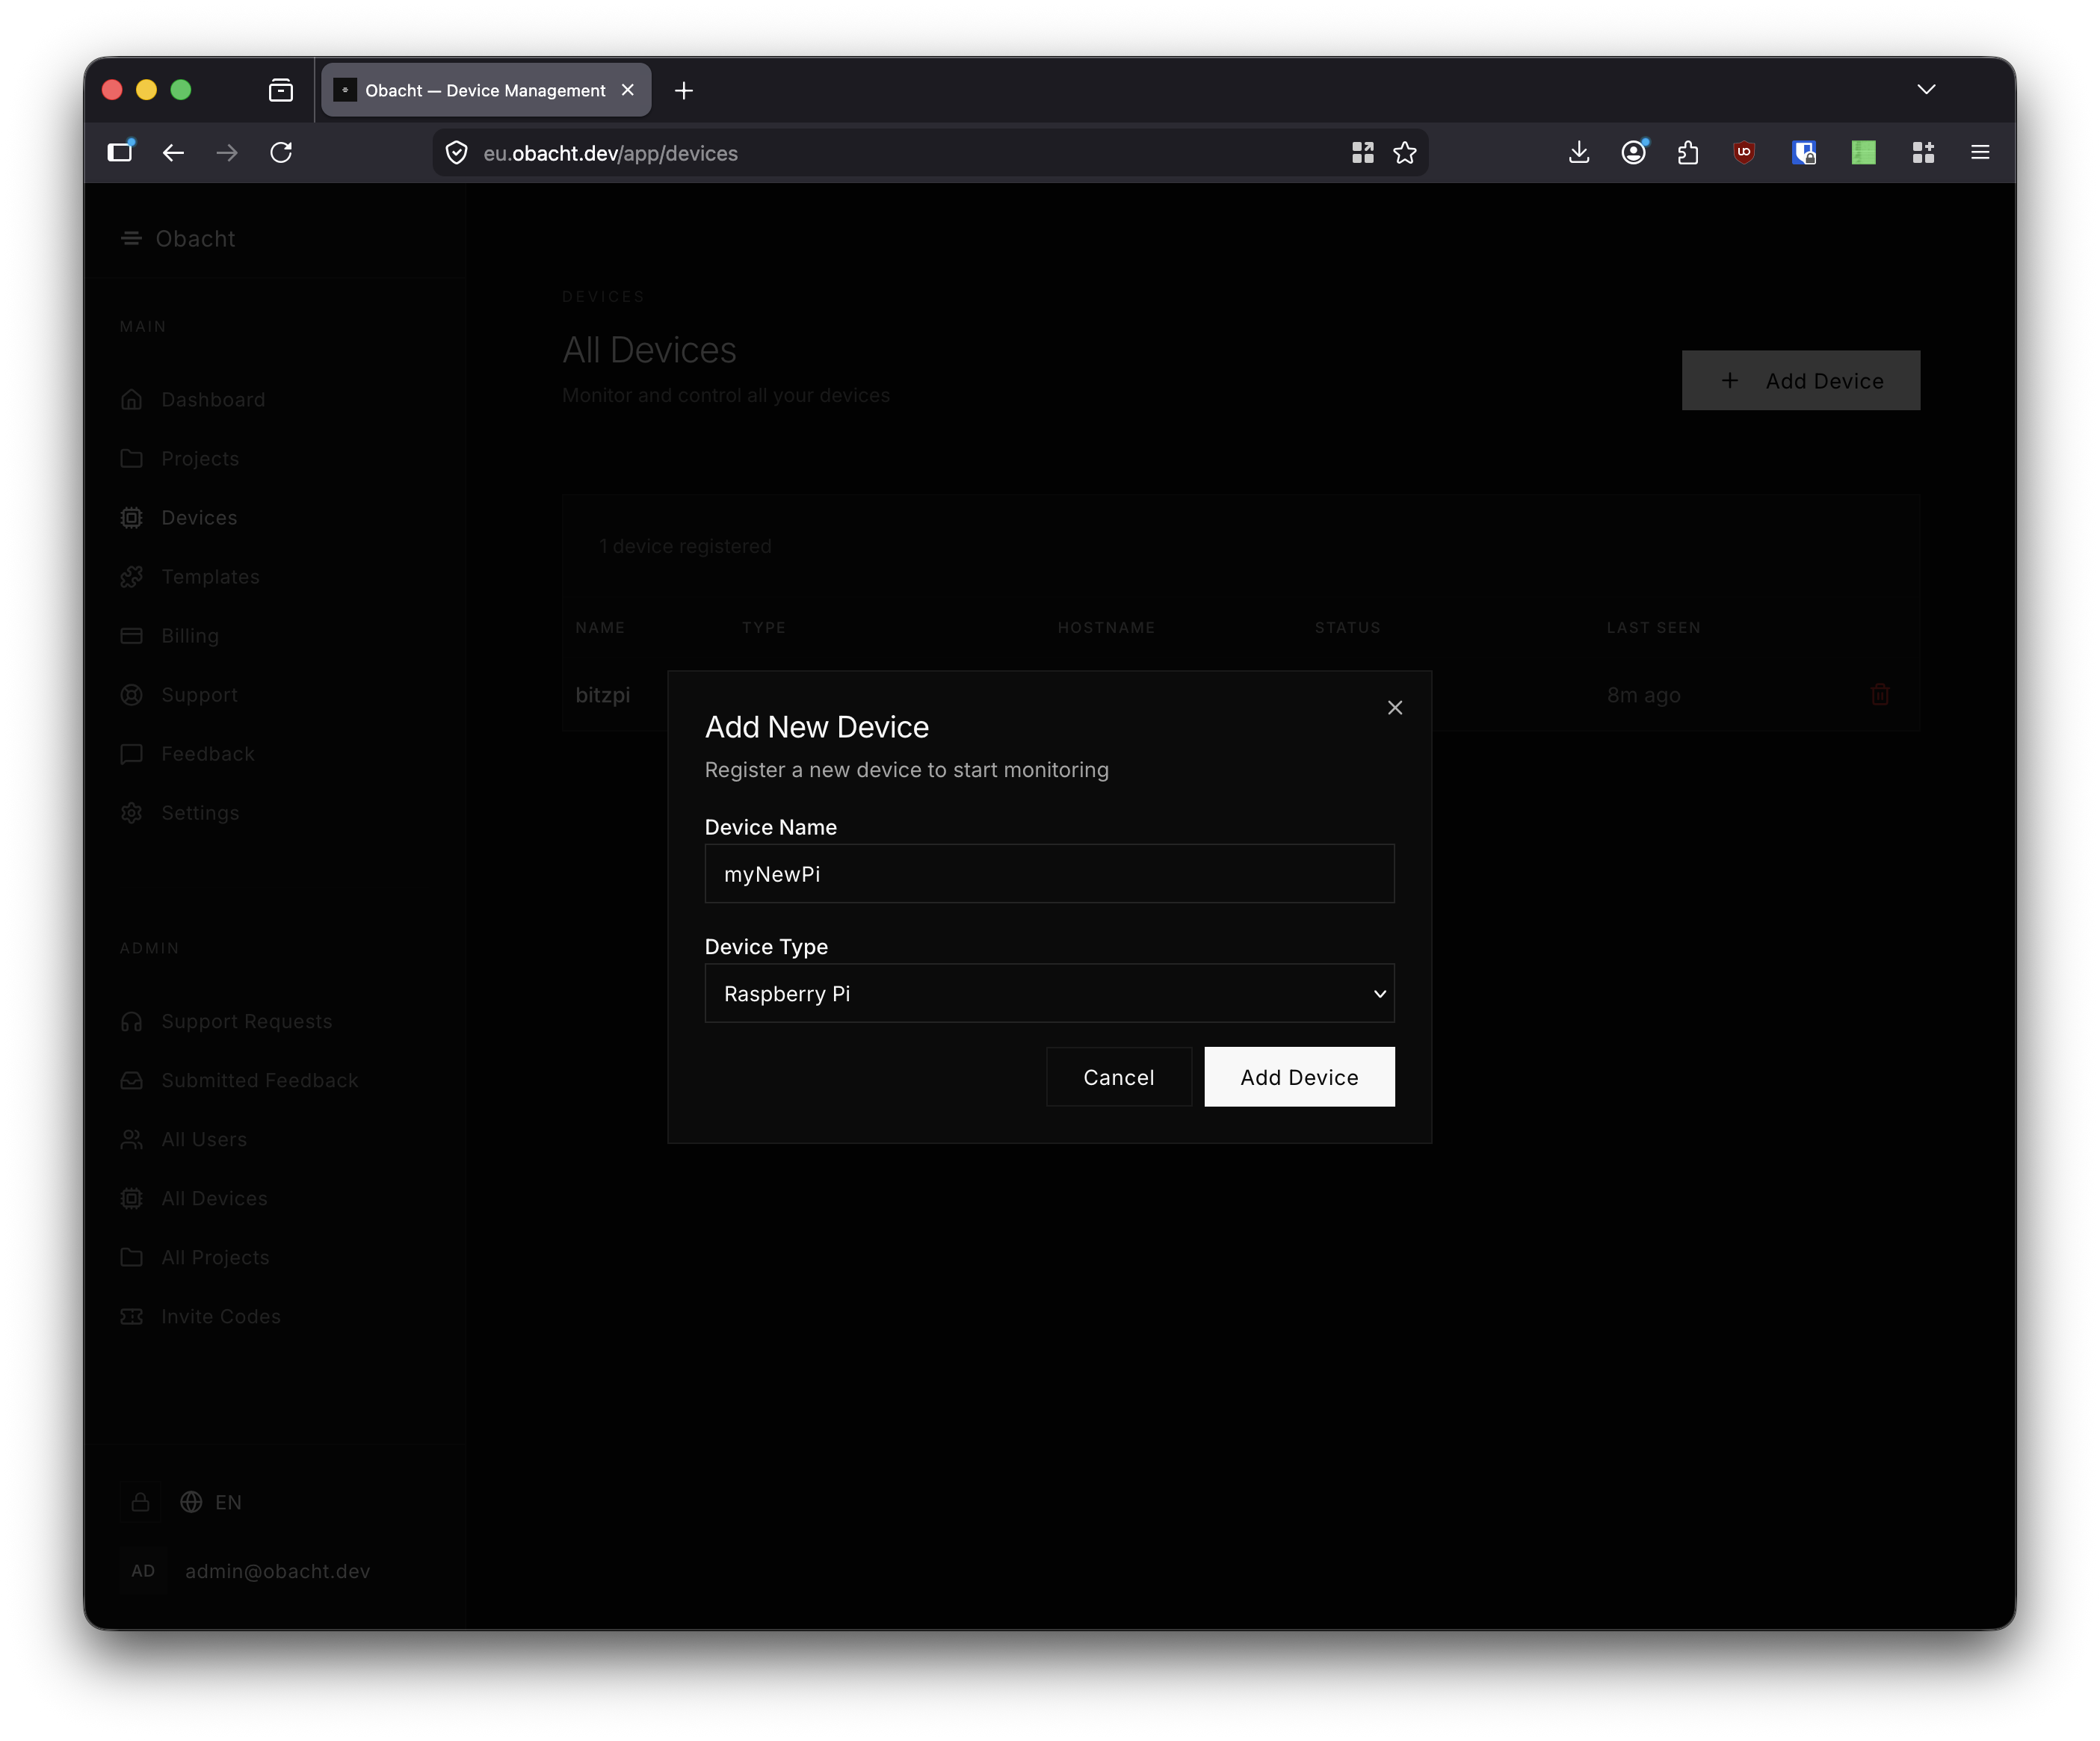
Enter a name and select the device type (e.g. Raspberry Pi), then click Add Device.
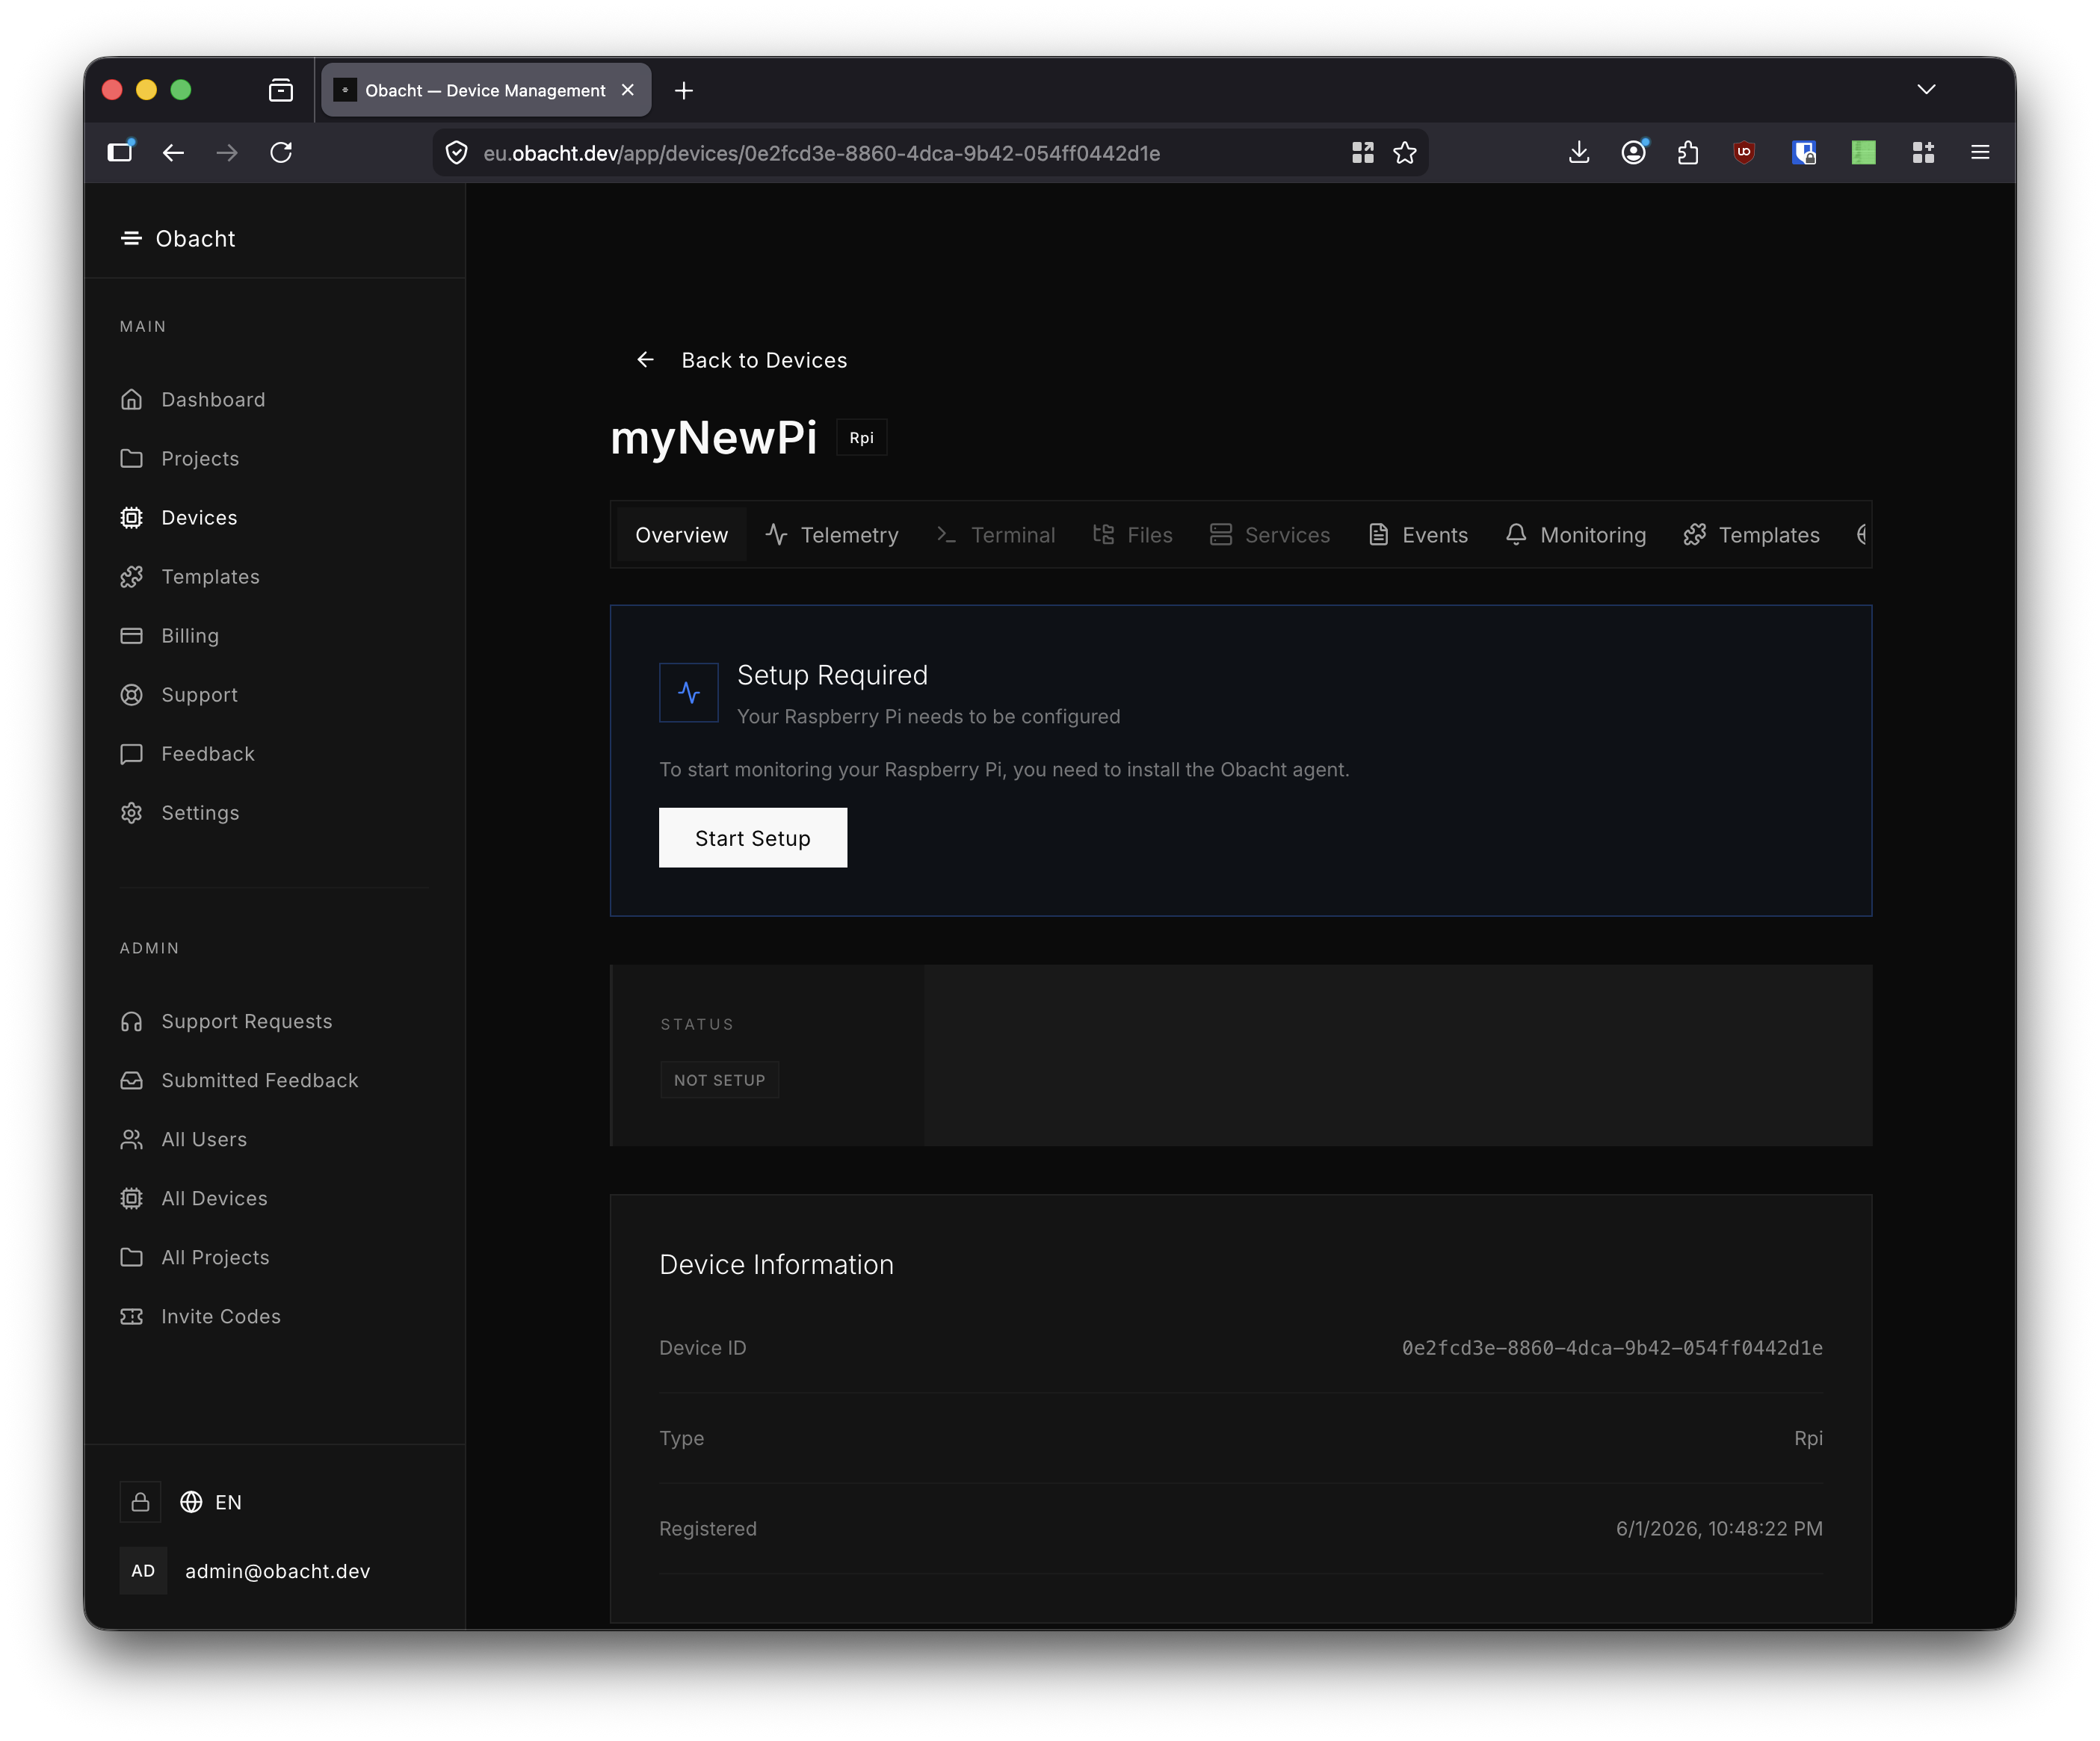
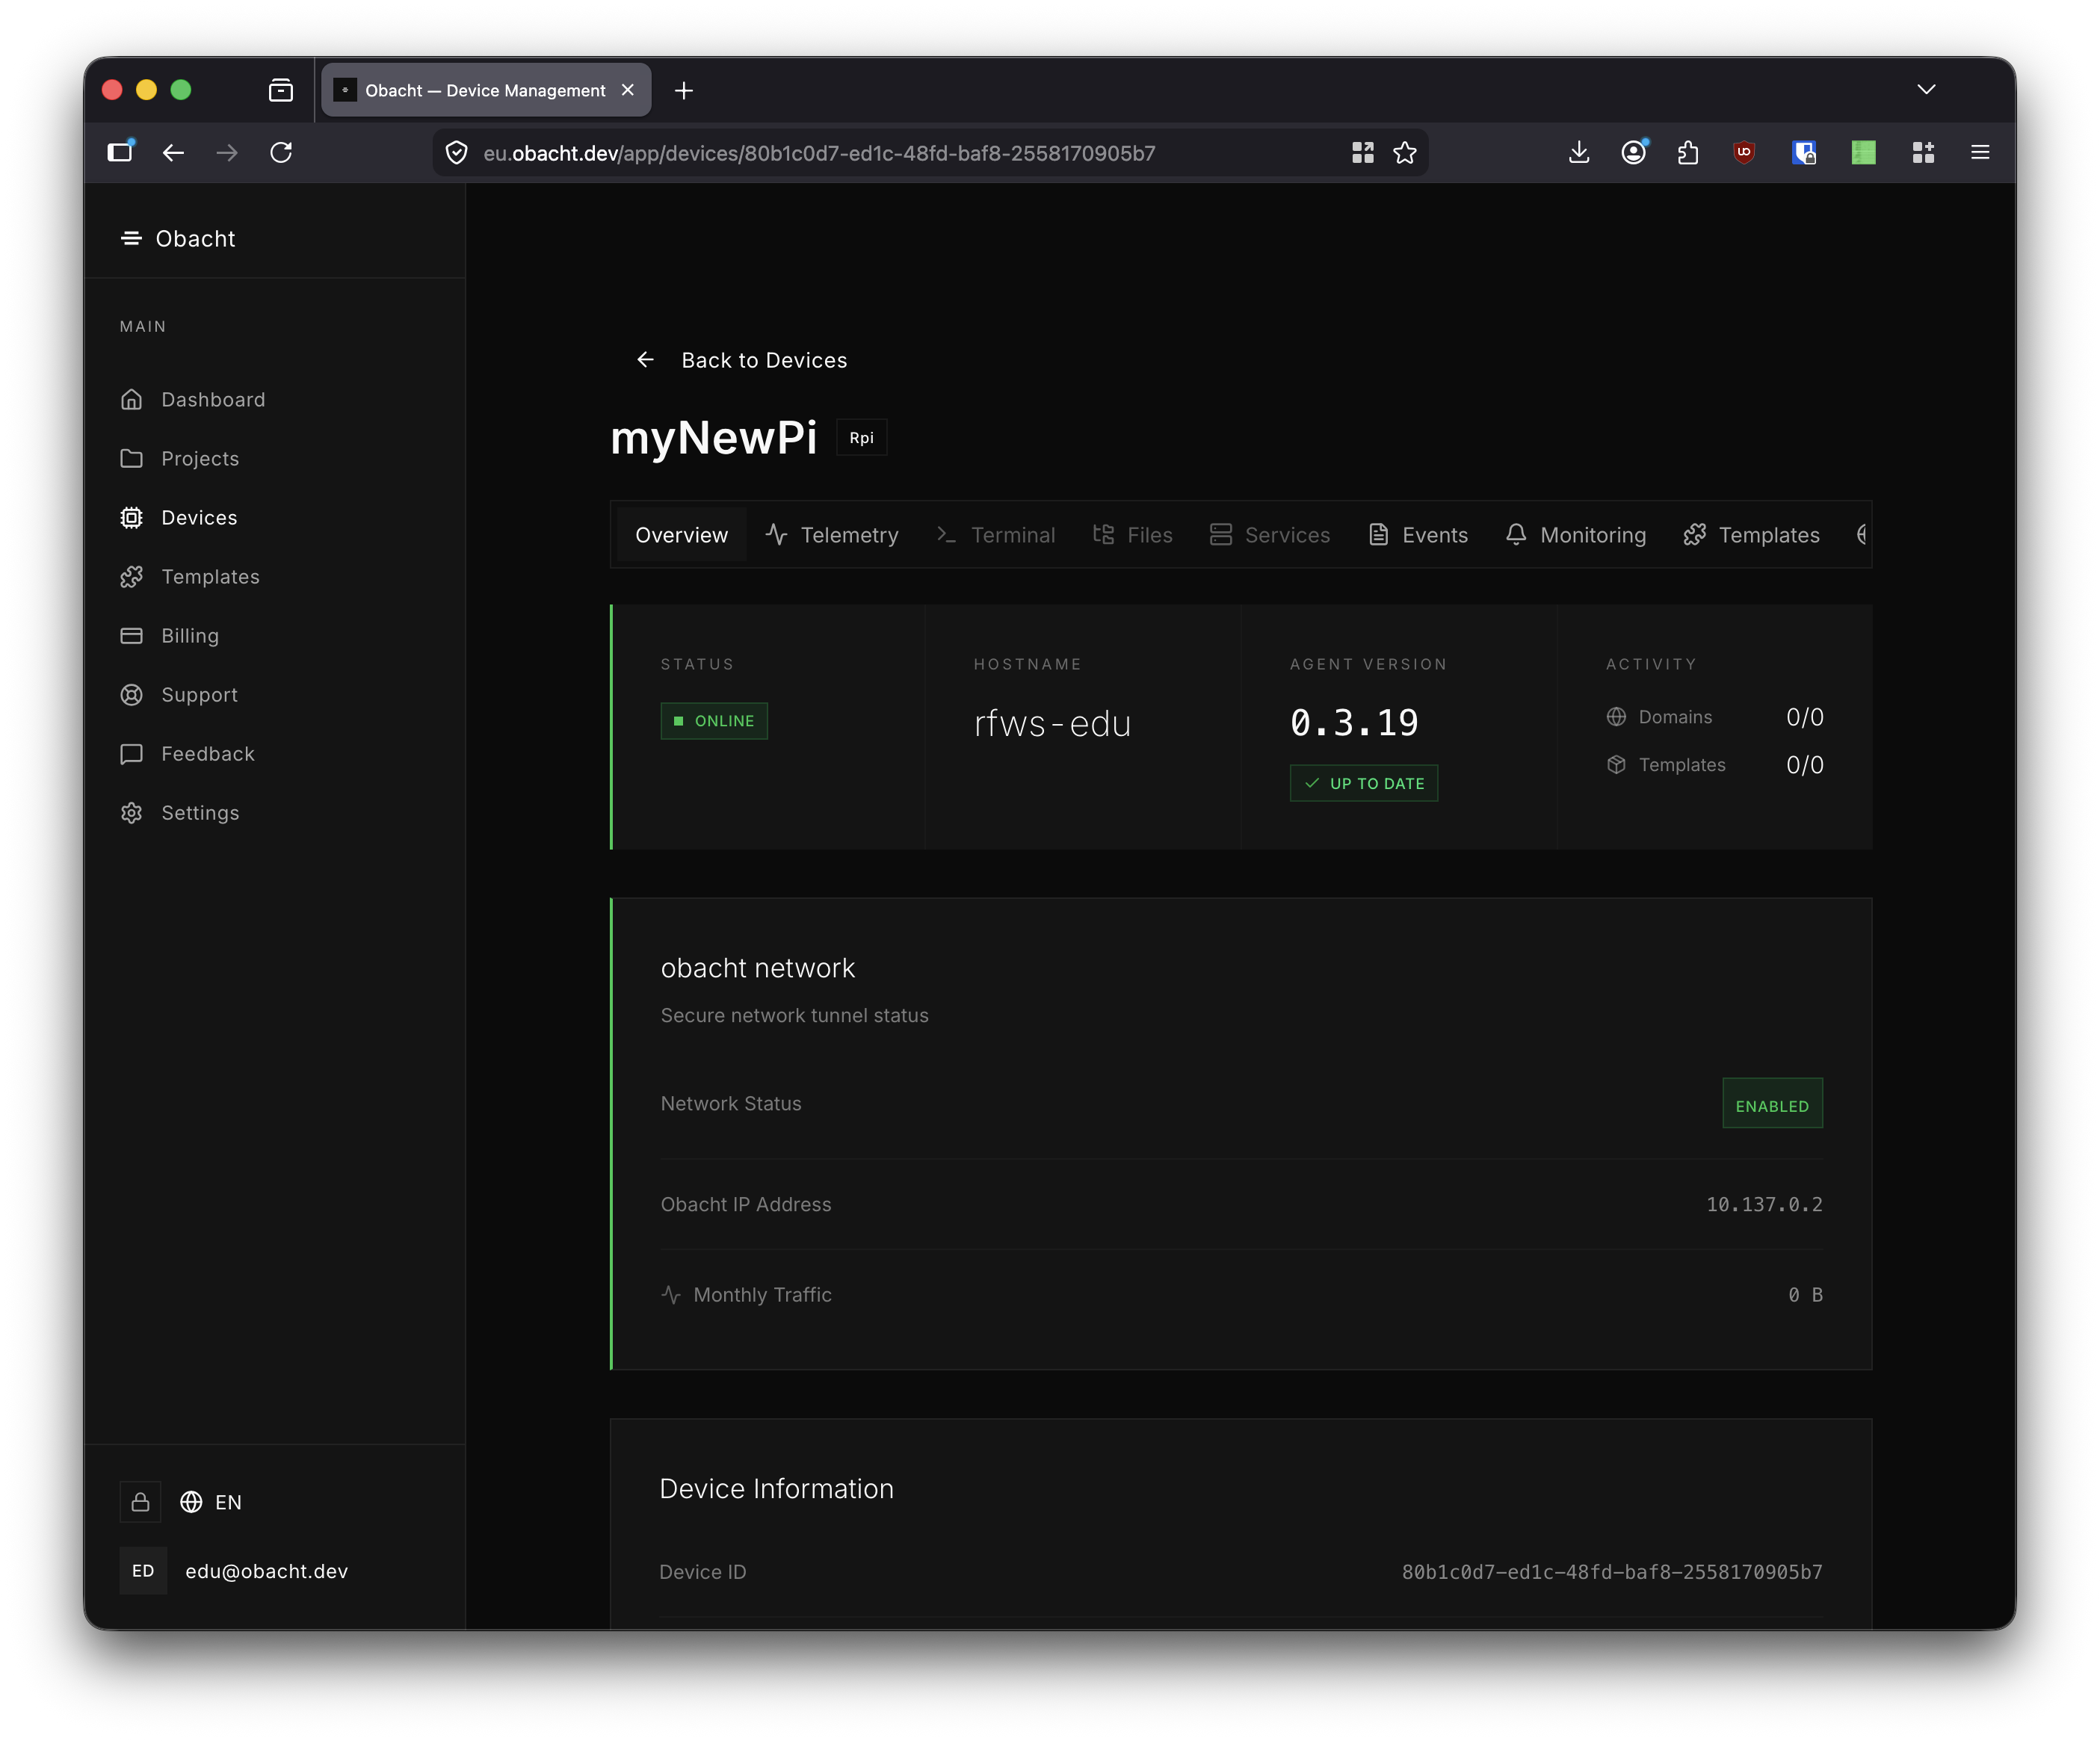
The device detail page opens. Status shows Not Setup. Click Start Setup to enter the setup wizard.
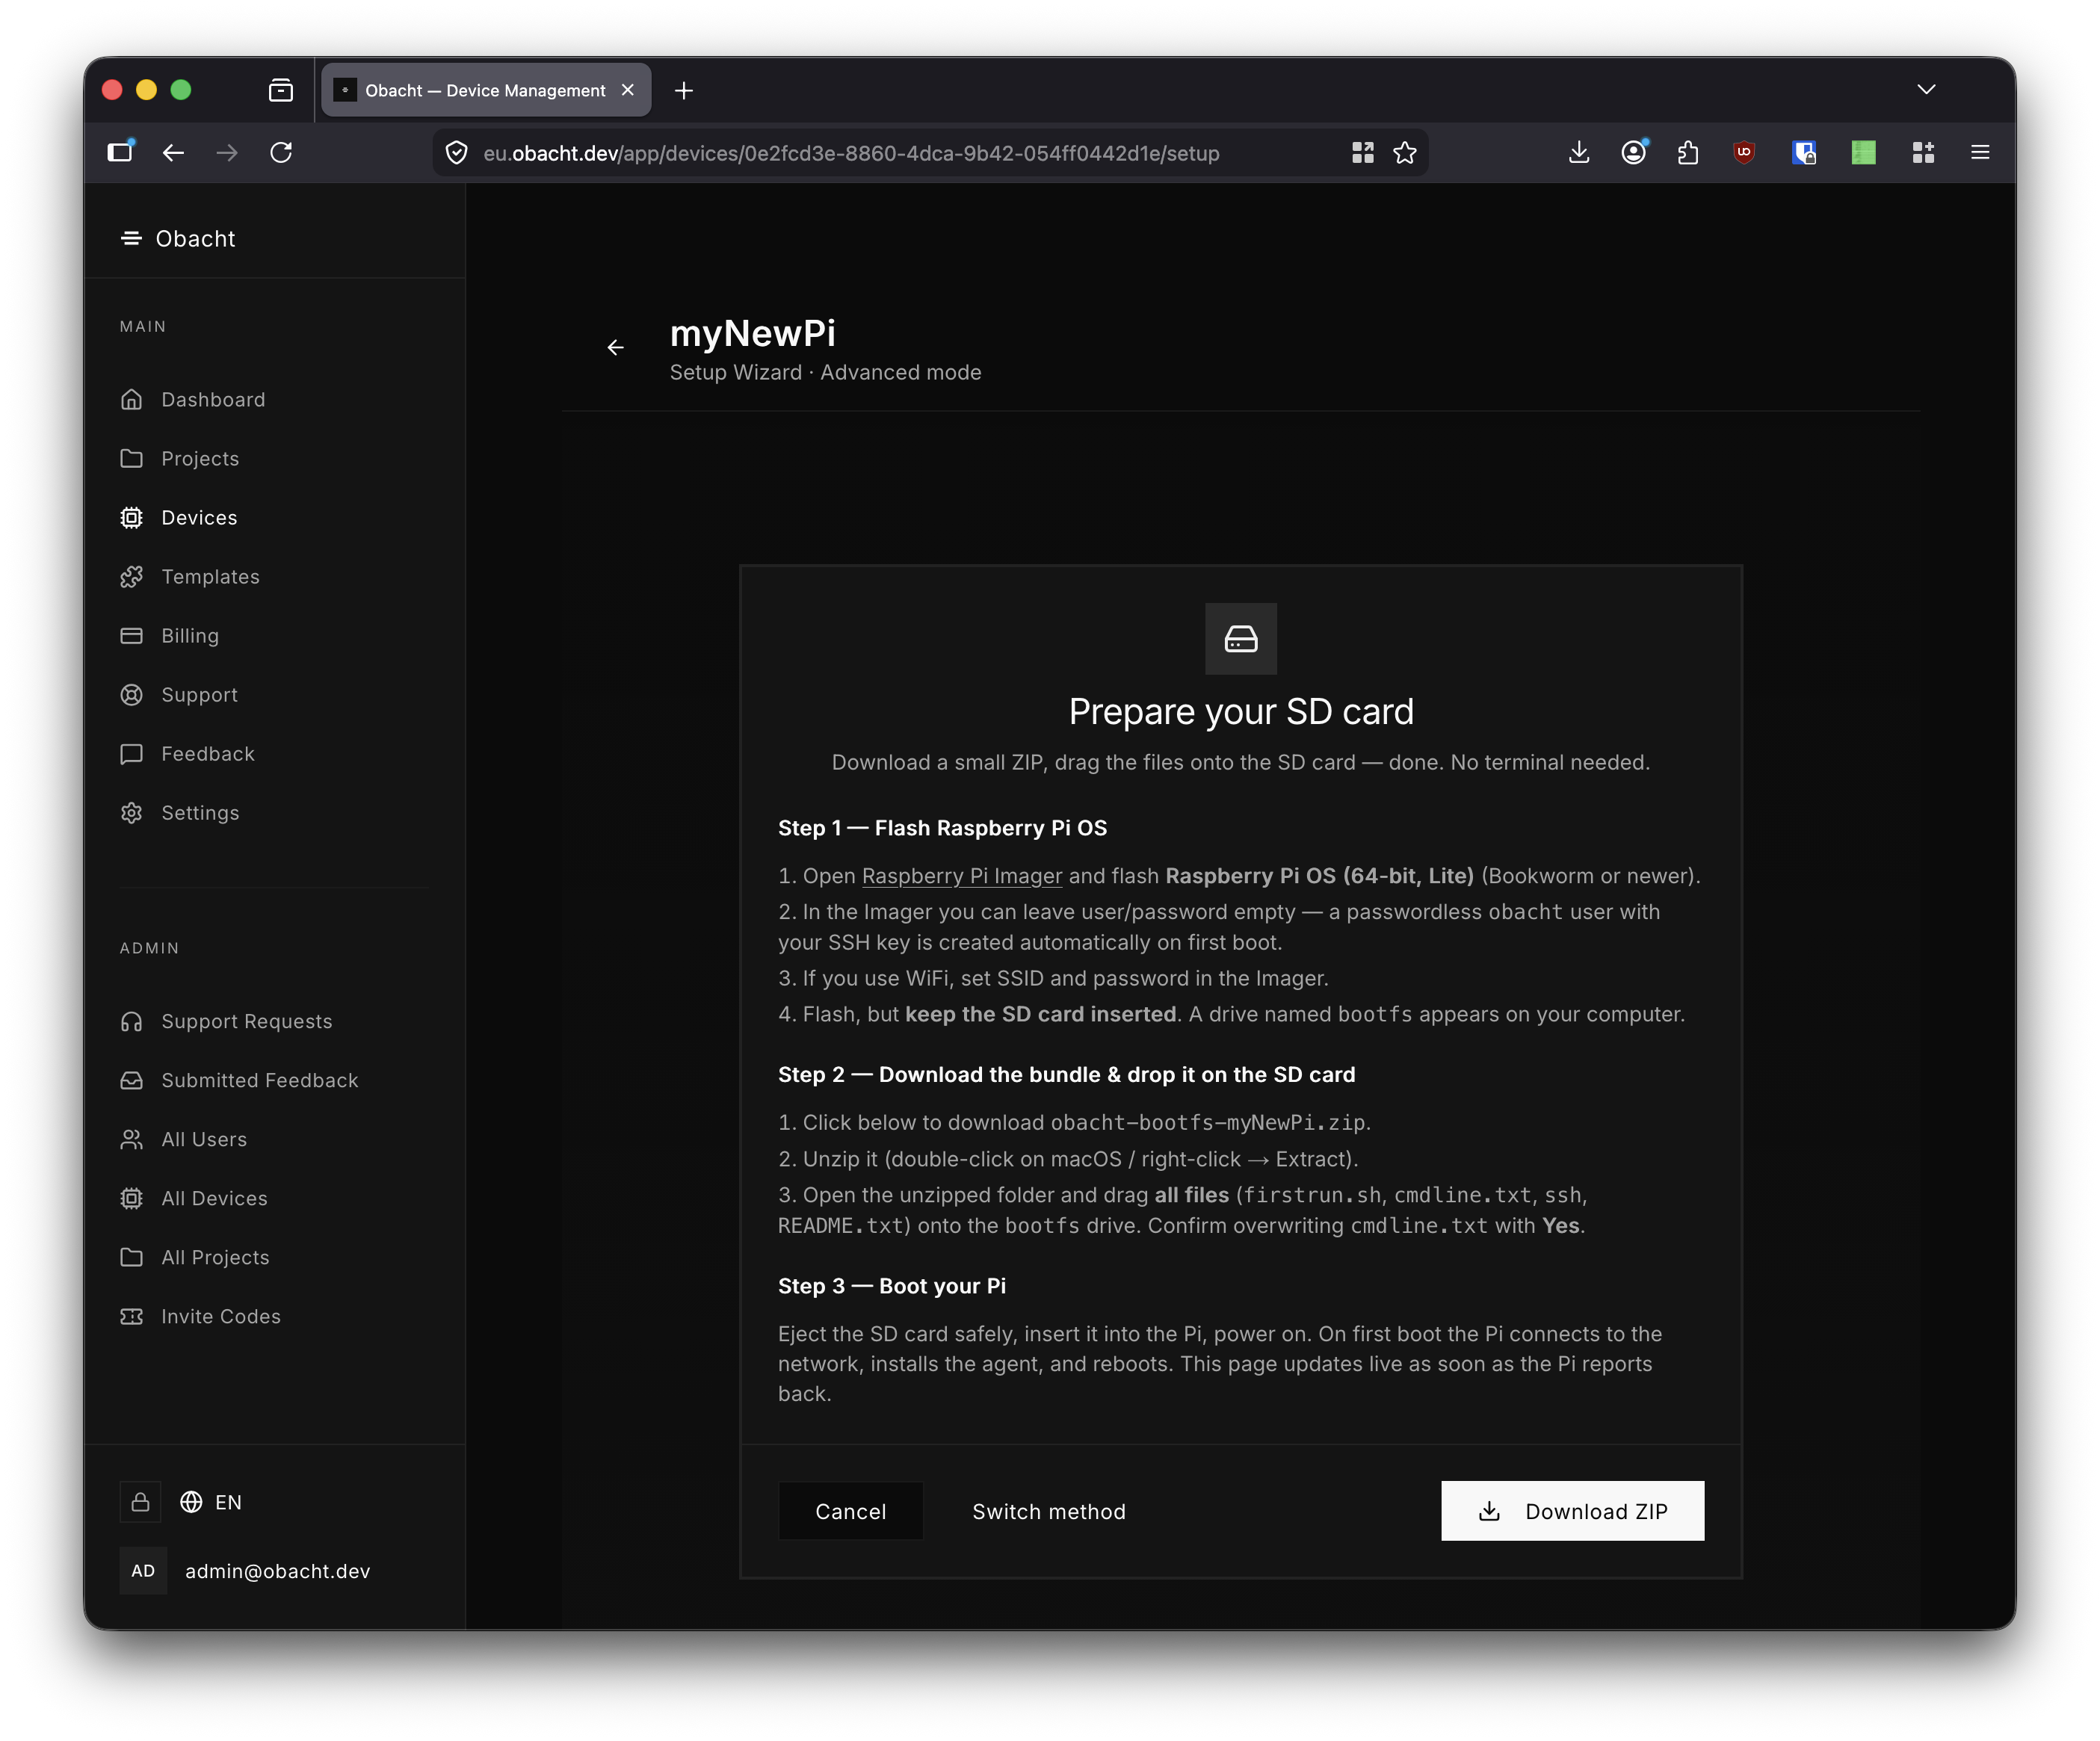
2. Flashing the SD Card
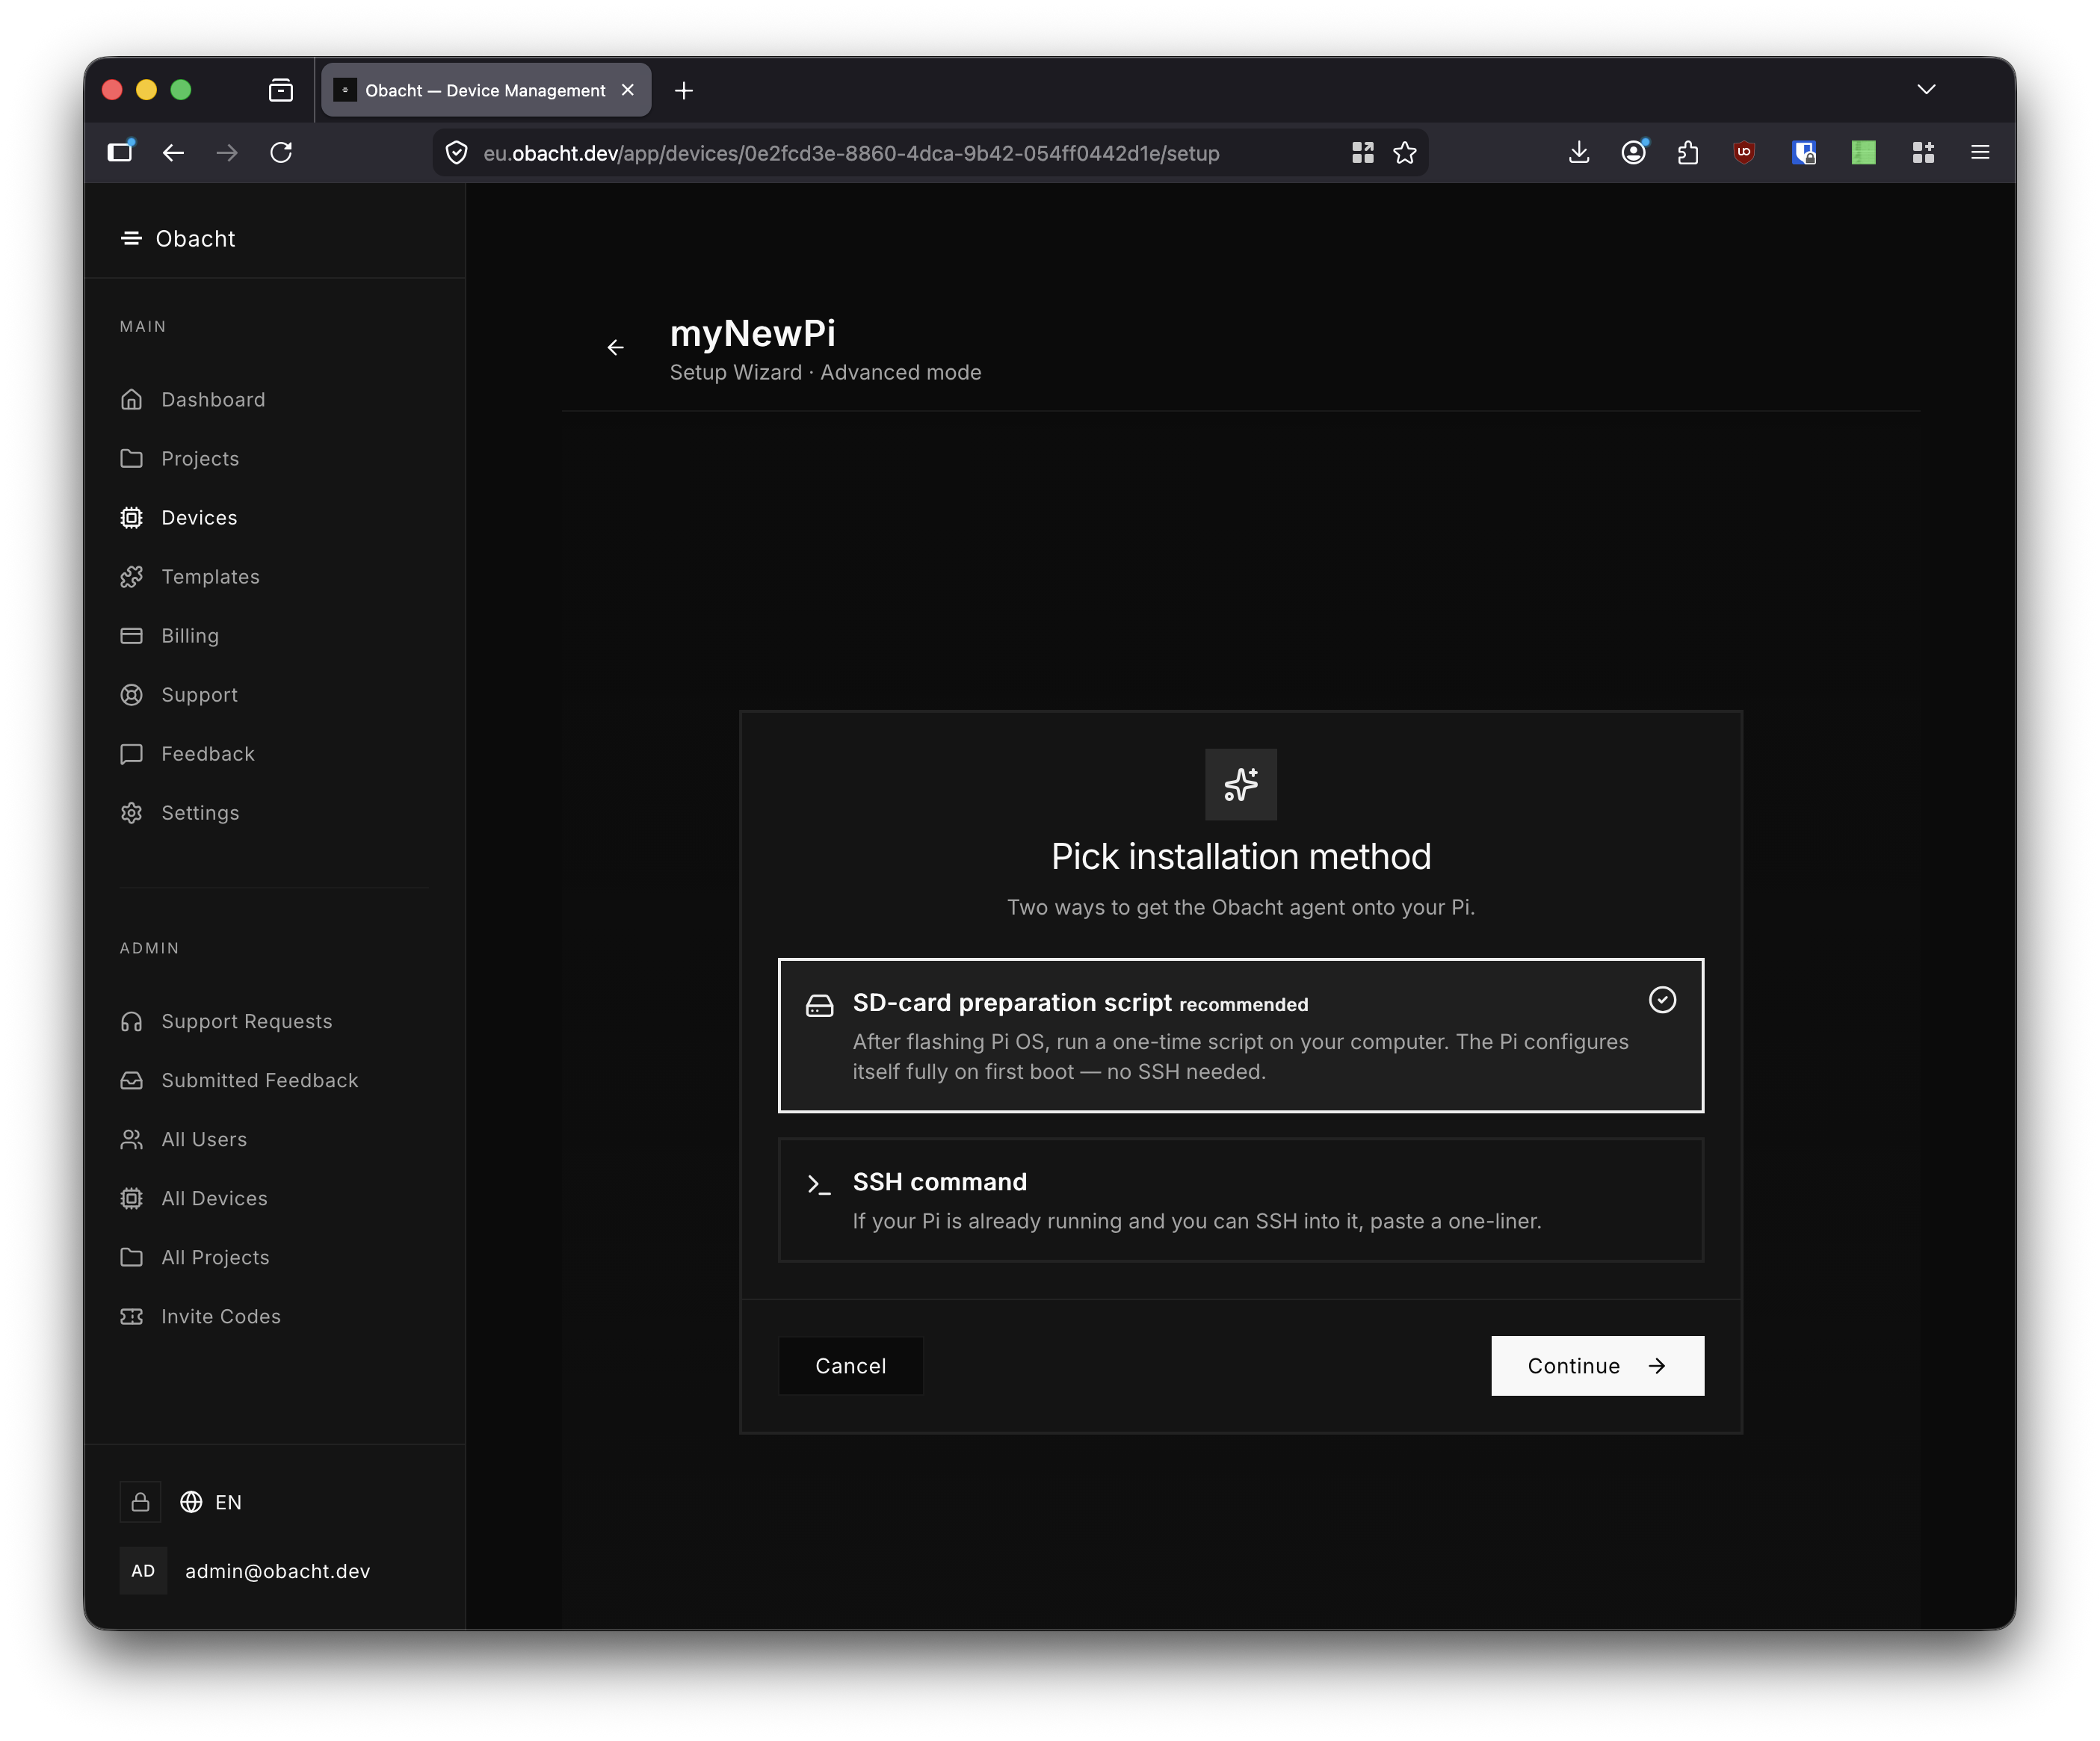
Select SD-card preparation script (recommended) and click Continue.
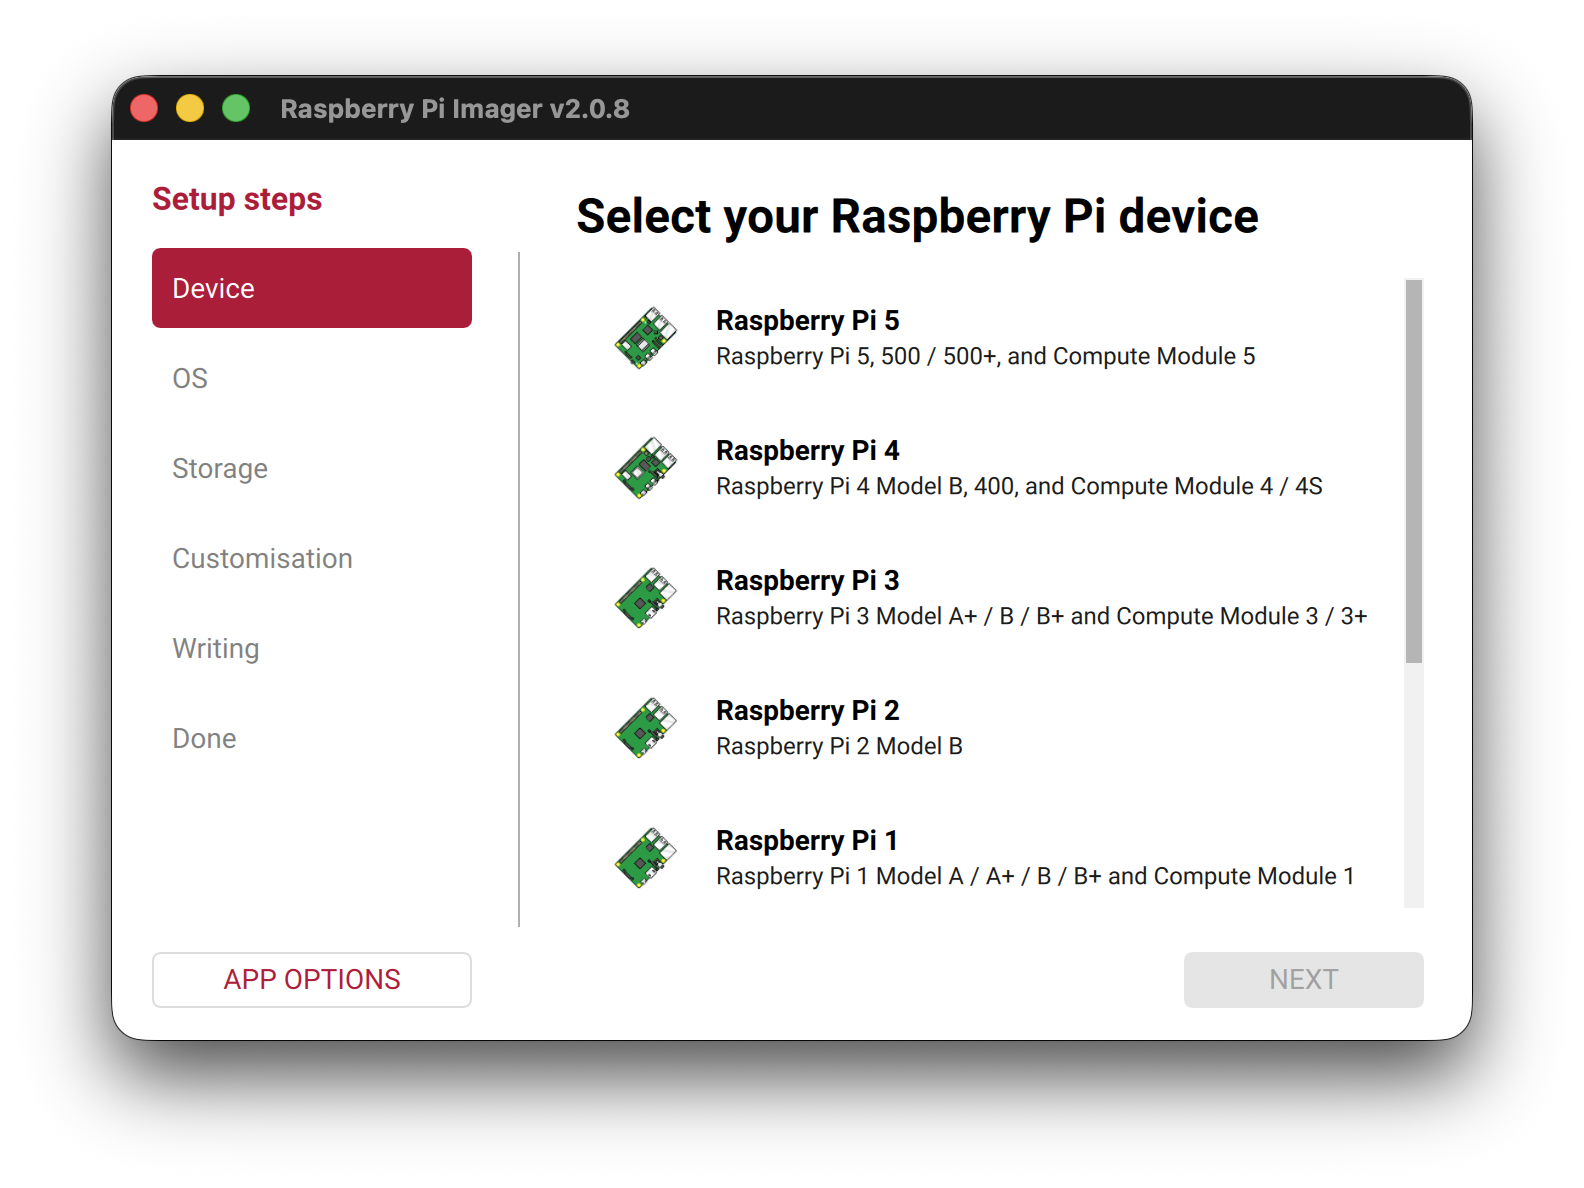
Step 1 — Flash Raspberry Pi OS
Open Raspberry Pi Imager (v2.x). Select your Raspberry Pi model.
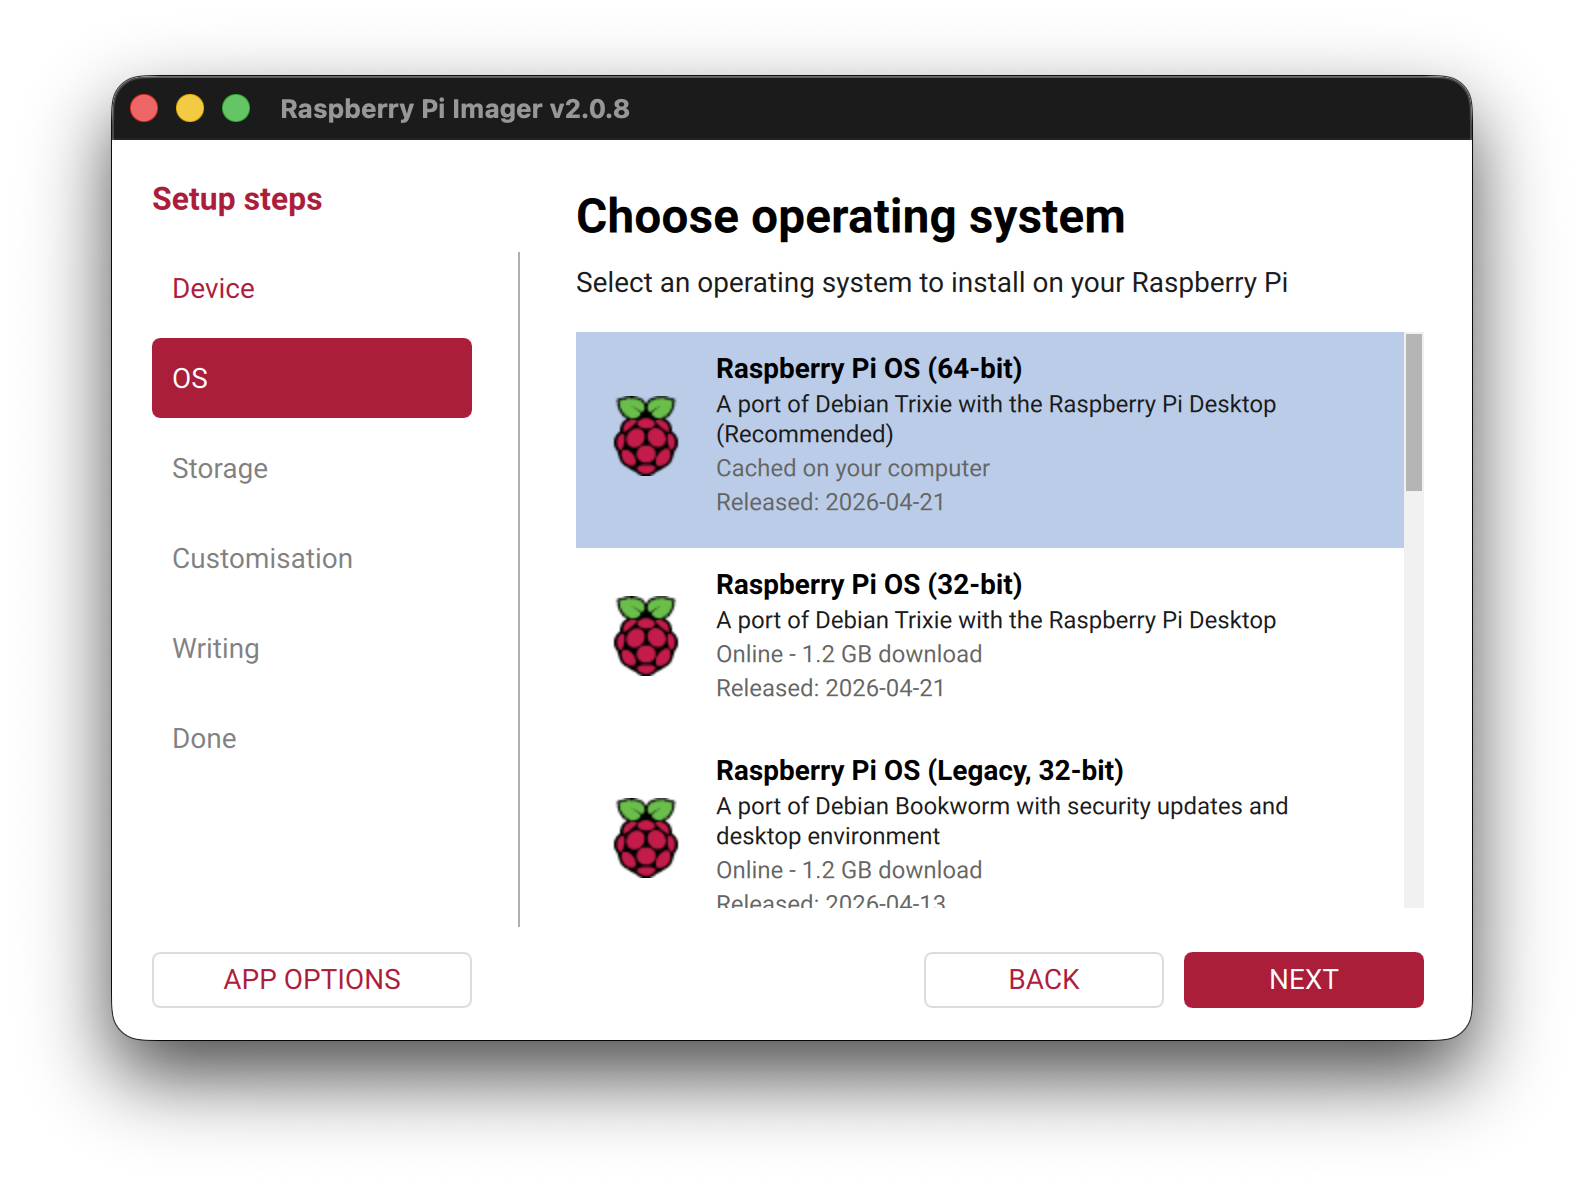
Choose Raspberry Pi OS (64-bit).
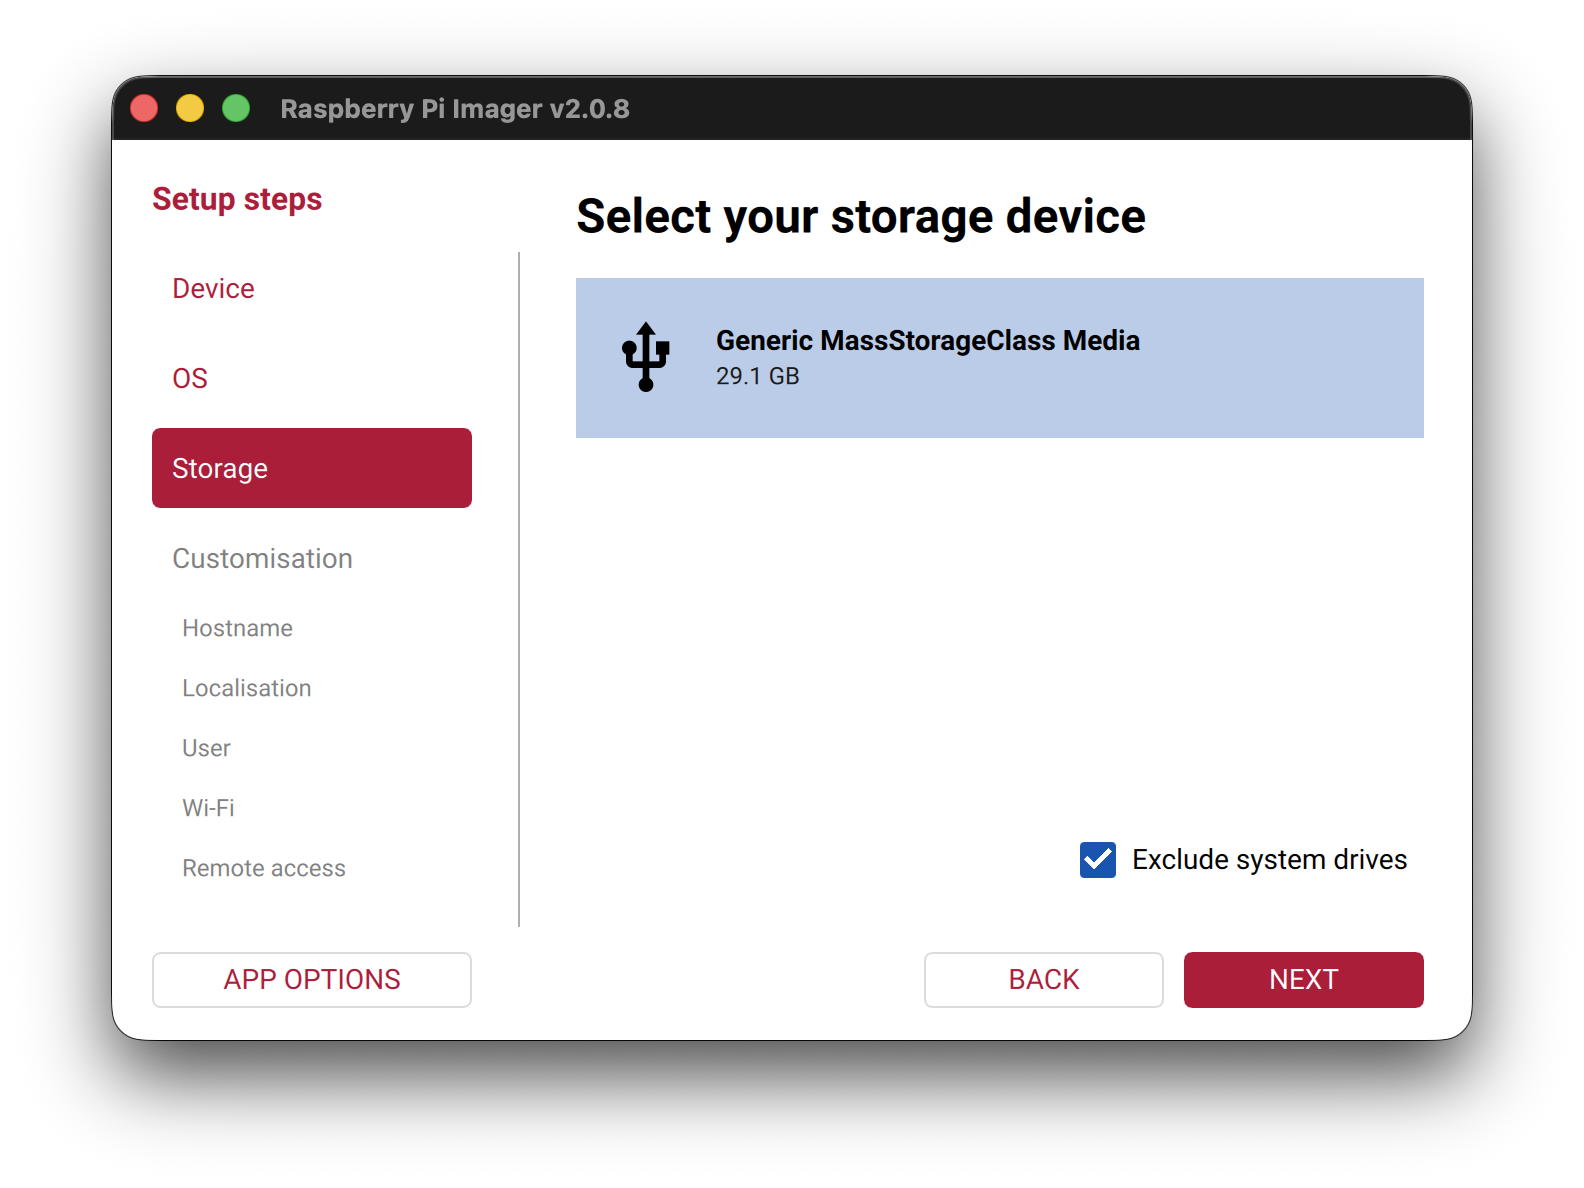
Select your SD card as the storage device.
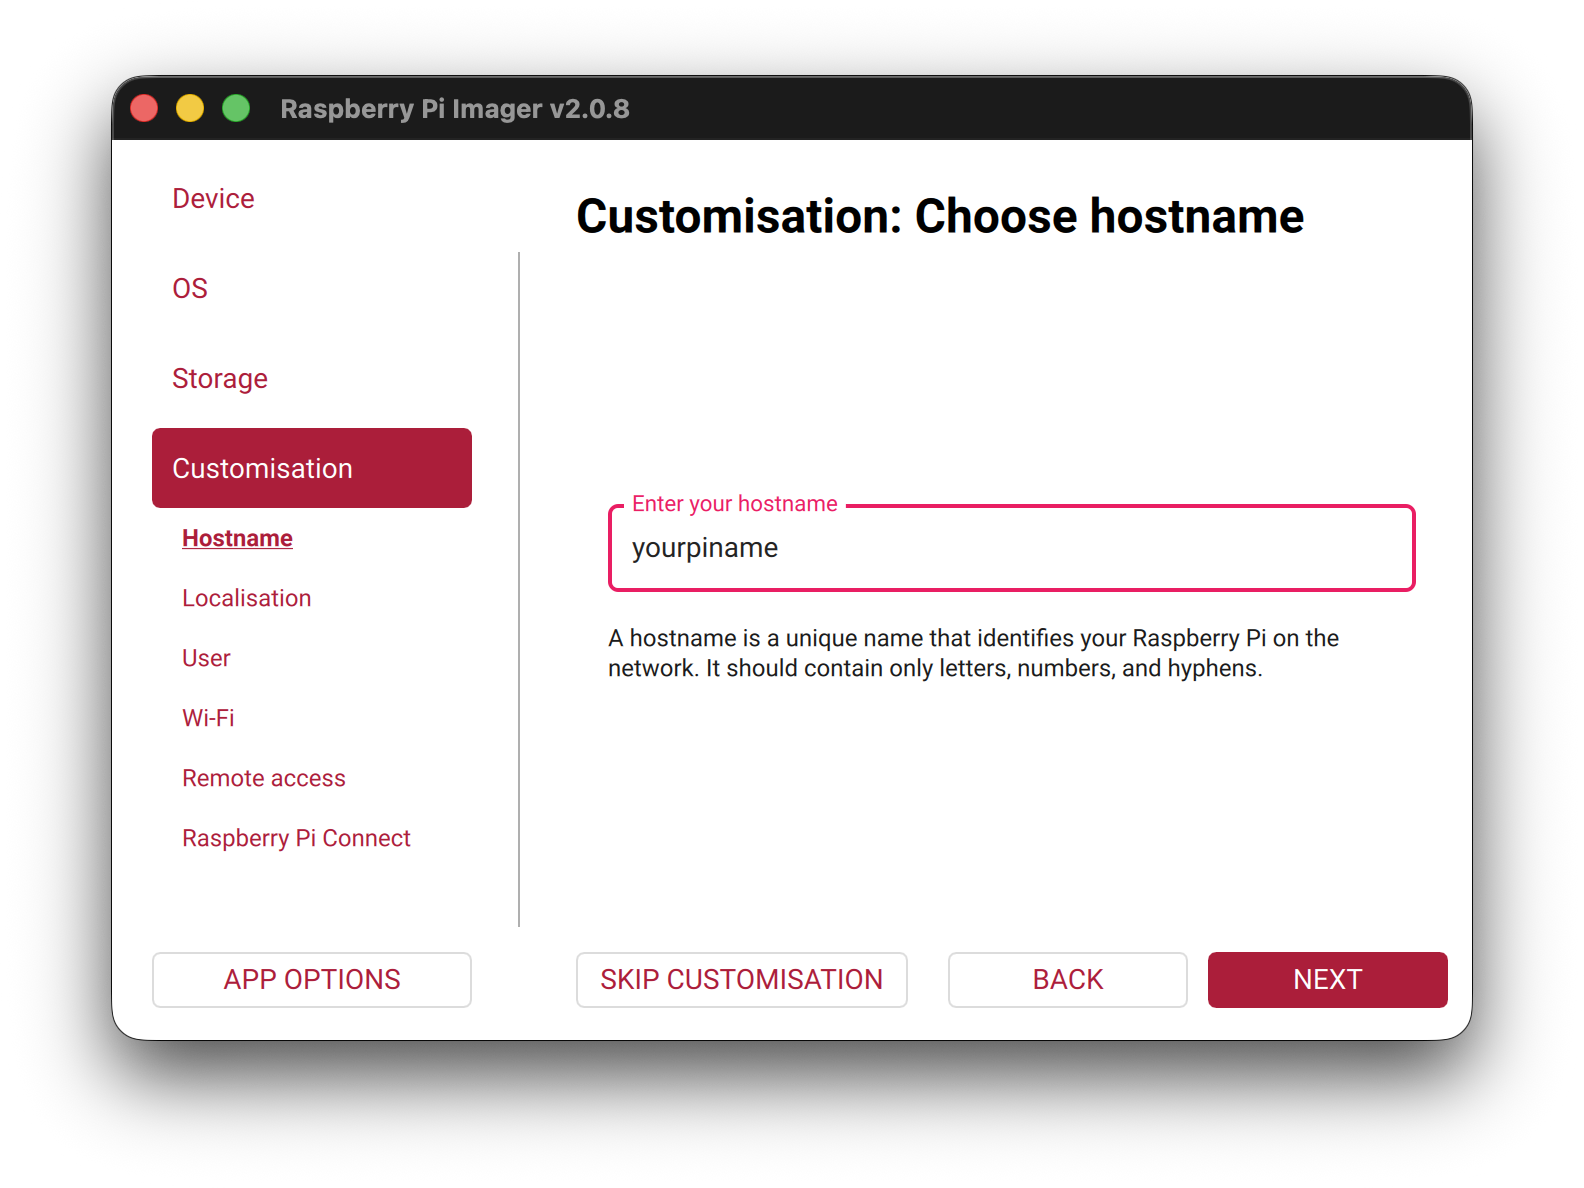
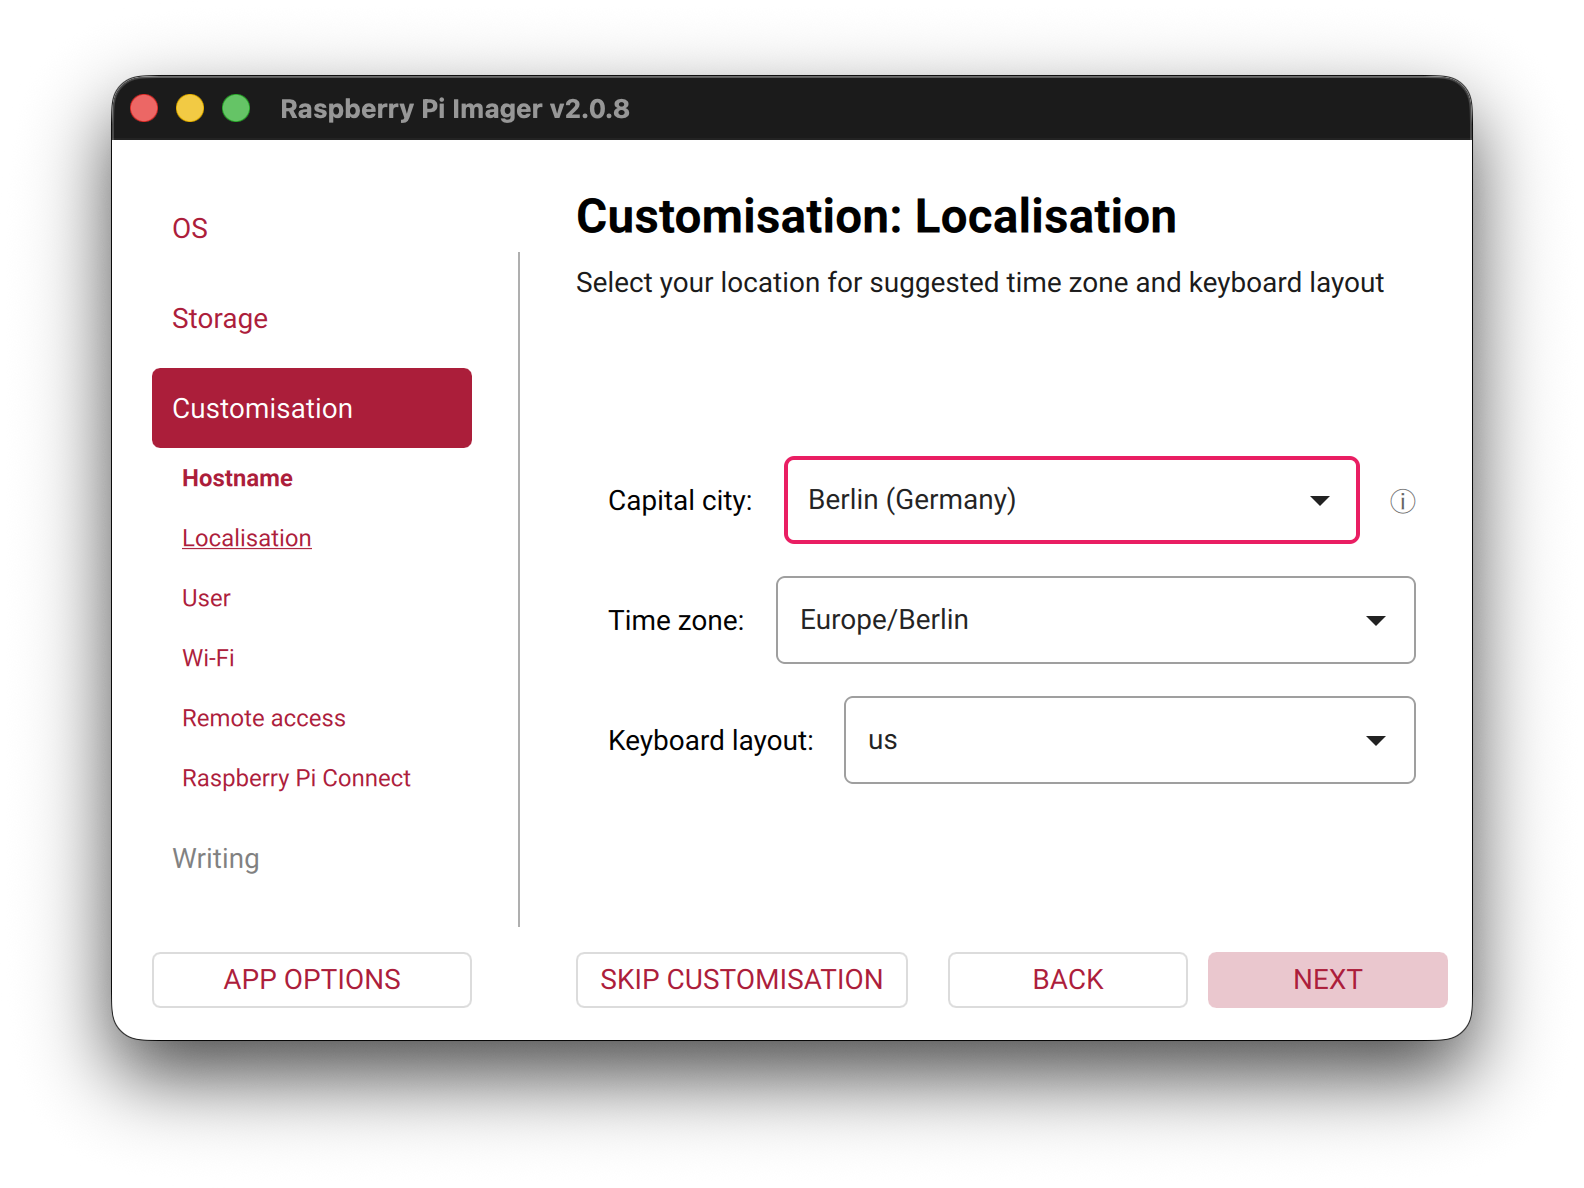
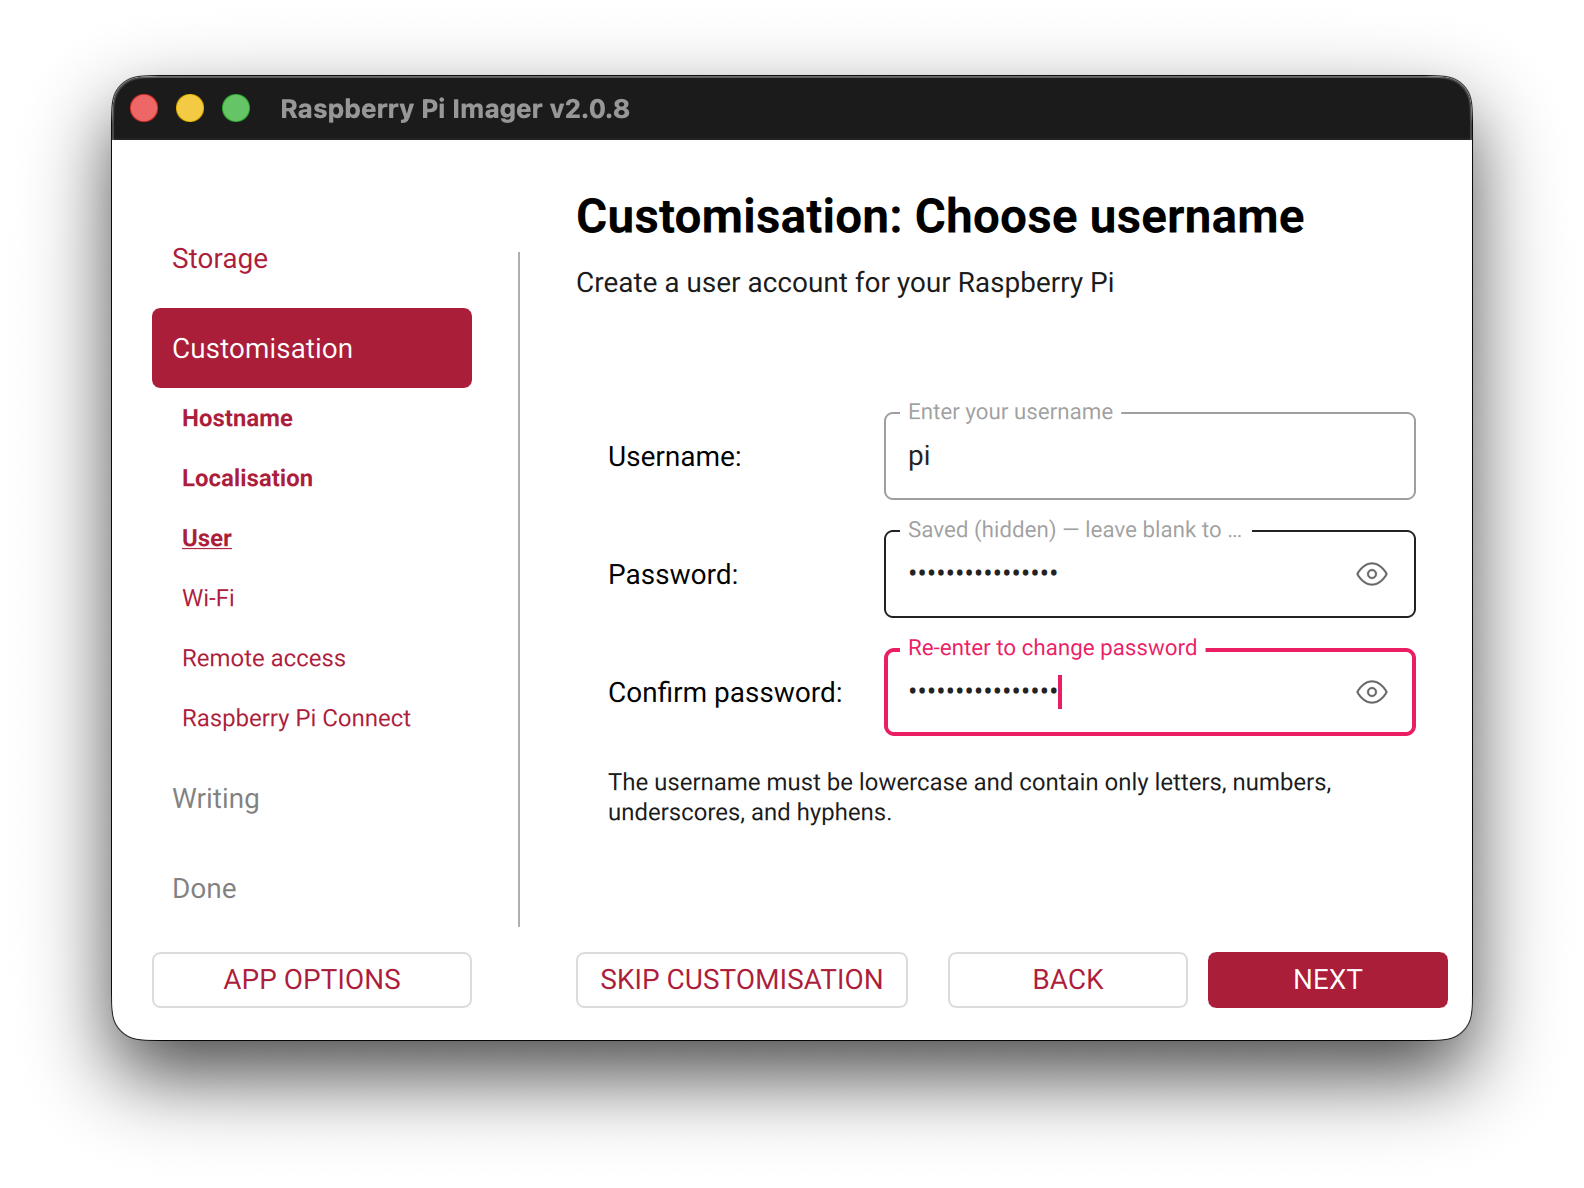
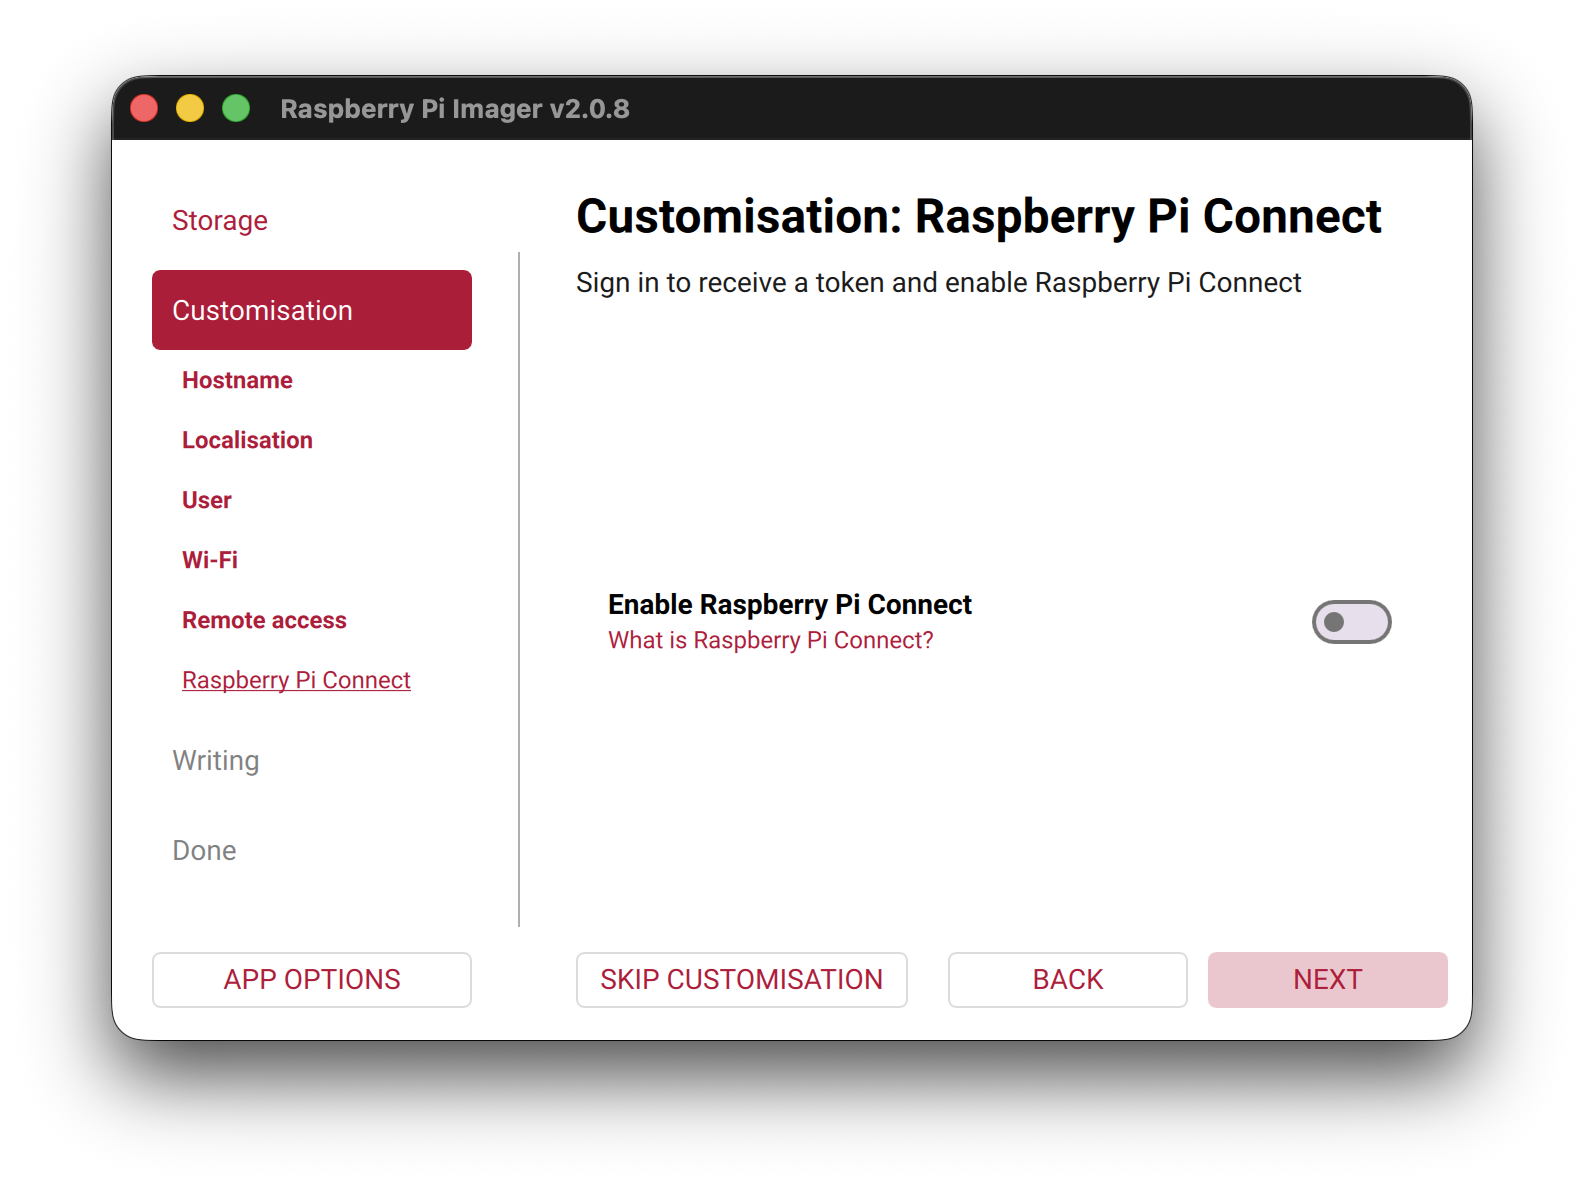
In the Customisation screens, set a hostname, localisation, and user account.
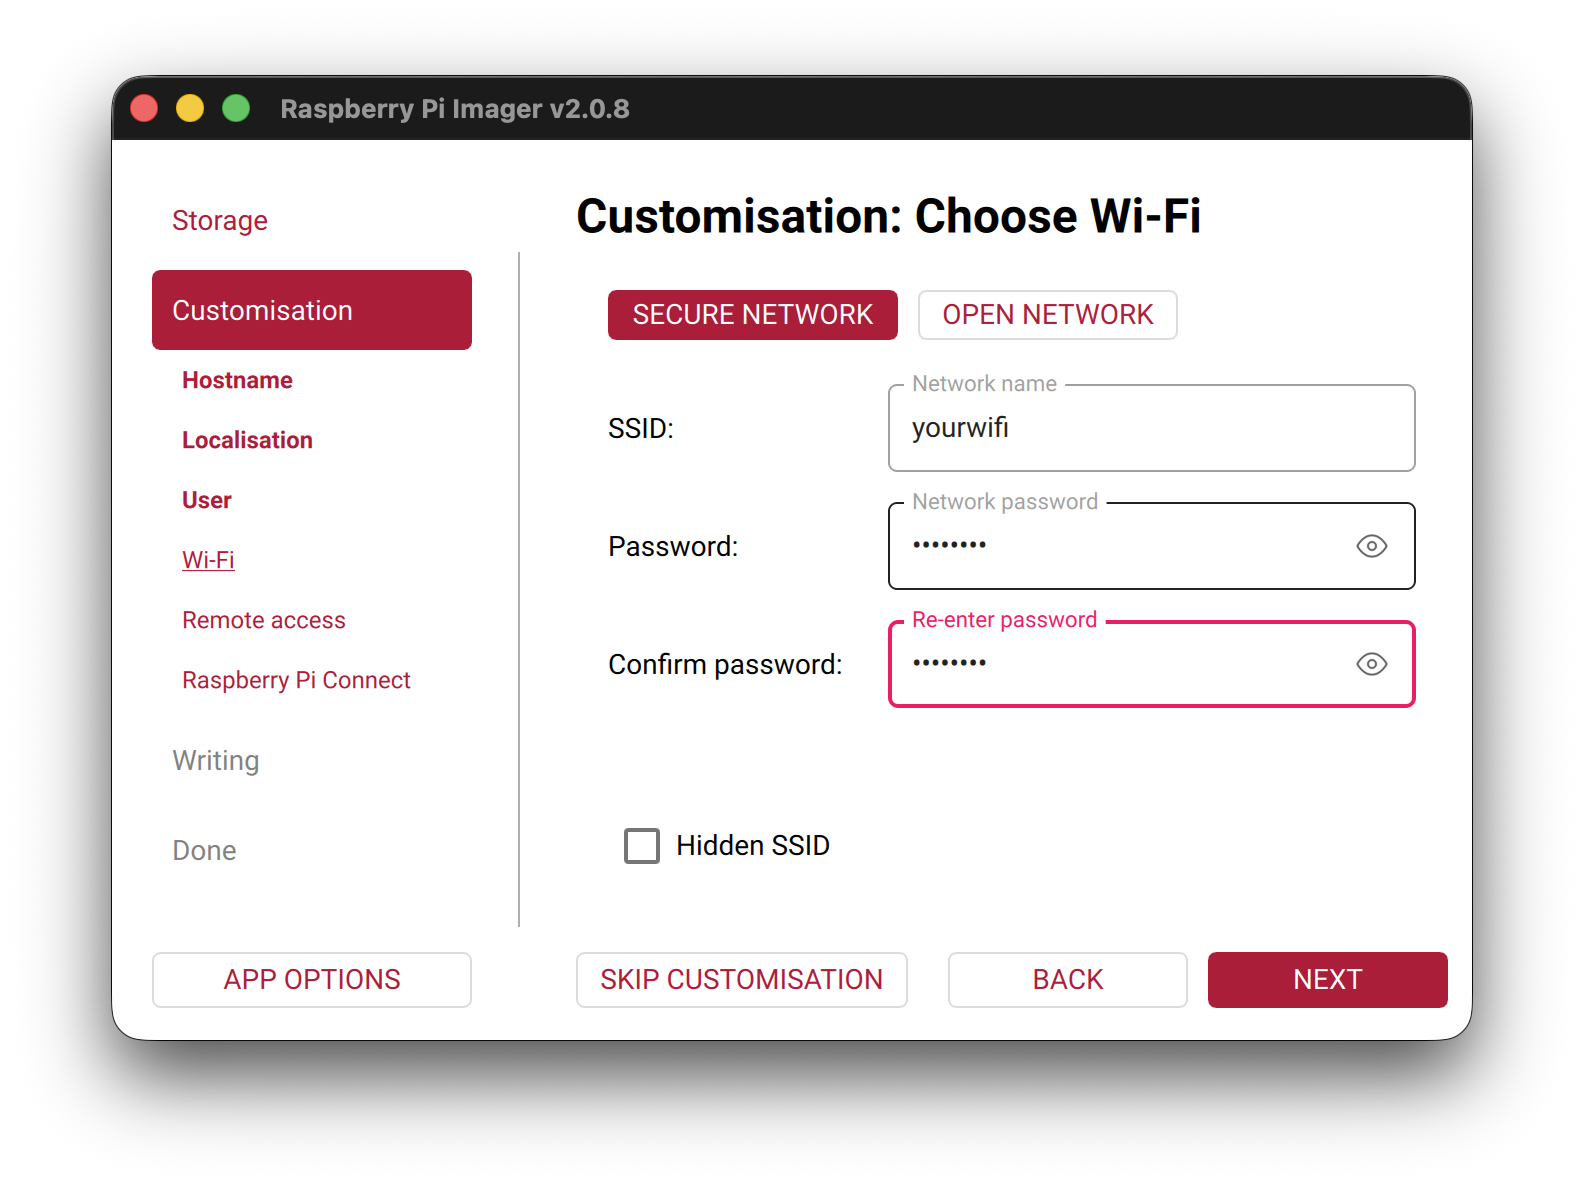
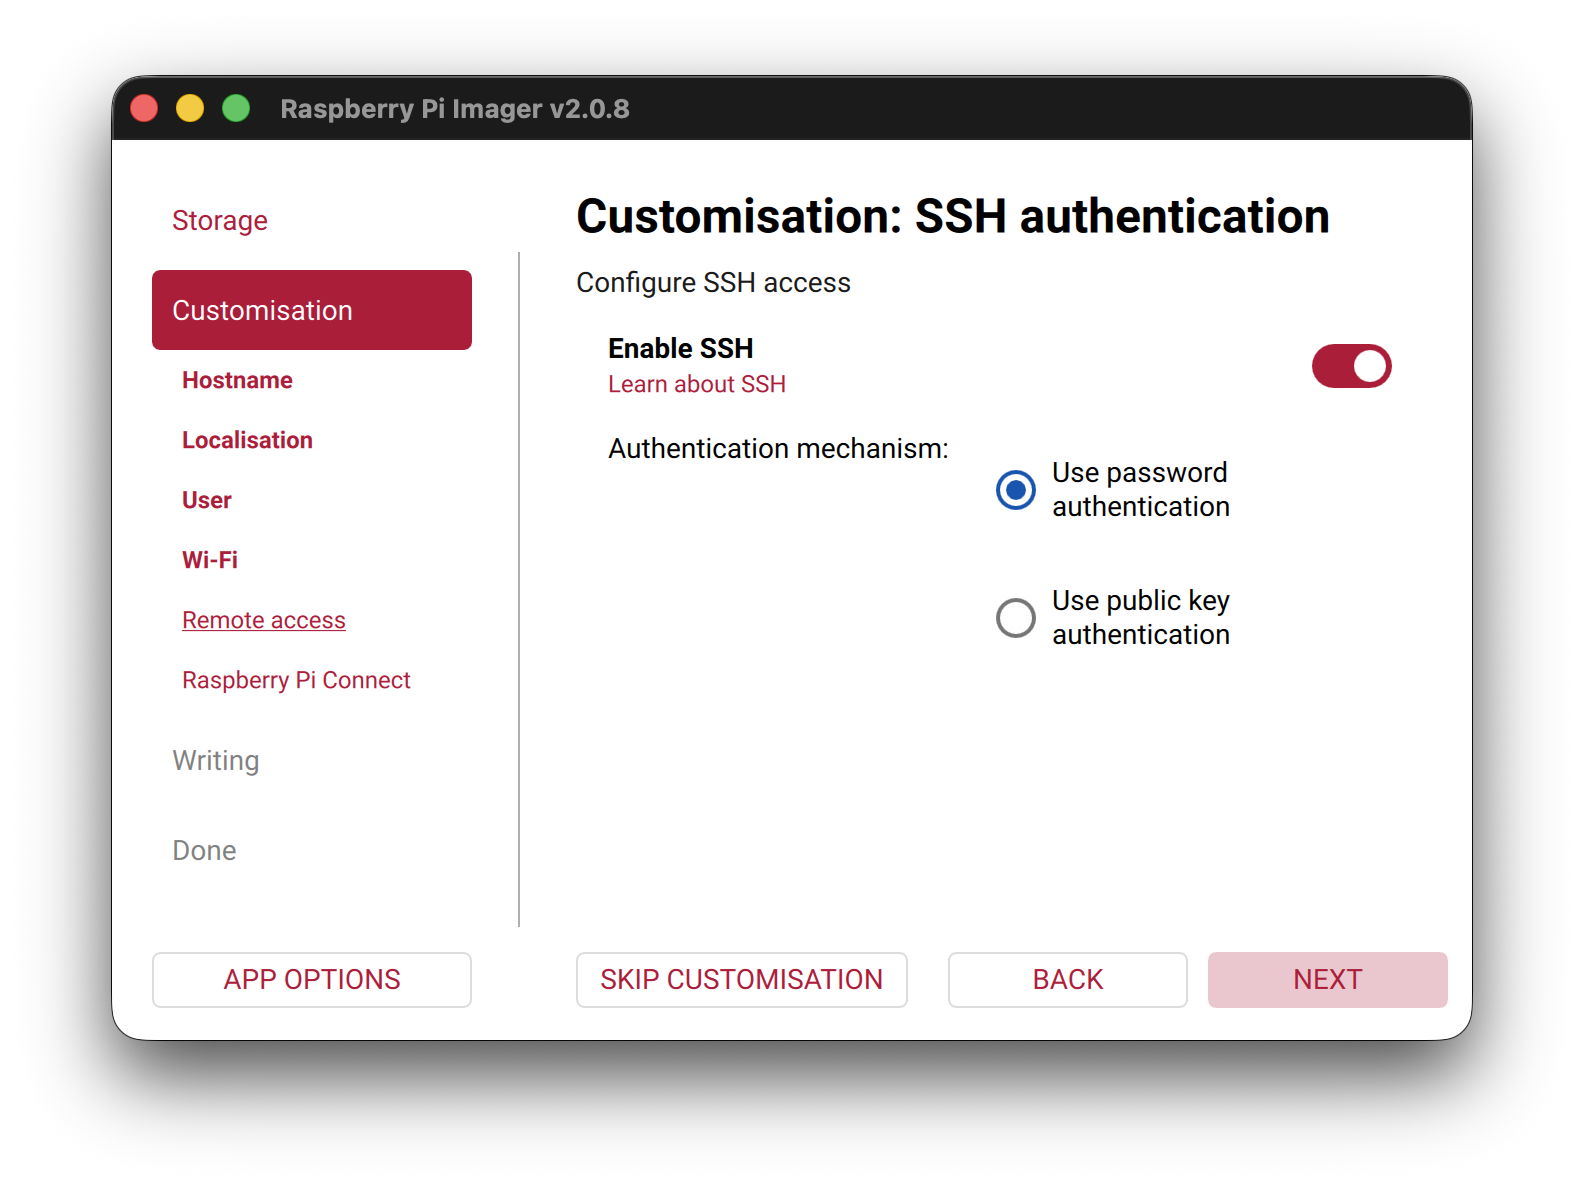
If the Pi will use Wi-Fi, enter your SSID and password. Under Remote access, enable SSH with password authentication.
Leave Raspberry Pi Connect disabled.
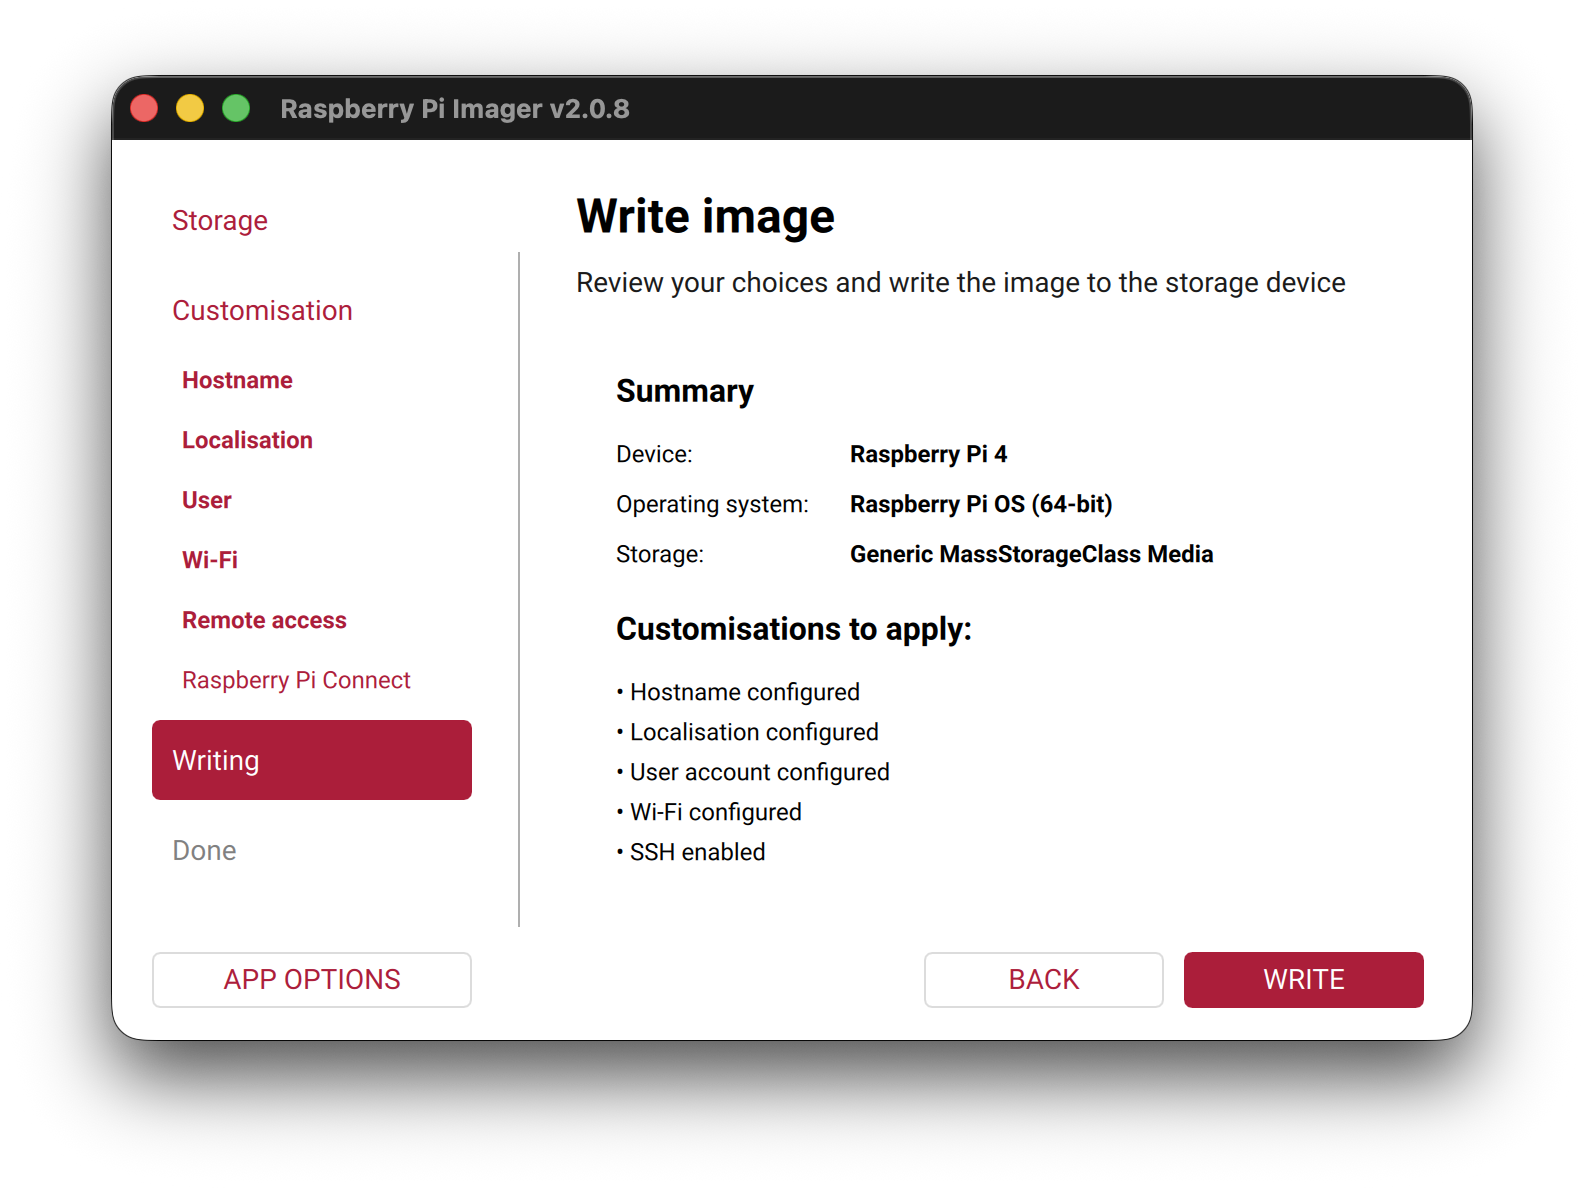
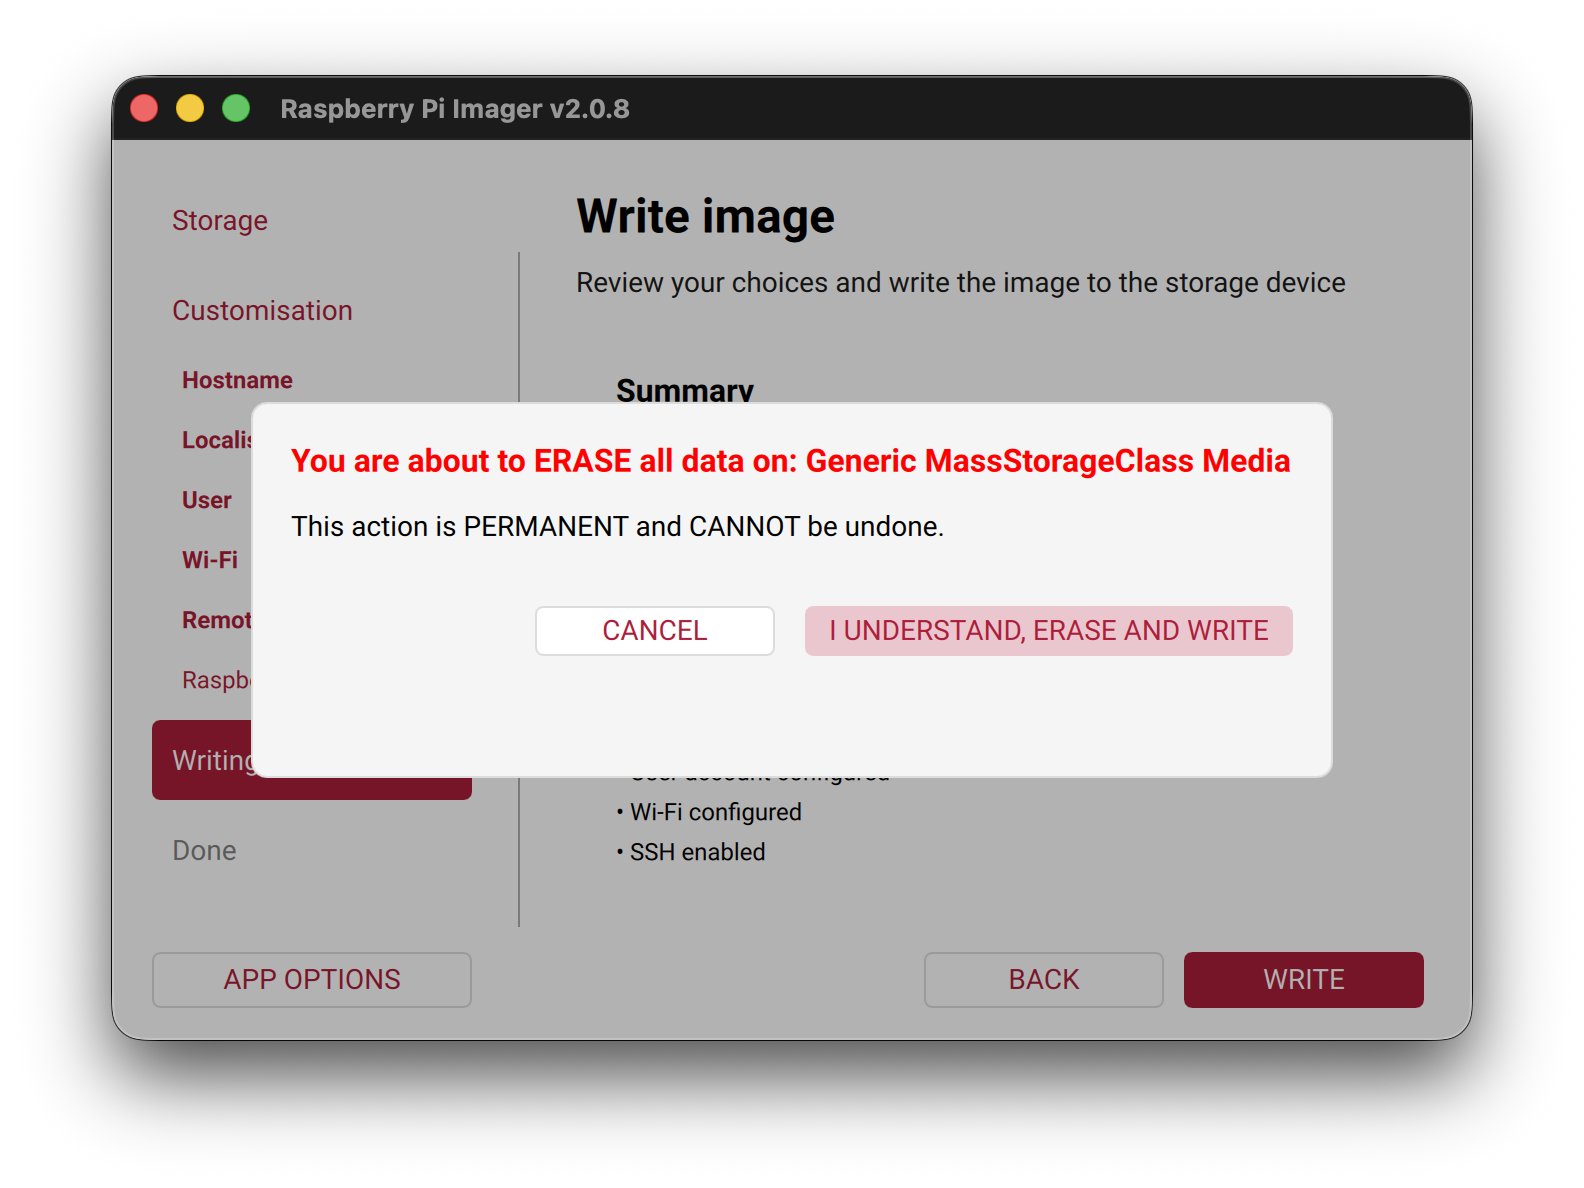
Review the summary and click Write, then confirm the erase dialog.
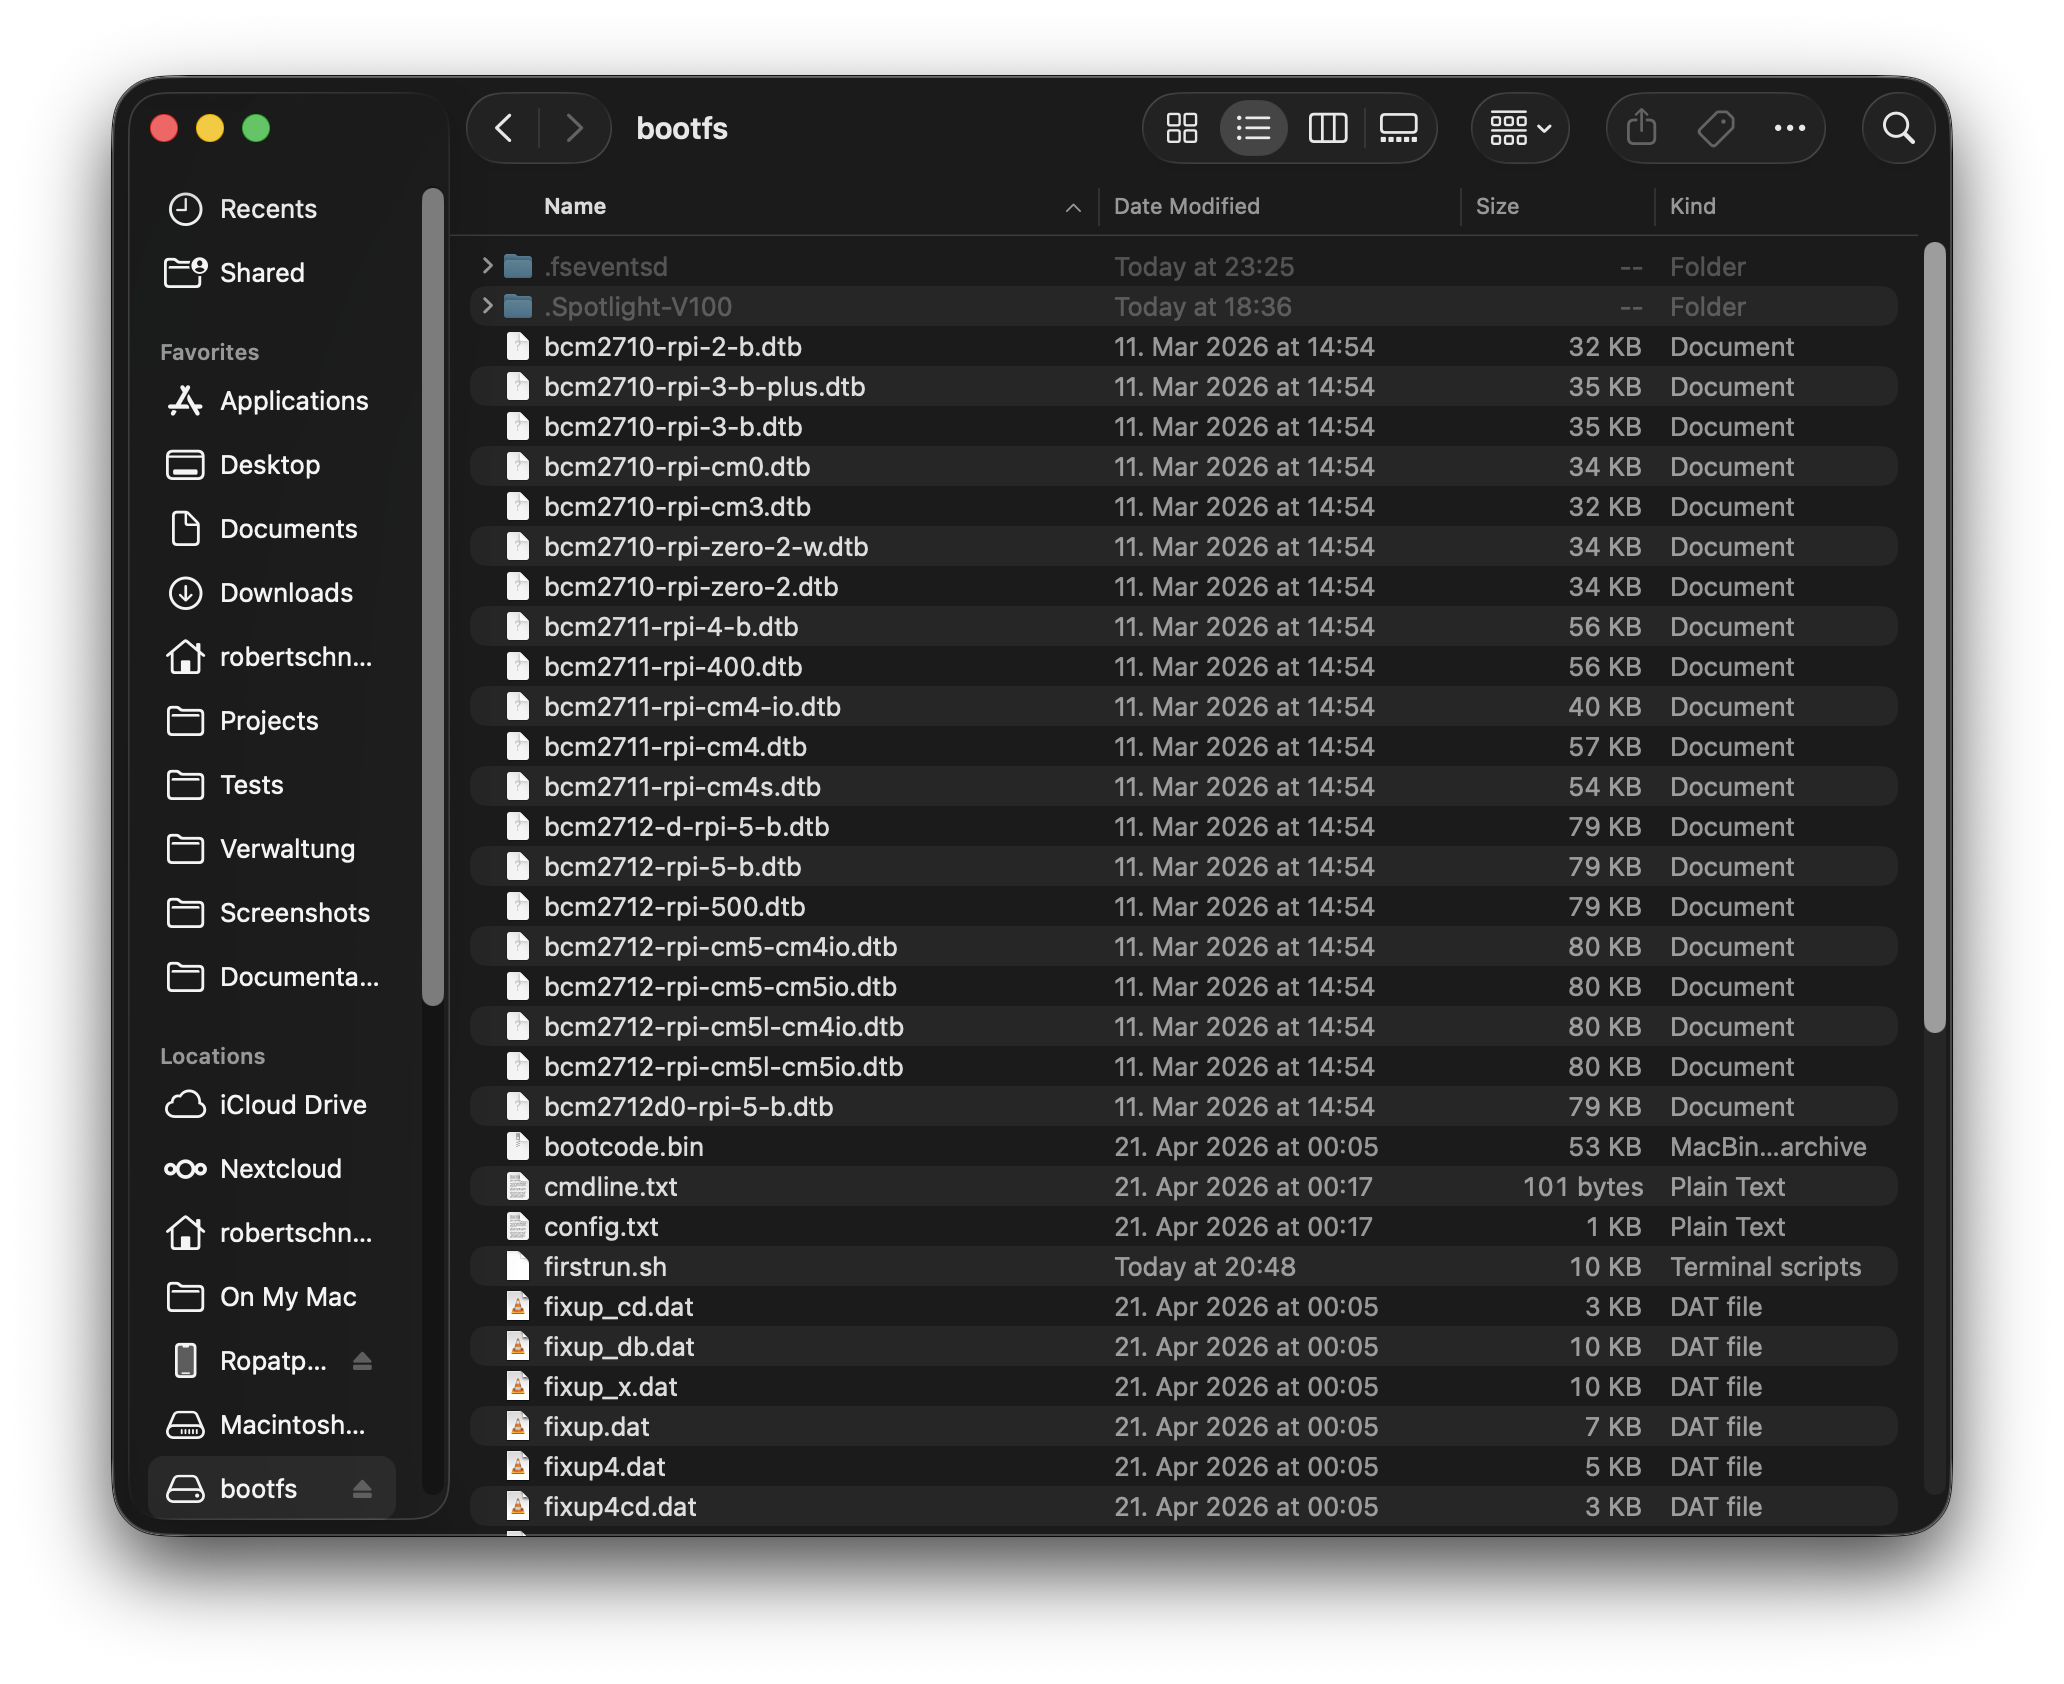
After flashing, keep the SD card inserted. A drive named bootfs appears on your computer.
Step 2 — Copy the obacht bundle to the SD card
In the obacht wizard, click Download ZIP to get obacht-boot-fs-<devicename>.zip. Unzip it — four files appear: cmdline.txt, firstrun.sh, README.txt, and ssh.

Drag all four files onto the bootfs drive. Confirm overwriting cmdline.txt with Yes.
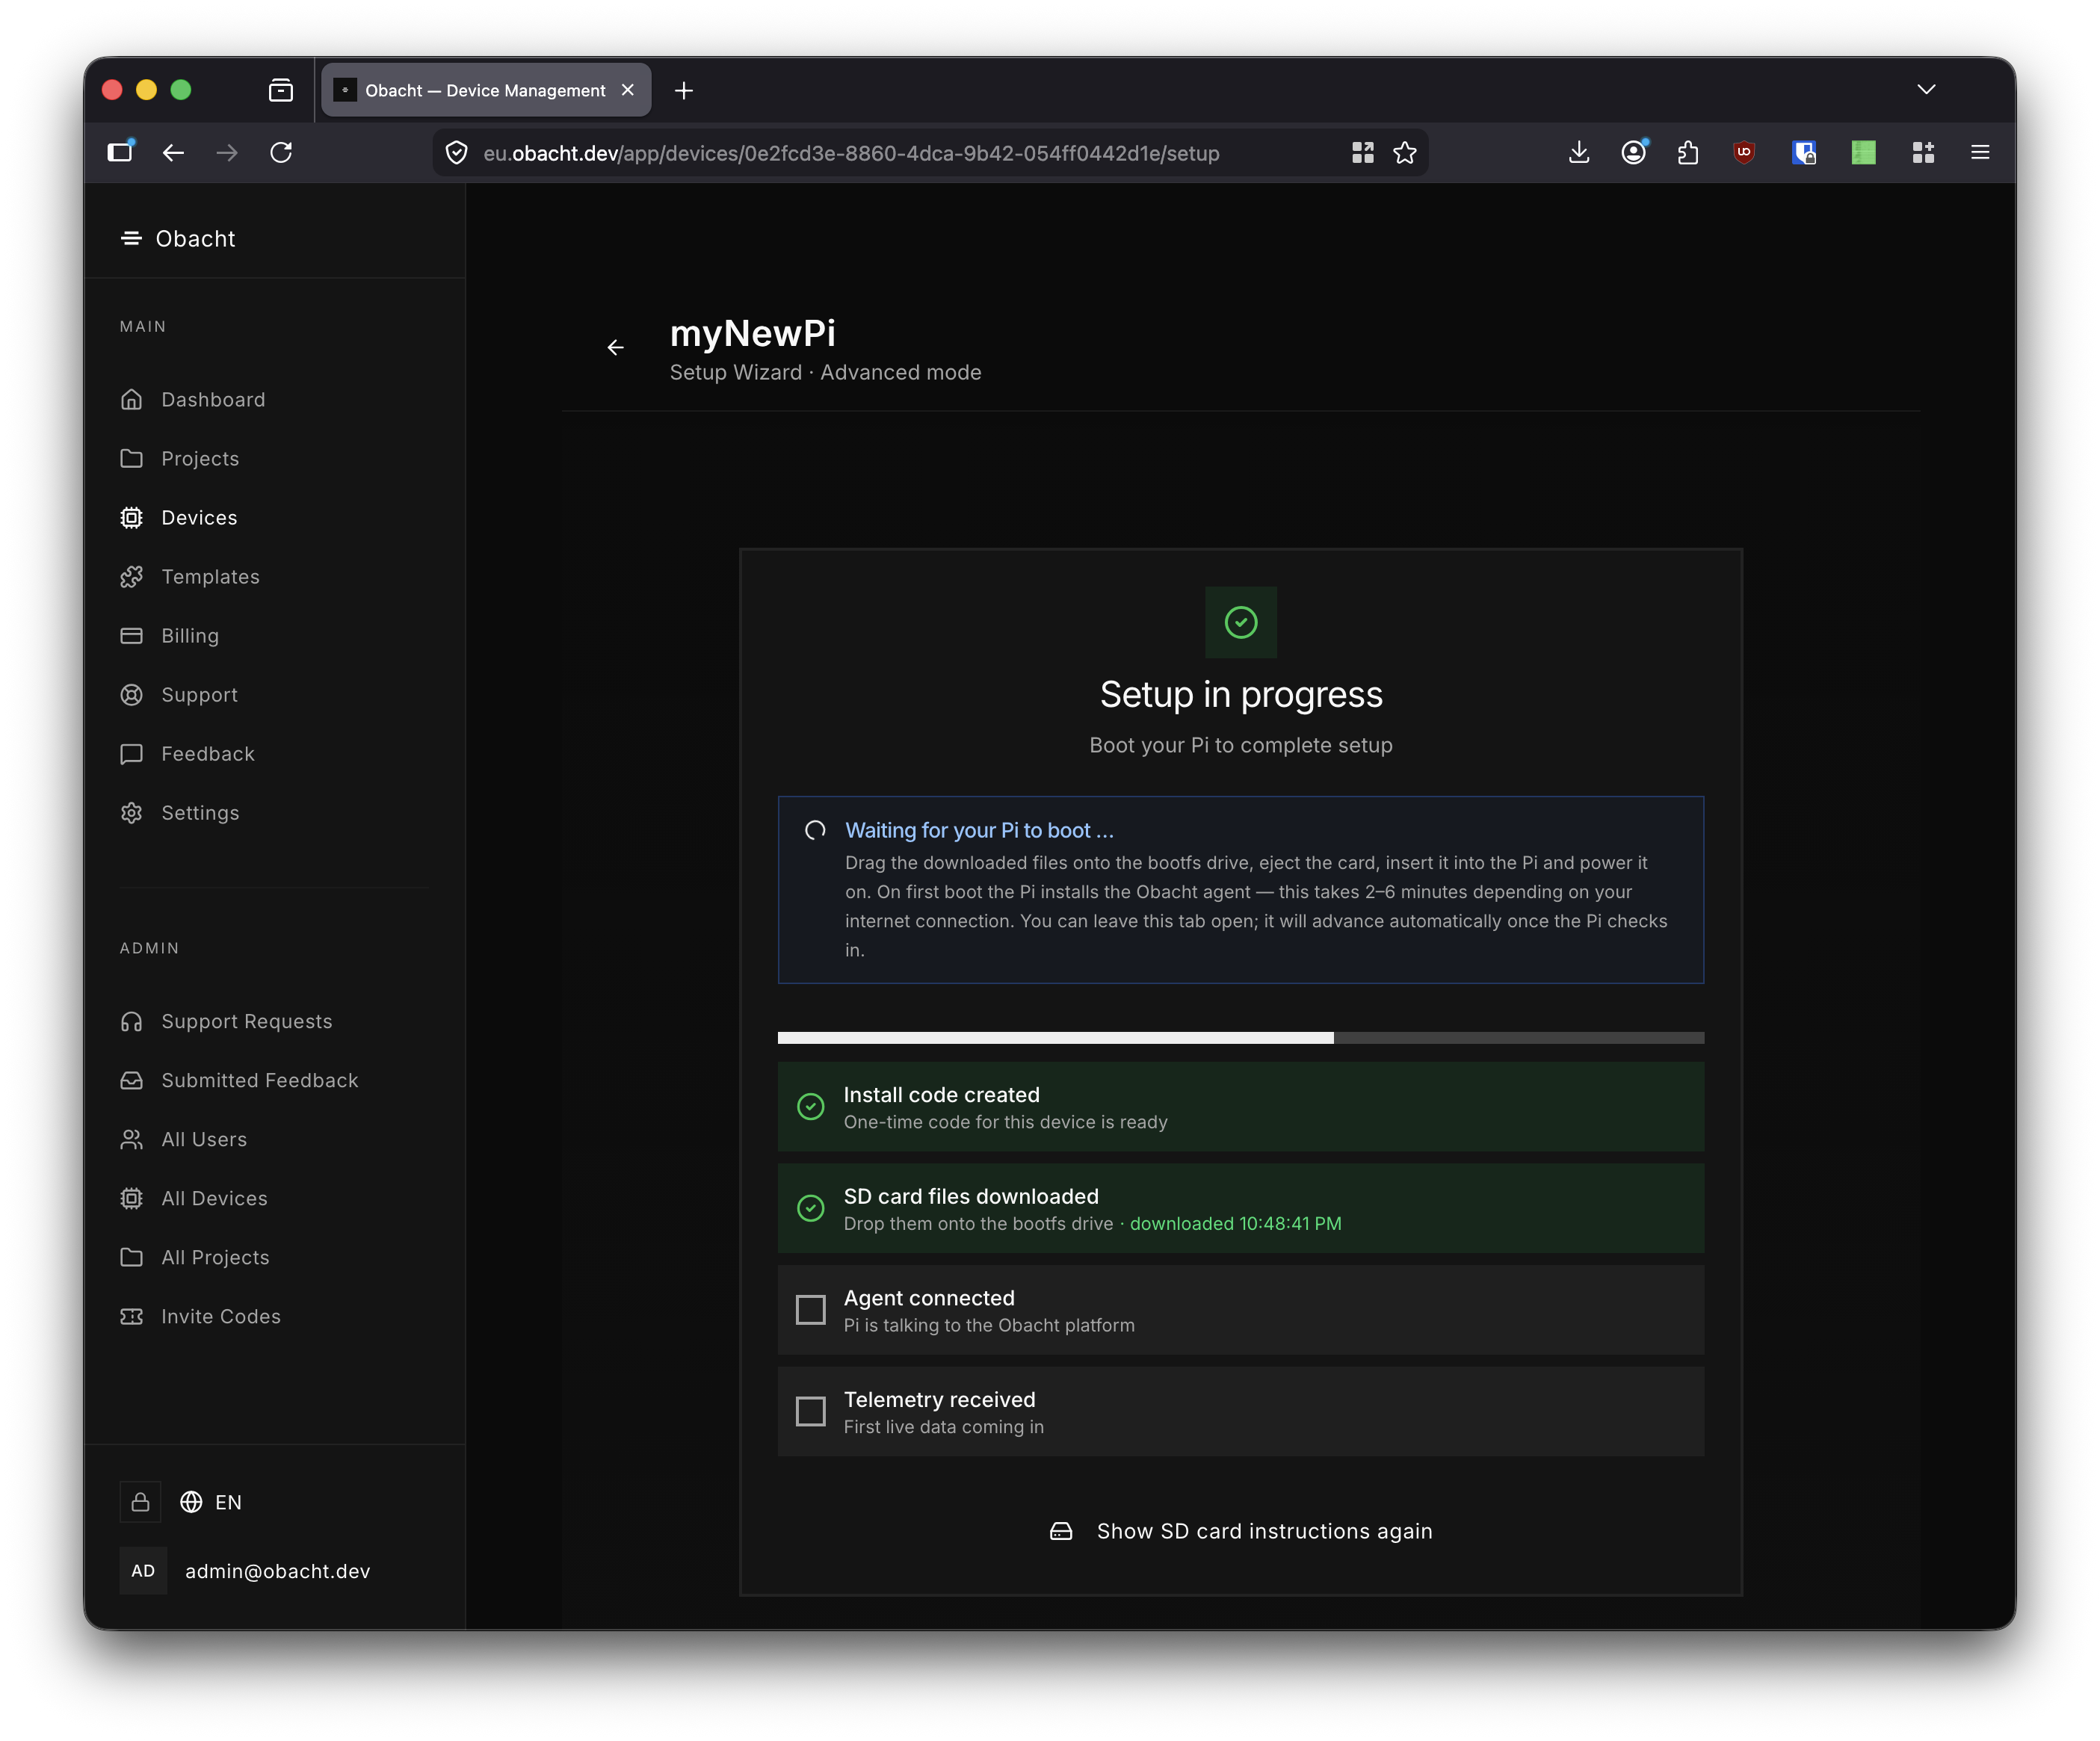
Step 3 — Boot the Pi
Eject the SD card, insert it into the Pi, and power on. The wizard page updates live as setup completes.
3. Unlocking Power Mode
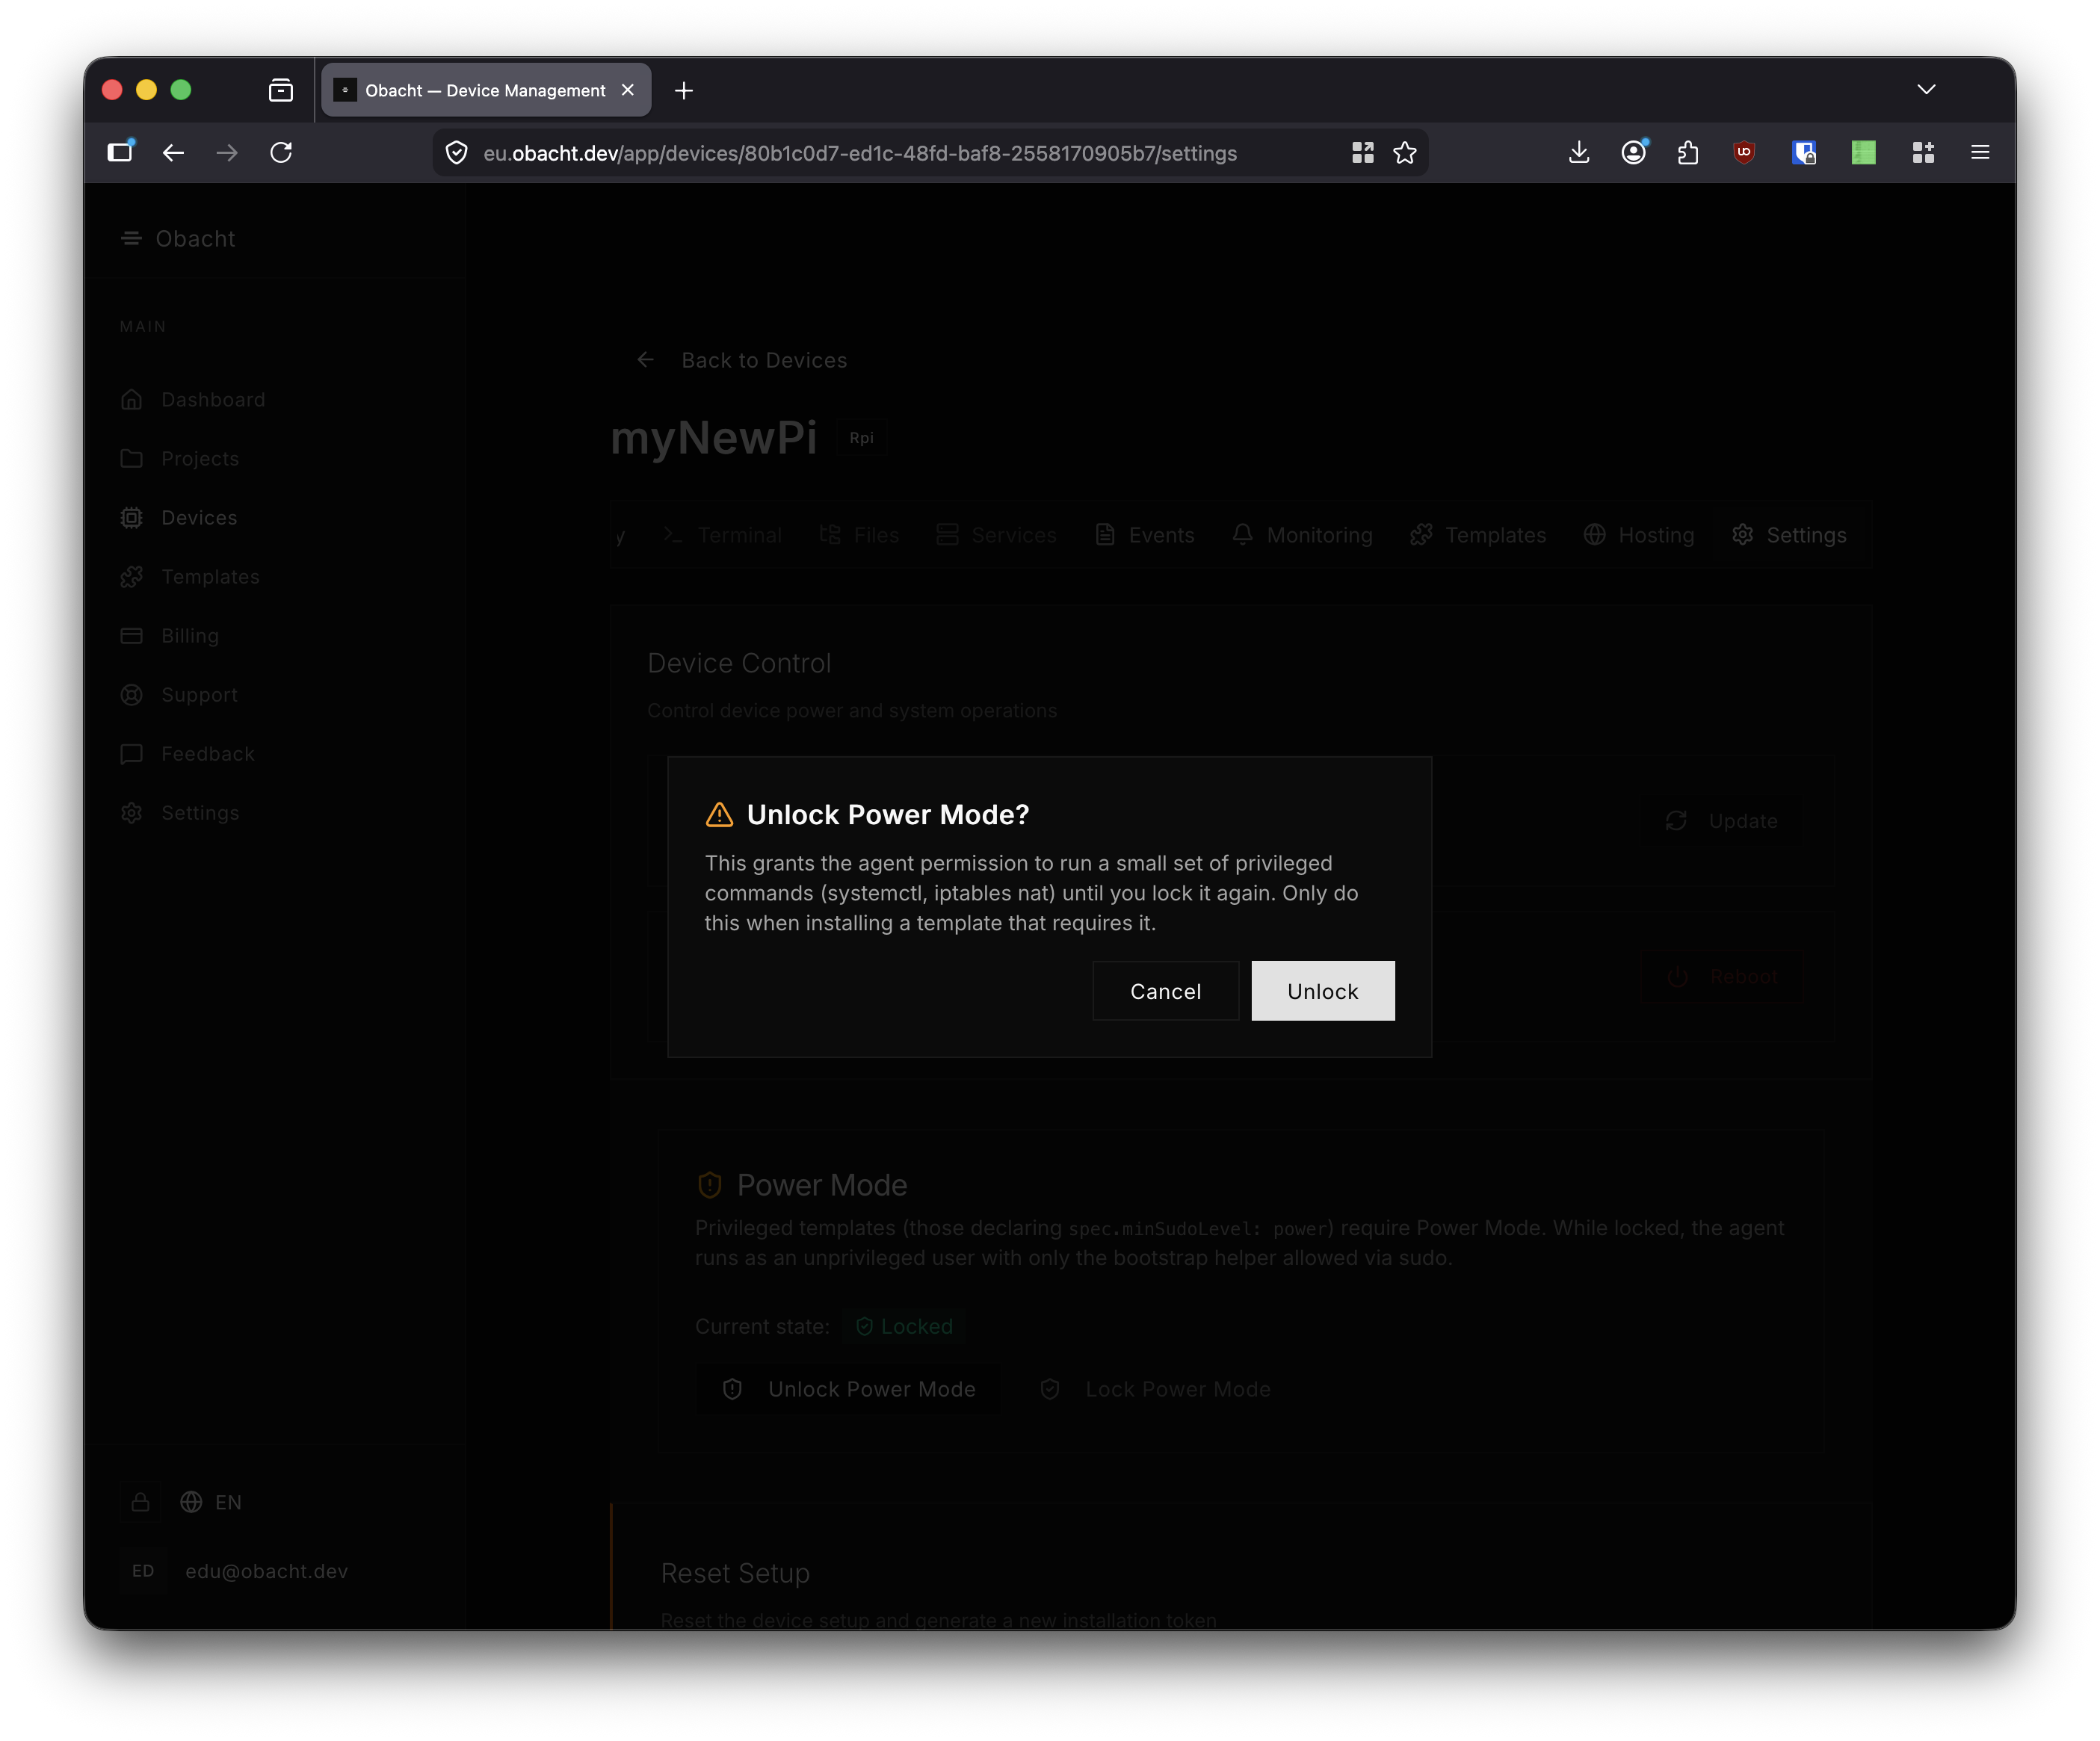
Some templates require elevated system access (systemctl, iptables). By default the agent runs as an unprivileged user — Power Mode must be unlocked explicitly.
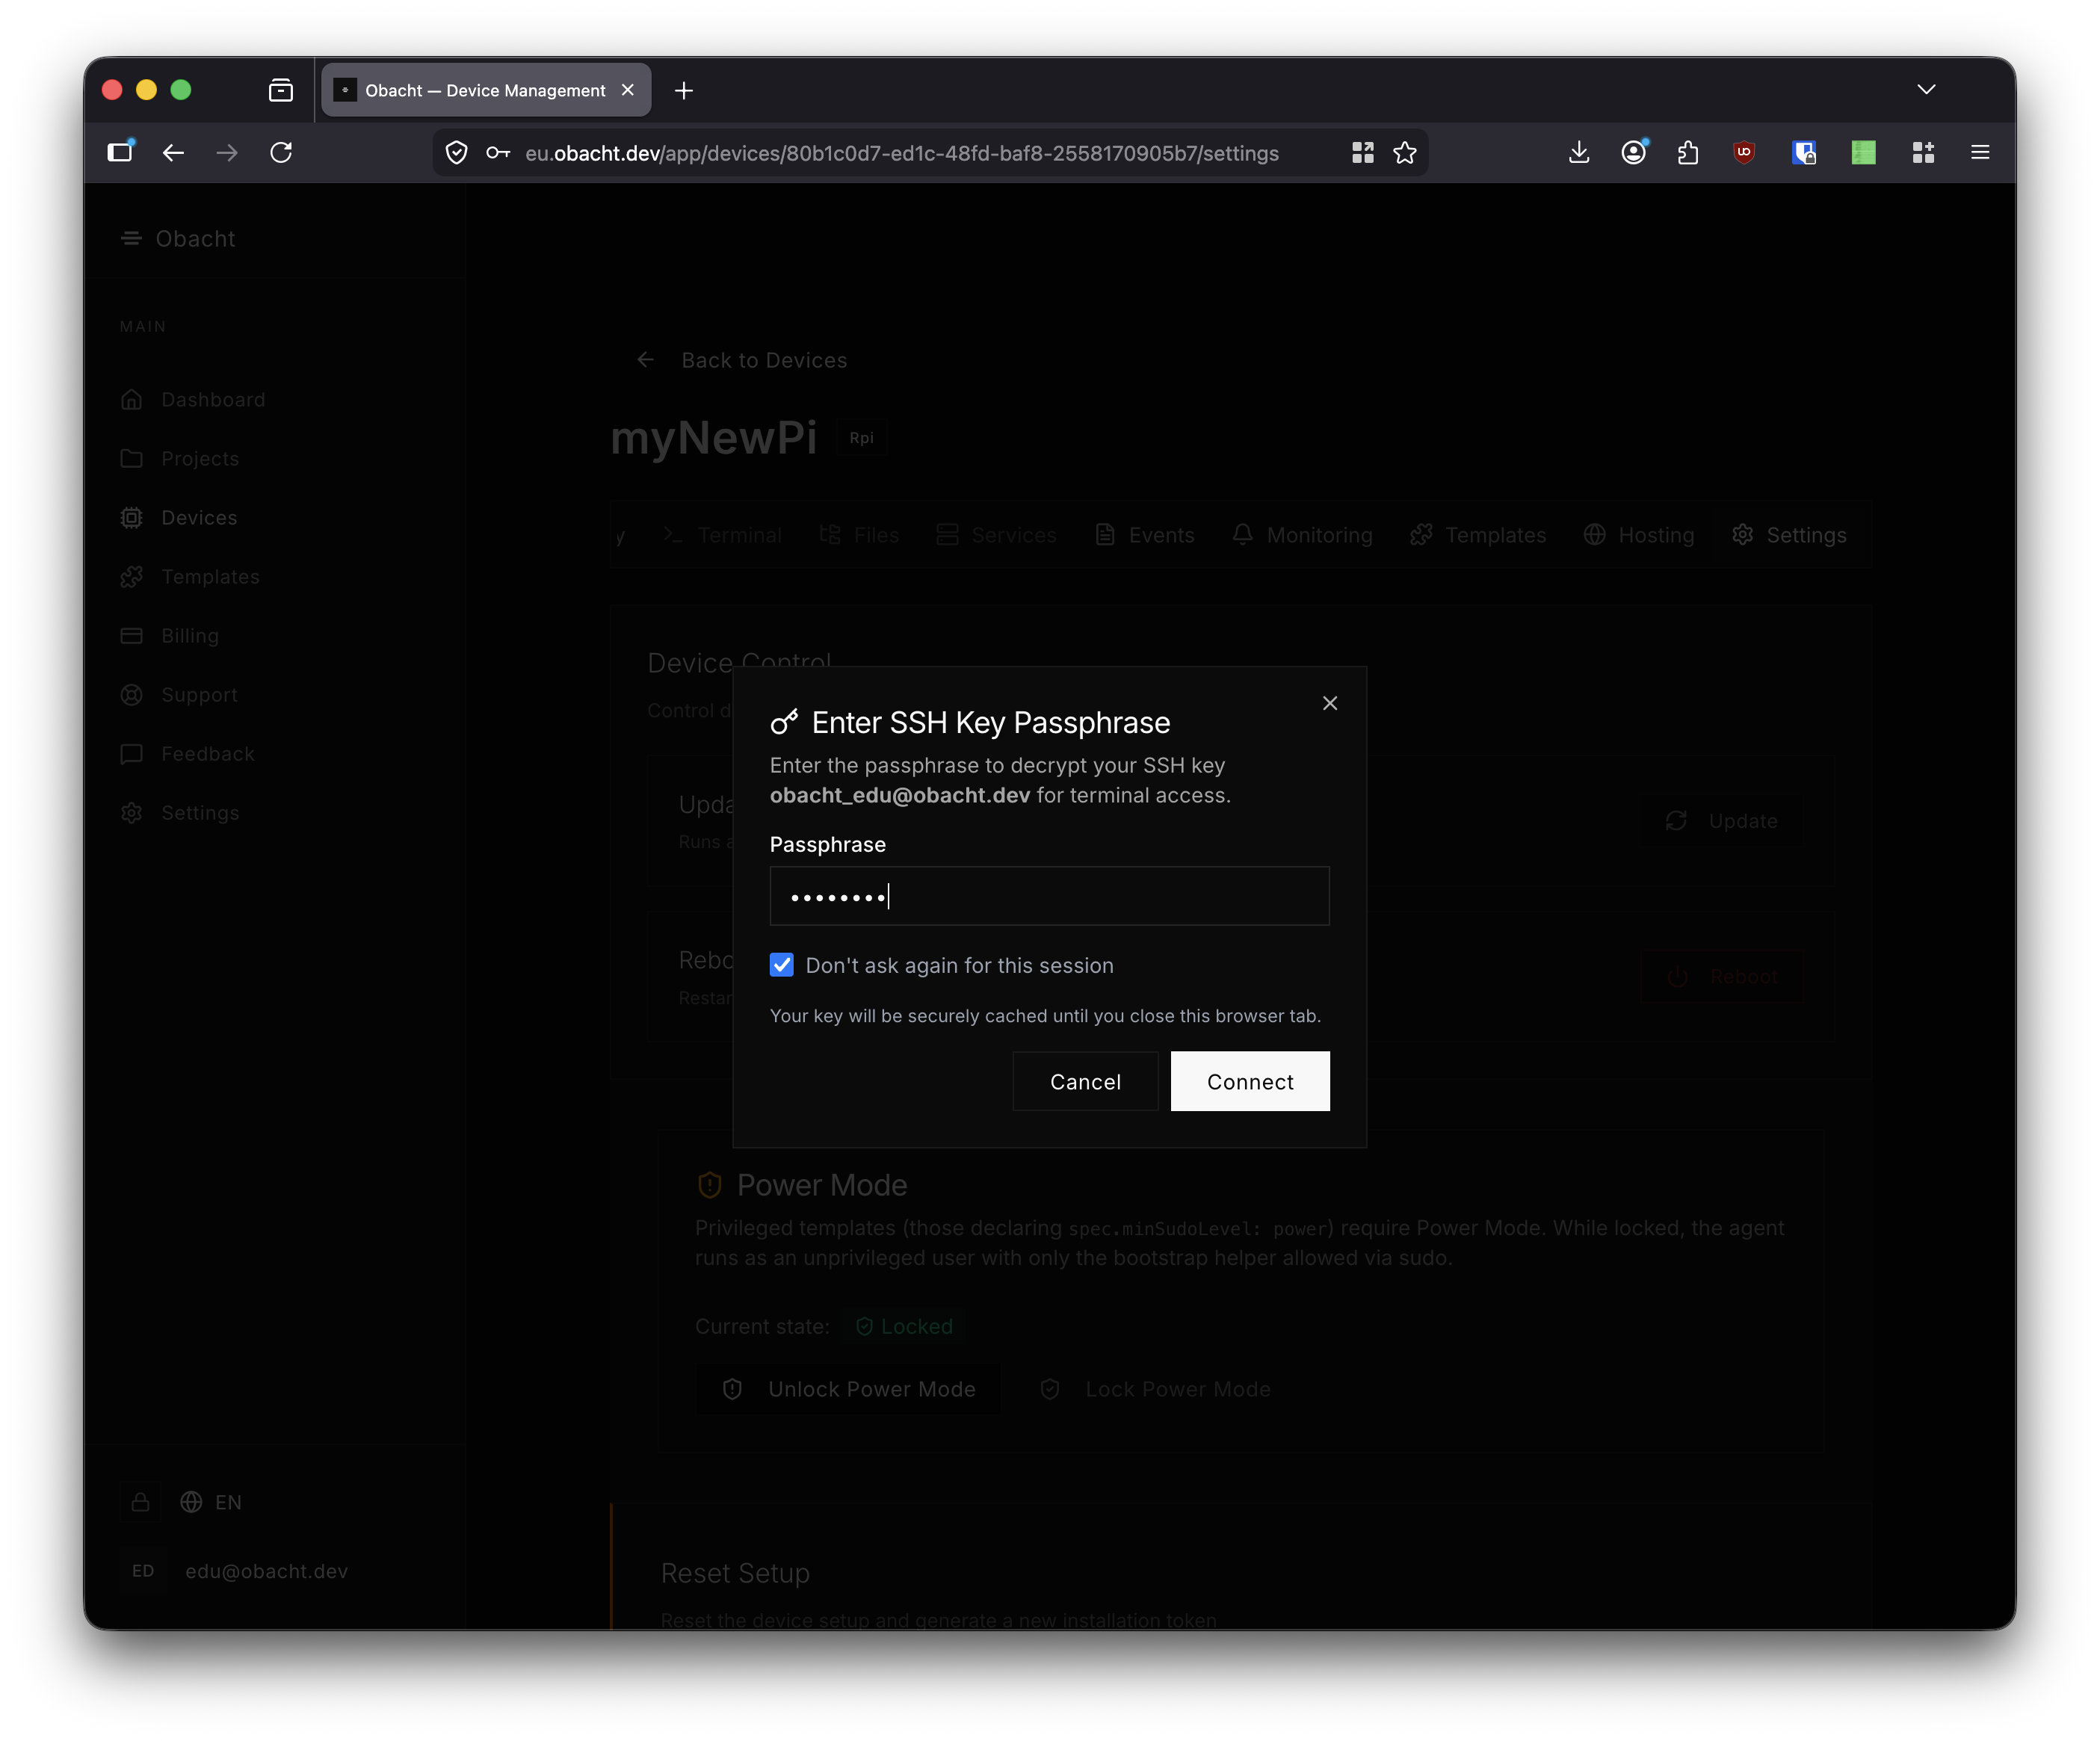
Once the device is online, go to the Settings tab and scroll to the Power Mode section. Current state shows Locked. Click Unlock Power Mode.
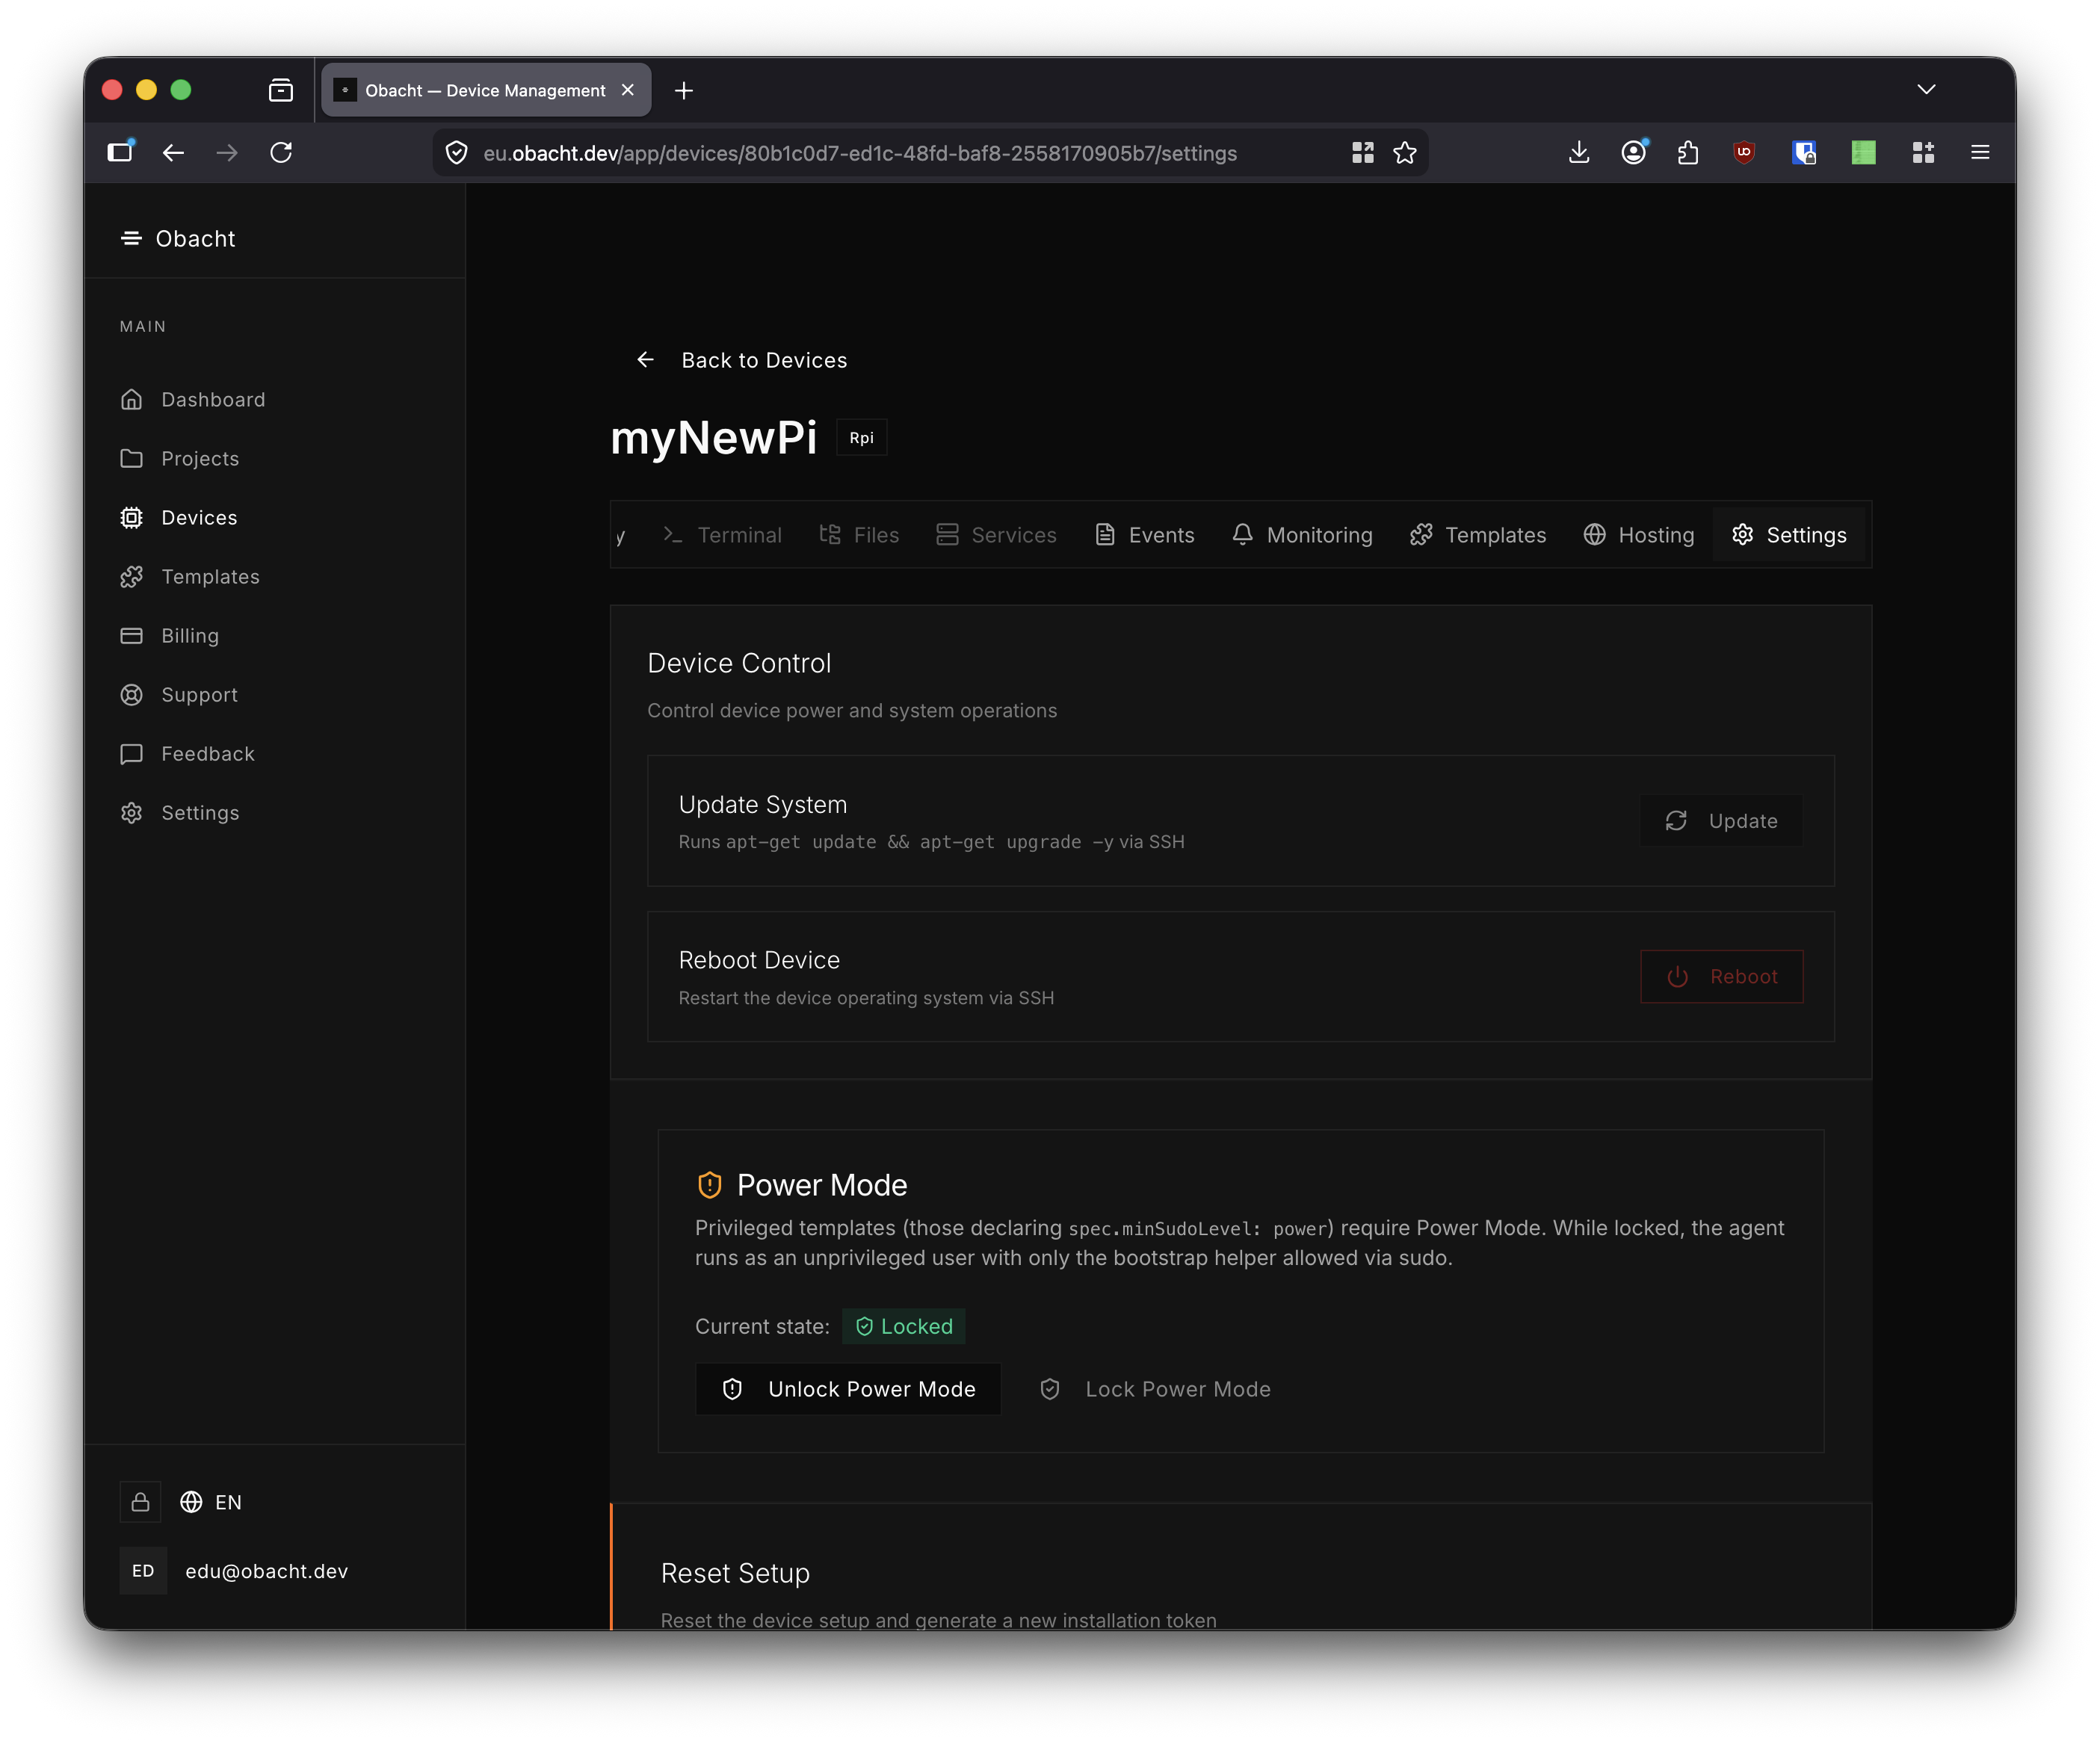
If your SSH key has a passphrase, a prompt appears. Then confirm the unlock dialog.
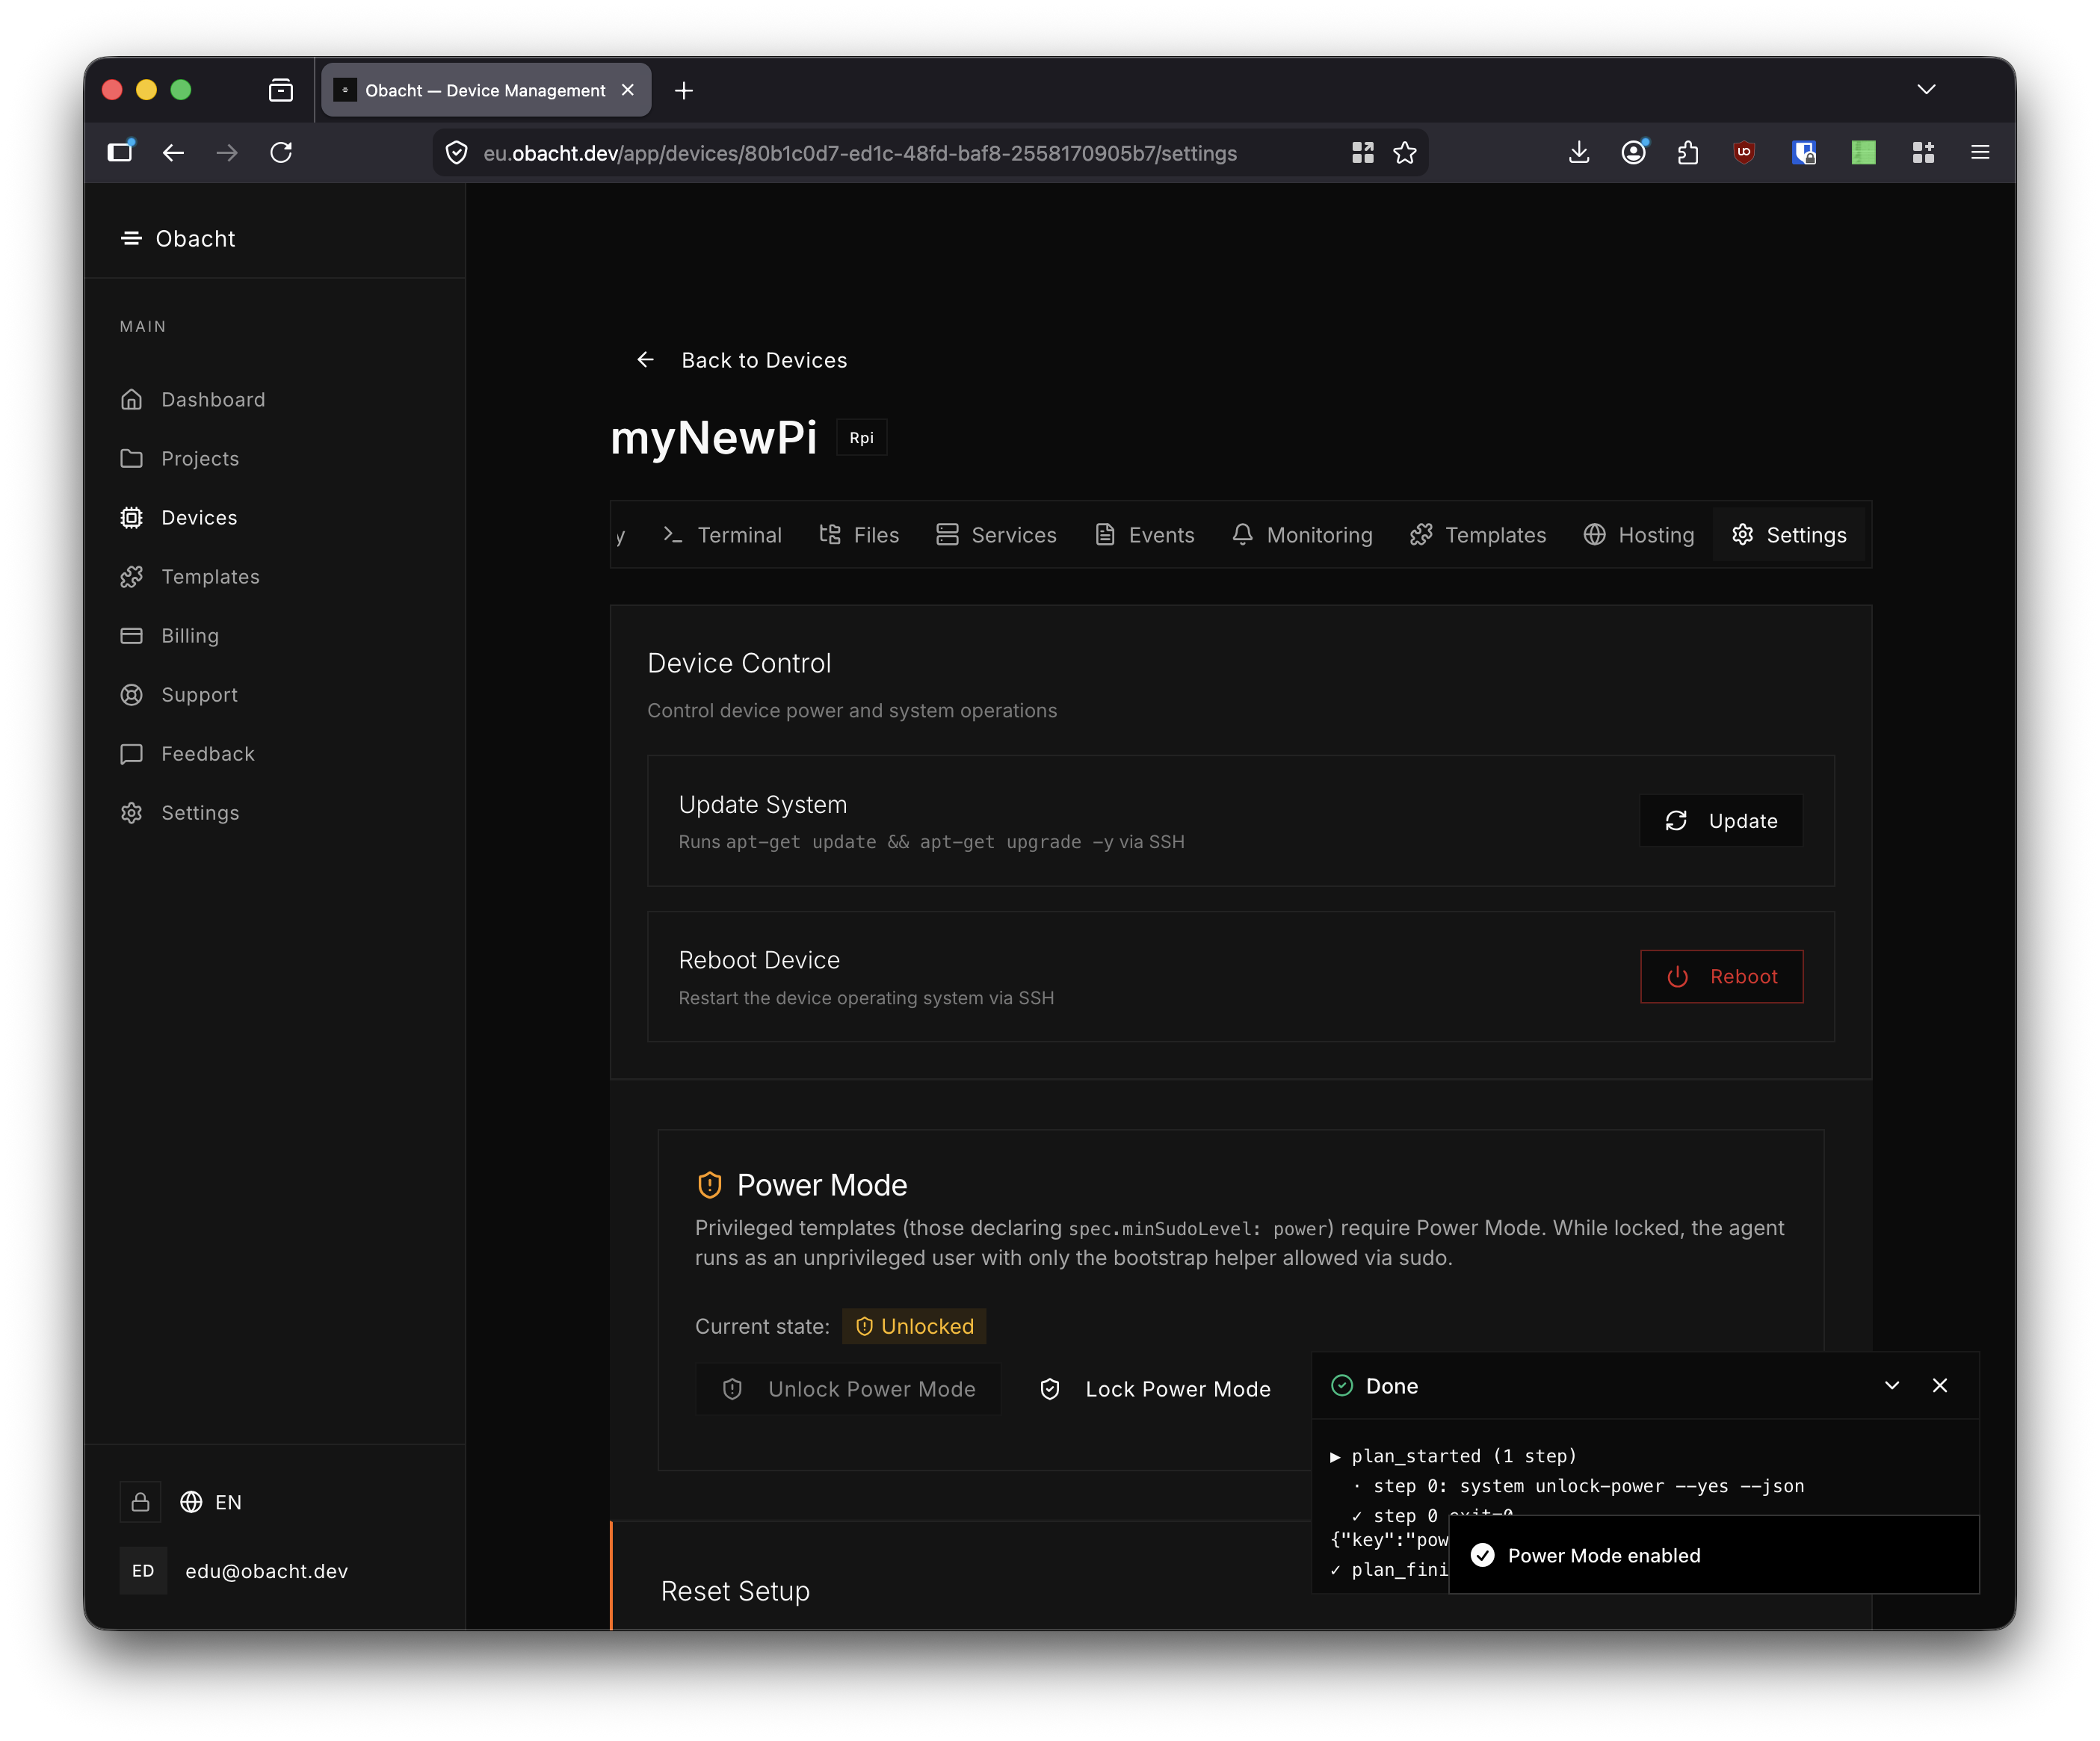
The settings page updates to show Unlocked and a plan execution log confirms the change. Lock Power Mode again when it is no longer needed.
4. Using Terminal
Go to the Terminal tab and click Connect. The session opens over SSH tunnelled through the obacht WireGuard network — no local SSH client or open ports required.
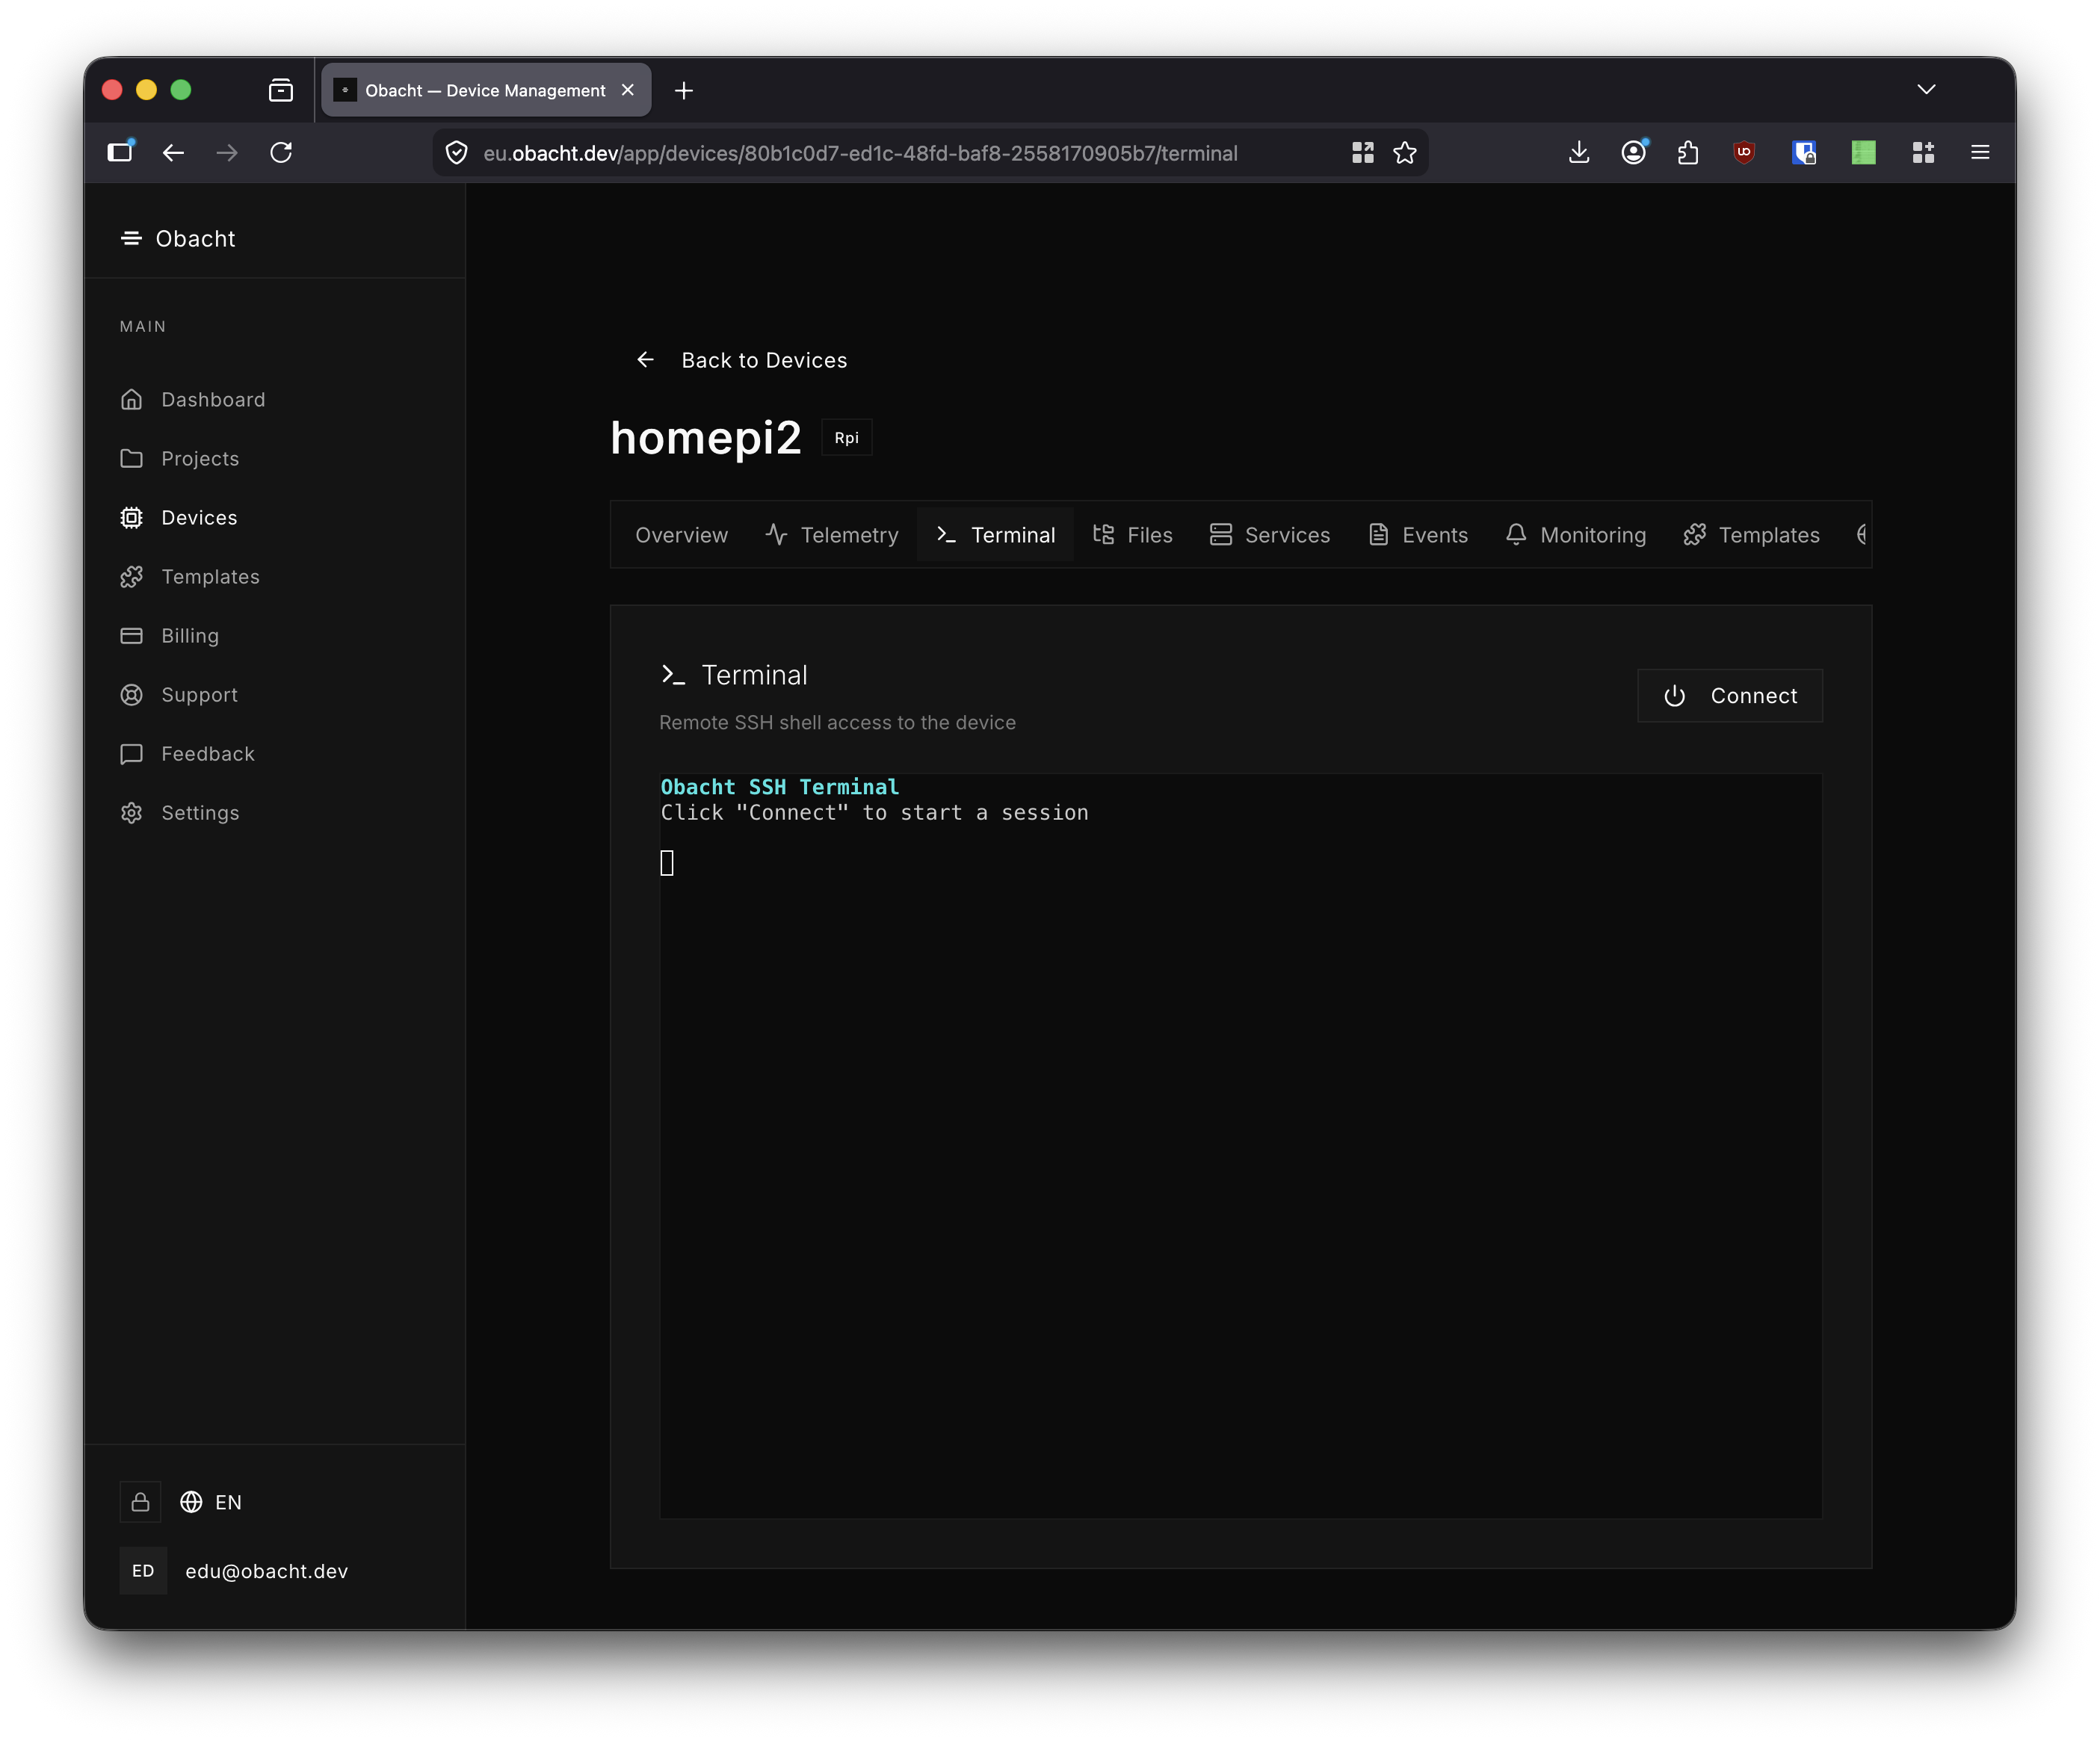

Sessions time out after 15 minutes of inactivity. Click Disconnect to close early.
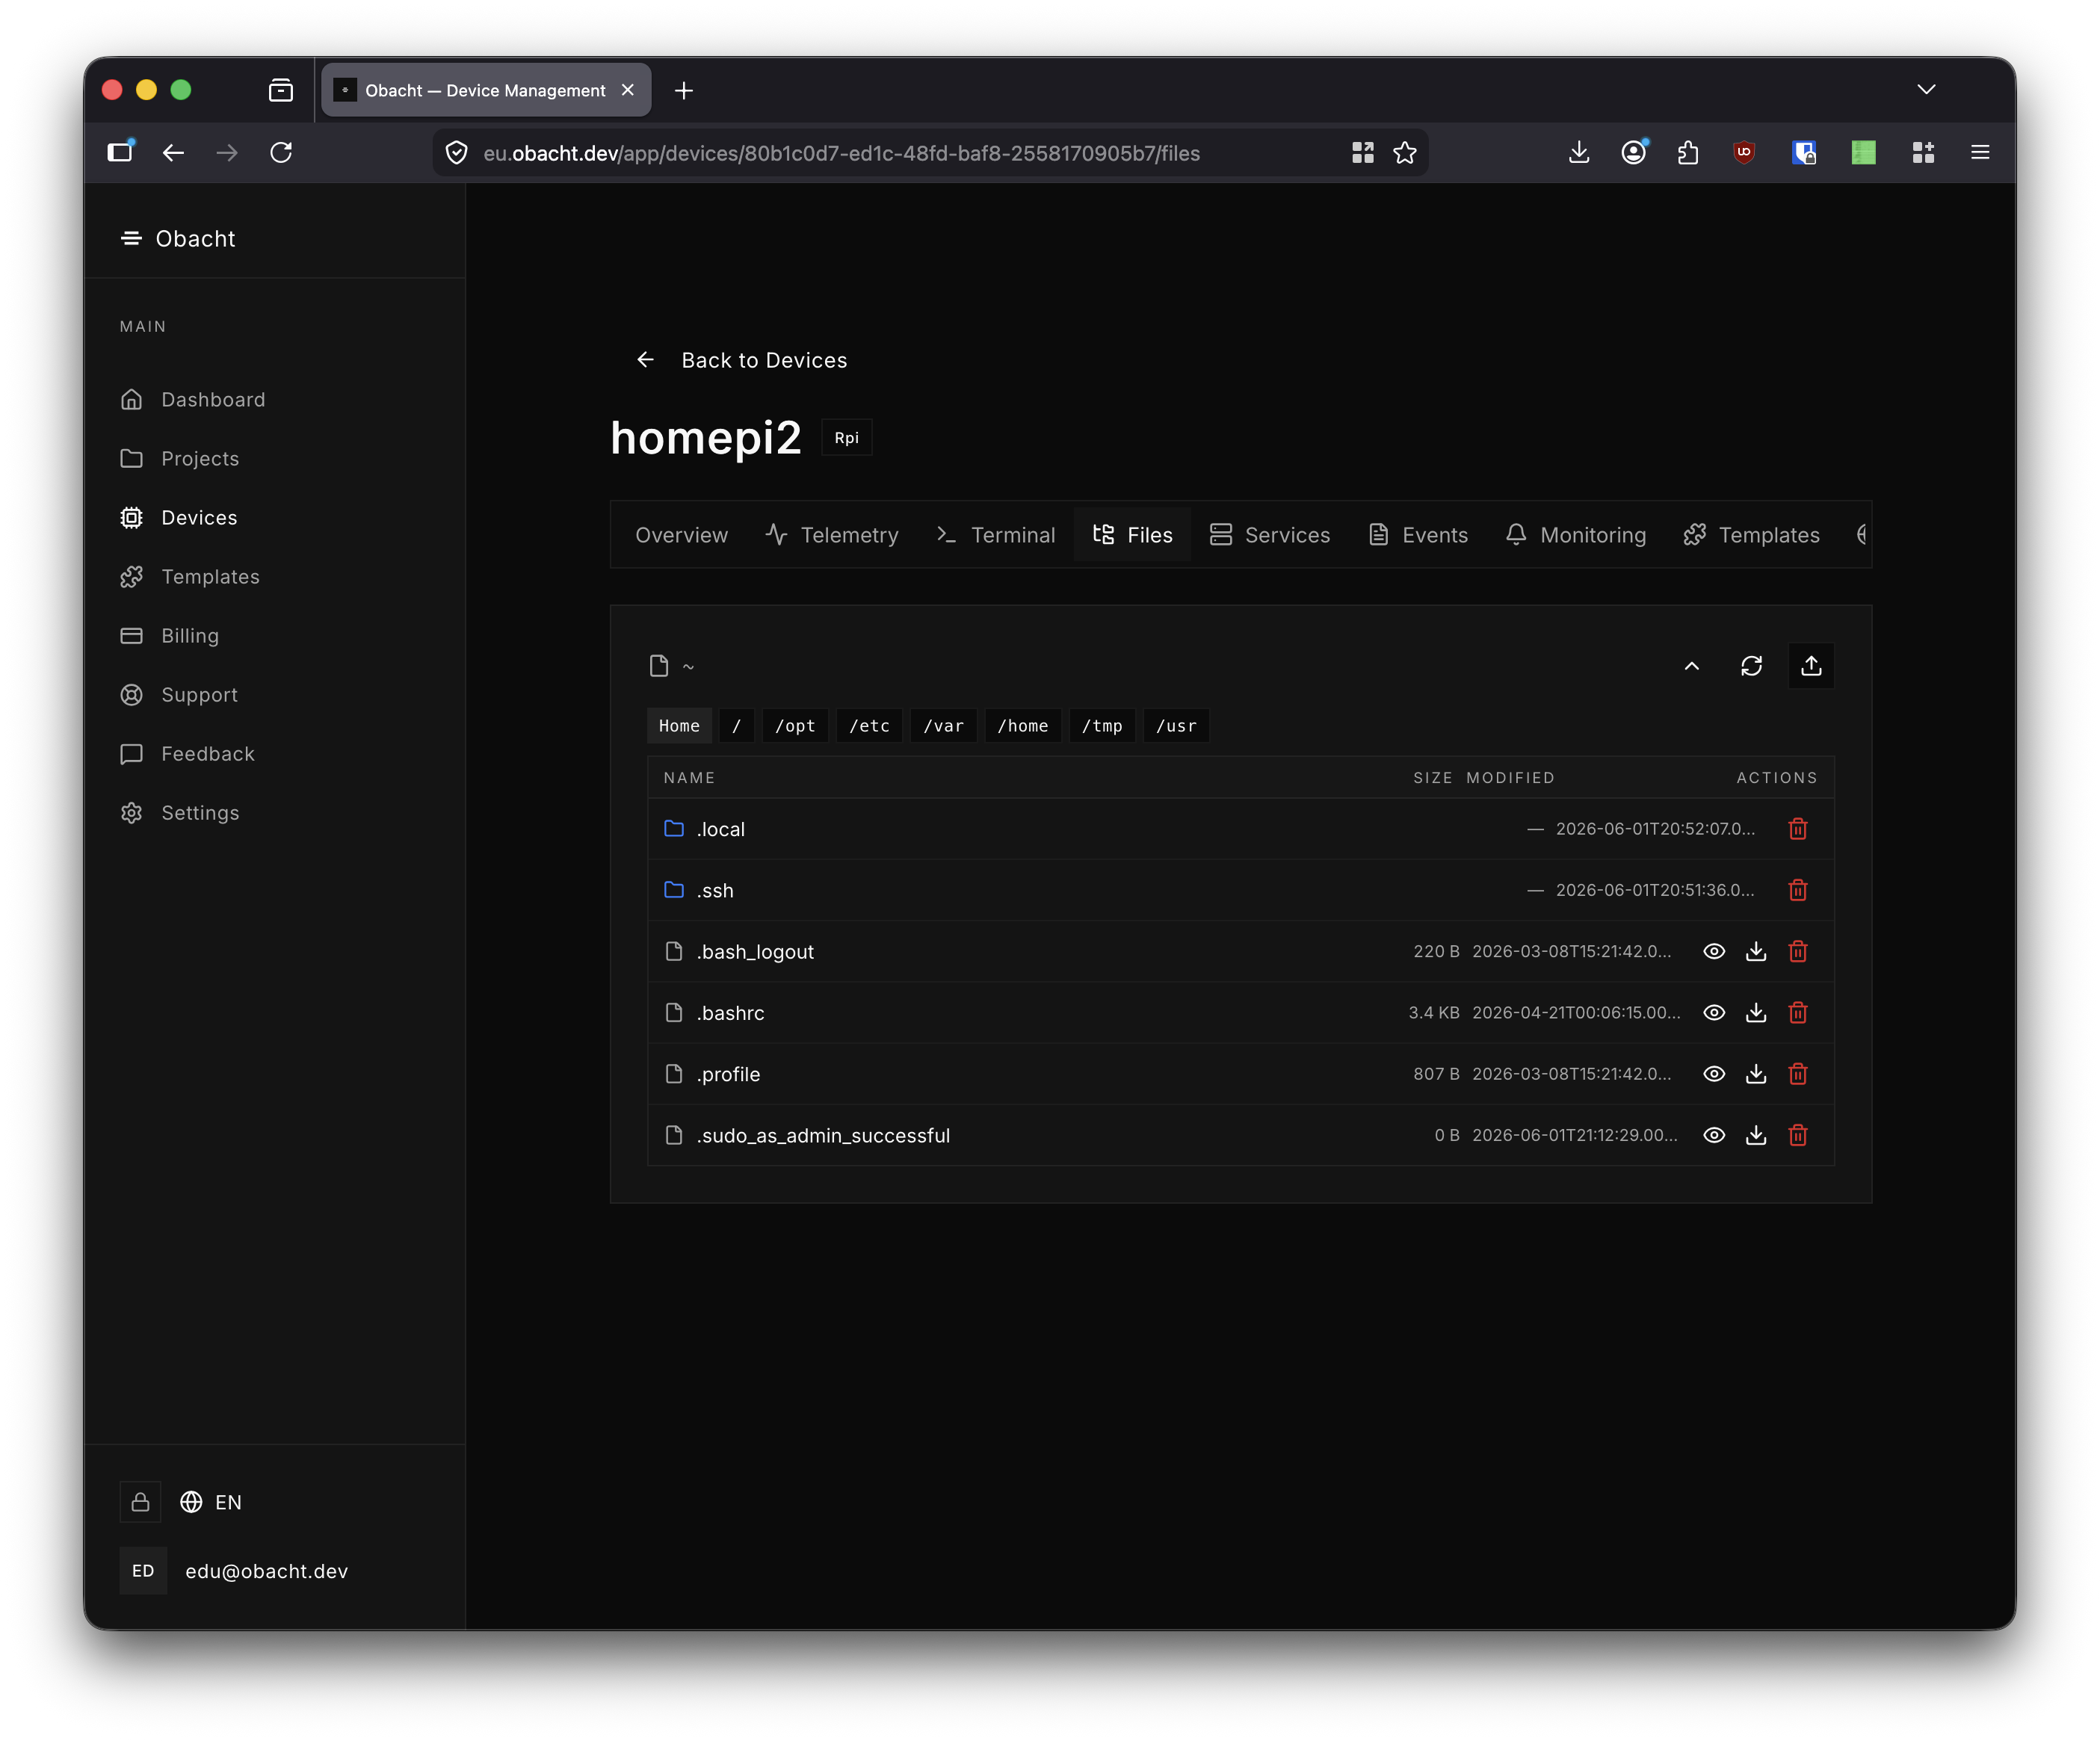
5. Using Files
The Files tab provides a browser-based SFTP file manager. Use the breadcrumb bar to navigate the filesystem (/home, /opt, /var, etc.). Files can be viewed, downloaded, uploaded, or deleted directly from the browser.
6. Viewing Telemetry
Go to the Telemetry tab to see live system metrics. The top row shows a summary: CPU usage, memory, disk, and temperature.
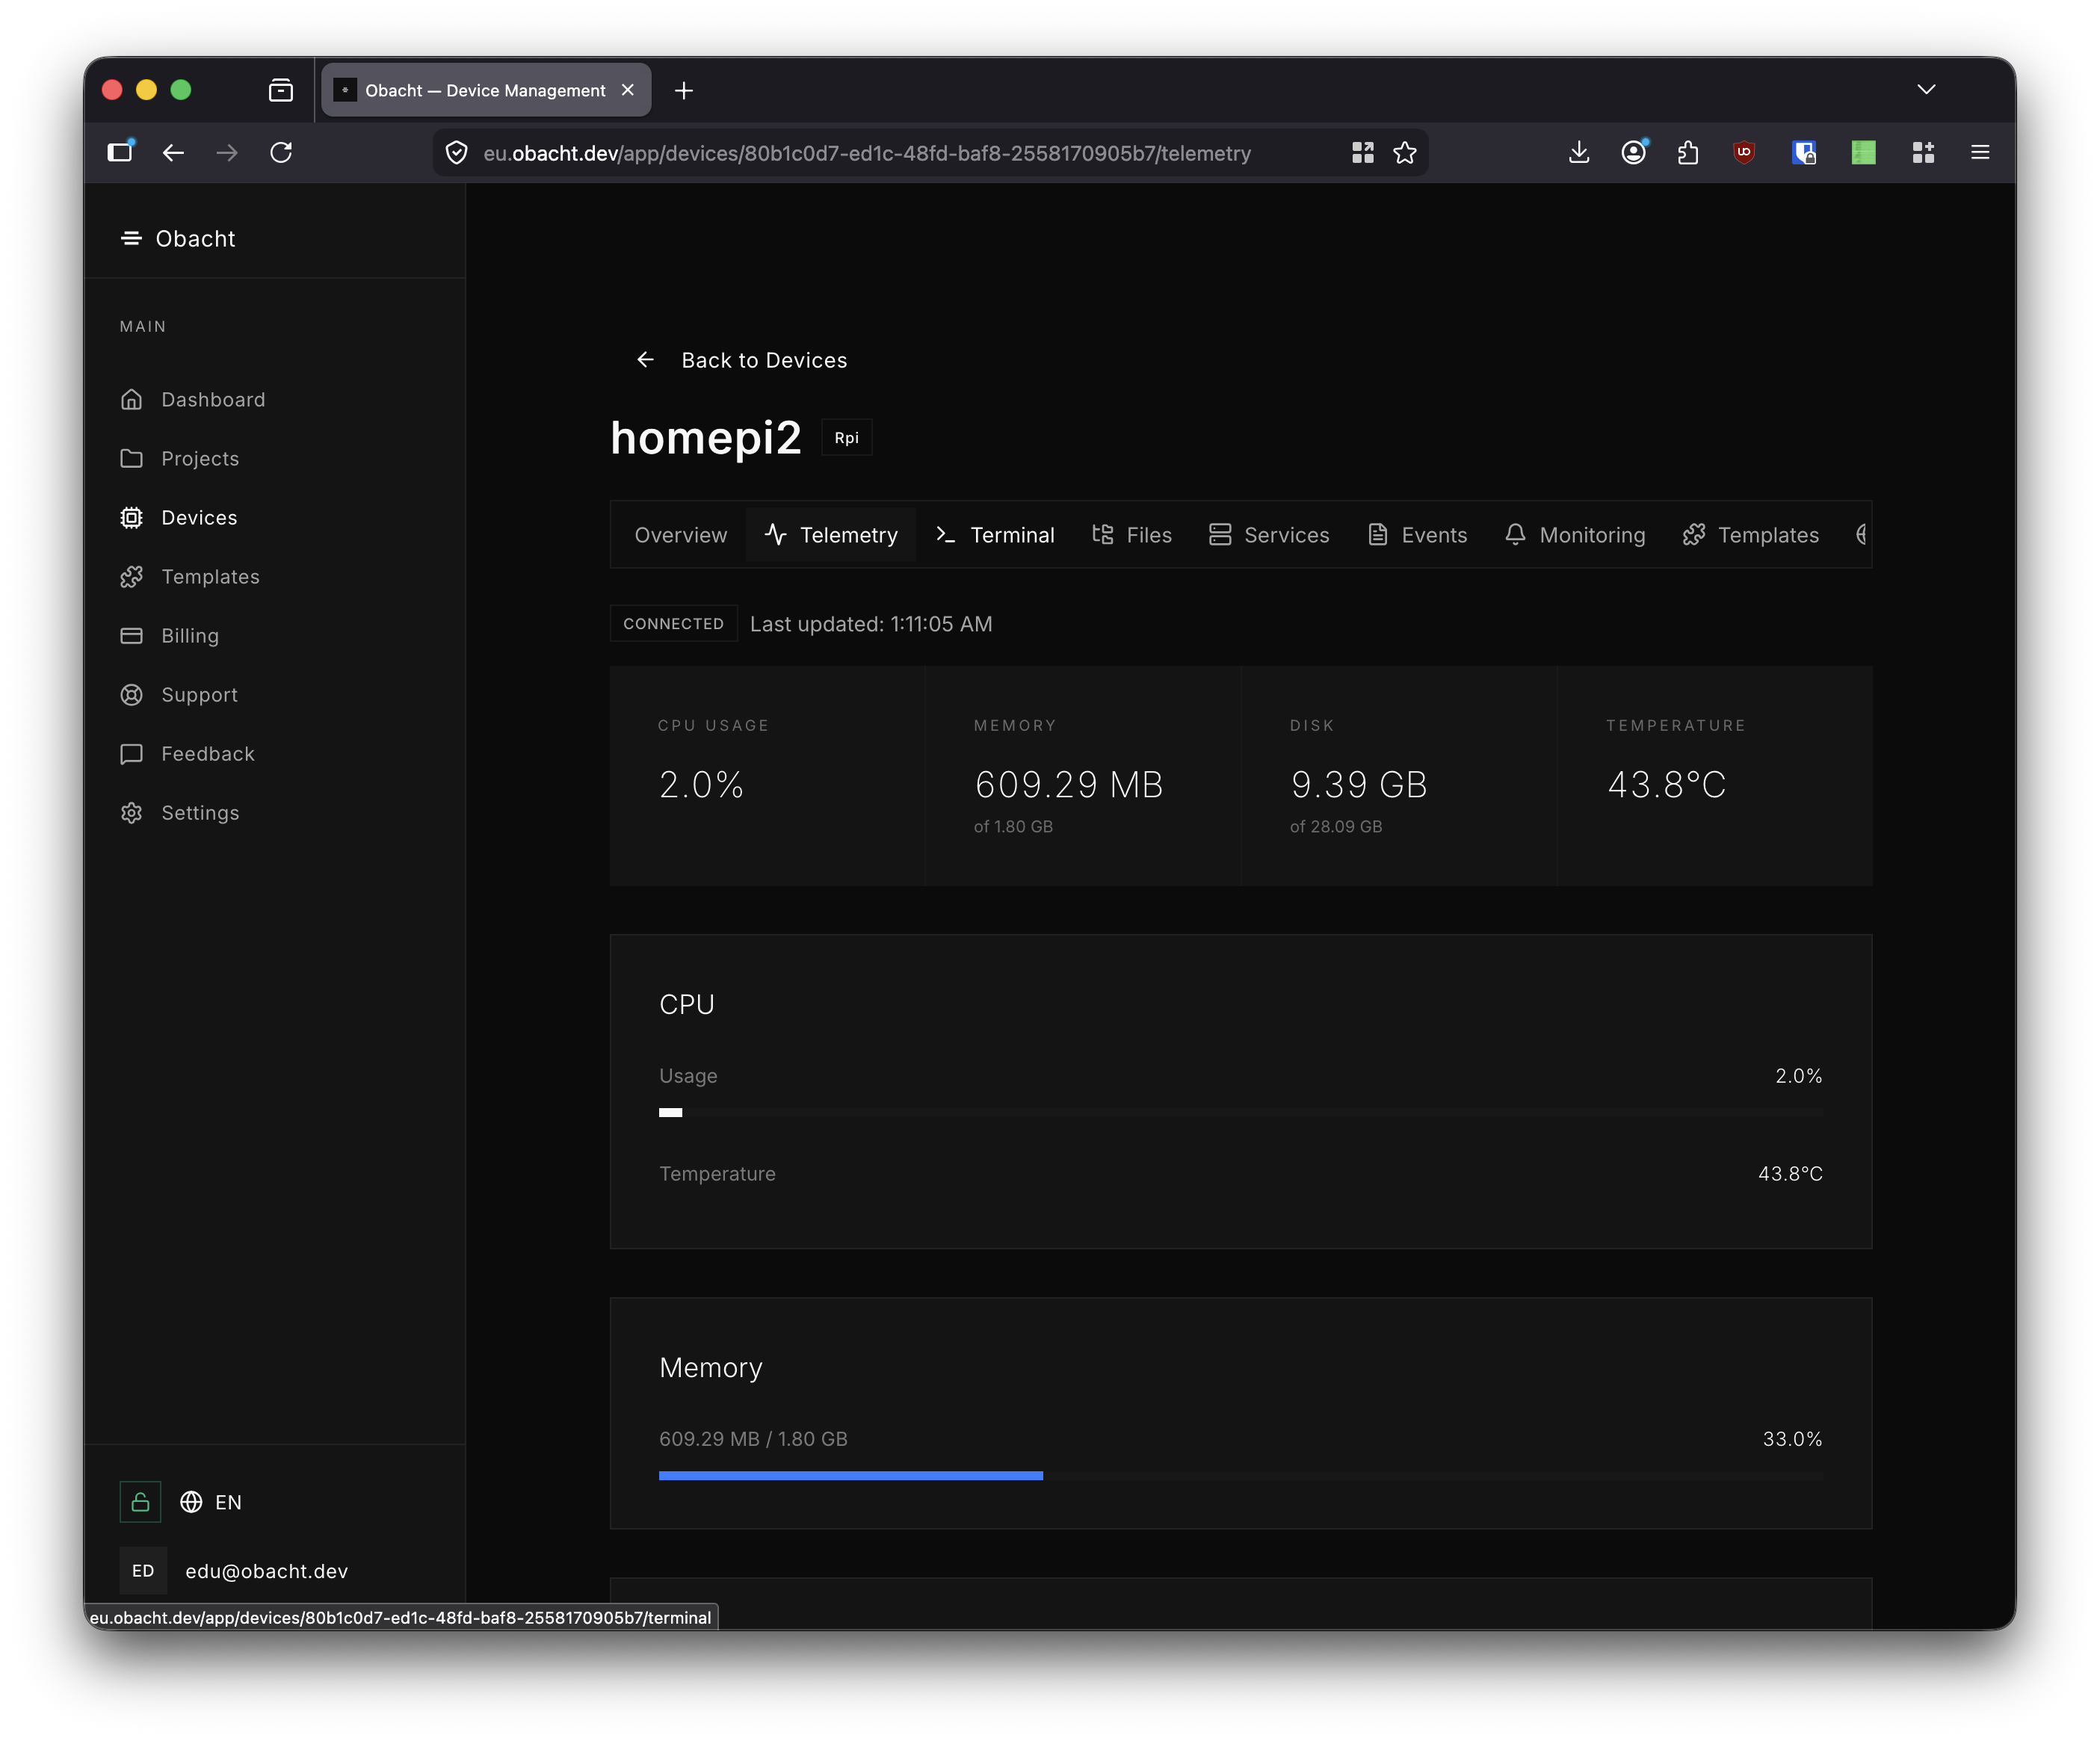
Scroll down for detailed breakdowns of CPU, memory, disk usage, and networking — including the obacht network IP, local IP, and global IP.
